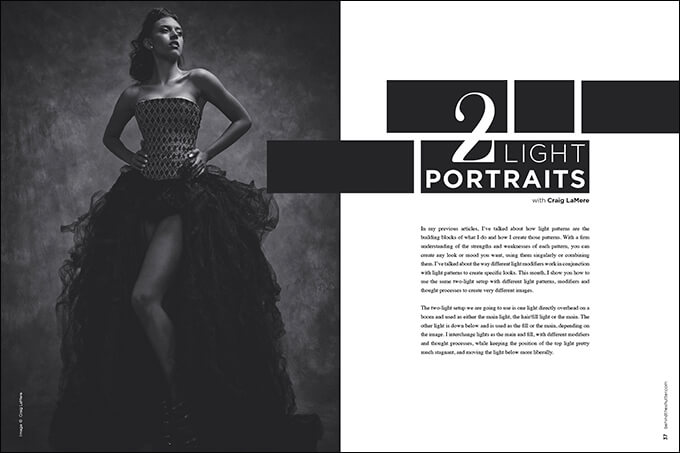
Two-Light Portraits with Craig LaMere
In my previous articles, I’ve talked about how light patterns are the building blocks of what I do and how I create those patterns. With a firm understanding of the strengths and weaknesses of each pattern, you can create any look or mood you want, using them singularly or combining them. I’ve talked about the way different light modifiers work in conjunction with light patterns to create specific looks. This month, I show you how to use the same two-light setup with different light patterns, modifiers and thought processes to create very different images.
The two-light setup we are going to use is one light directly overhead on a boom and used as either the main light, the hair/fill light or the main. The other light is down below and is used as the fill or the main, depending on the image. I interchange lights as the main and fill, with different modifiers and thought processes, while keeping the position of the top light pretty much stagnant, and moving the light below more liberally.
The Drama Shape Shot
One of the principles of portrait shooting is to focus on the eyes. There must be a great catchlight. In the two-light shot we will set up, we will be concerned with capturing a shape, an idea and the mood of your subject. I call this a “shape shot.”
This setup is pretty simple. You will need a boom arm to get the main light directly above the subject. The light modifiers I use for the main are either a 7-inch reflector with a grid or a small strip light, around 9×24. I use the 7-inch reflector when I’m shooting a single person, and I use the strip when shooting two people. I have never shot more than two people with this setup.
Place the main light directly over your subject. The height of the light determines the spread and coverage of the light. Turn your modeling lamp up all the way so you can see the light better.
Once you have your light where you want it, meter it at the highest point to find your exposure. Because the light is direct and pointed, your subject must not move. Add fill to bring back the detail in the shadows. Because of the small light source and the grid, the light will not spread very far; where it does not directly hit, there will not be a lot of spread, so there is a tendency to clip the shadows. This is where artistic taste comes into play. How much or how little you fill in the shadows is totally up to you. In a lot of cases, you would use a reflector placed close to the subject and bounce back the light to add fill.
You can’t do that in this case because the light is coming straight down. The best way to add fill is to bring in a second light.
The best fill is a very broad and soft light. I use a 4×6 or 3×4, or, when I’m on location, a shoot-through umbrella. When you use the umbrella, remember that the farther away the inside of the umbrella is, the softer the light will be. I place my fill light directly behind and above me so it shoots a butterfly pattern at the subject. Even though is it a fill light, I match the pattern of the main as best I can so they don’t fight each other. Add a little more than what you feel might be right since it is easier later in post to subtract light than it is to try to pull detail out of the shadows later.
You have three choices for the look of the image. One is to keep your subject’s head lower. This blackens the eyes and gives your image an ominous shape. If you bring your subject’s head up, you have a choice of patterns. If the light is directly above and you bring the head straight up, you make a butterfly pattern. If you bring the head up and turn the chin to one side, you make loop light. When I shoot a male and female together, I keep one of the subjects’ heads down and bring one to the light, creating great contrast.
This two-light setup is best for athletes, fitness competitors and other clients looking for something badass.
Full-Body Glam Shot
I use almost the same setup for full-length lying-down glam images. The only change is in the main light modifier. Where I used the 7-inch reflector to pinpoint the light on a standing subject, this time I use a 16×60 gridded strip light to spread the light all over a lying subject. When using the strip, it’s key how far to the front or to the back of the subject you put the light. If the light is closer to the front of the subject, there will be less light on the background and more on the subject, and vice versa if the light is moved closer to the back of the subject.
The more forward the light is, the more of a butterfly pattern you create. The farther back, the more of a split light pattern you create on the body of your subject. When the light is more to the back, you need more fill from the second light, and you will have less light on your subject’s face. If you want more light on the face from the main, have the subject lift her head more toward the light. This is a very pretty wrapping light. I use this setup in boudoir to show off curves.
Soft Portrait/Beauty Shot
The two-light setup is the same as the other setup, but the feel, look and philosophy of this shot is the polar opposite of the previous two shots. Where the last shots were hard, edgy and dramatic, this shot is soft, airy and light. In the other two setups, the light on the boom was the main; now, we are going to switch the role of the overhead light.
You will still use the same overhead light hung on the same boom. This time, instead of the light being very direct (because you used a 7-inch reflector as the main light), the light will be used as the fill/hair, along with a much larger and softer modifier. Use a 22-inch socked beauty dish or a 3×4 box. The sock softens and spreads the light. I want the dish to work more like an octabox than a beauty dish.
The overhead light now has three roles: hair light or separator; fill light; and the kick on the drop. One creative choice you have to make is how far away you place the light from the drop. If you’re closer to the drop, you get a brighter image; farther away, and the darker, more saturated your image will be.
The light on the ground is the main light. For this setup, I want the image to have a soft feel, so I use a softer directional modifier, like a strip with the grid taken out. I want the strip because, at a closer distance, it is very directional.
With this setup, you can do just about whatever you want with the main, and come out with killer images.