
5 Steps to Easy Headshots with Vanessa Joy
Want more information on this article? Get access to video content and additional supporting images. Launch the October 2017 issue of the magazine by logging in or signing up for a free account. Shutter Magazine is the industry’s leading professional photography magazine.
Headshots are becoming higher in demand with the rise of social media. In the age of startups, more and more people need to have a professional photo that represents them and their brand. If you’re not taking advantage of this exploding market in photography, I highly suggest you start. If you’re not sure where to start, www.headshot-bootcamp.com might be just the thing for you.
There are five steps to creating easy headshots that I implement in every single session that comes through my door at www.nj-headshots.com. Whether or not you have a studio, you can take these are steps to create the best possible headshot for every client.
1. Not all headshots are created equal.
Whenever a new client walks in, one of the first things I ask is what they do for a living and what they’ll be using the headshot for. Other than reading their personality in general, this is crucial to how I photograph them, light them and work with their expression.
If a lawyer comes in, I’ll typically make her appear more powerful, maybe even a little intimidating. If an actor comes in, I’ll likely want to give him one “commercial” happy photo, and another “character” style showing off more personality. What they do and how they use the photo impacts what kind of photo I’ll take. It’s the first thing to address before touching on the rest of the four steps to easy headshots.
2. Modify your light.
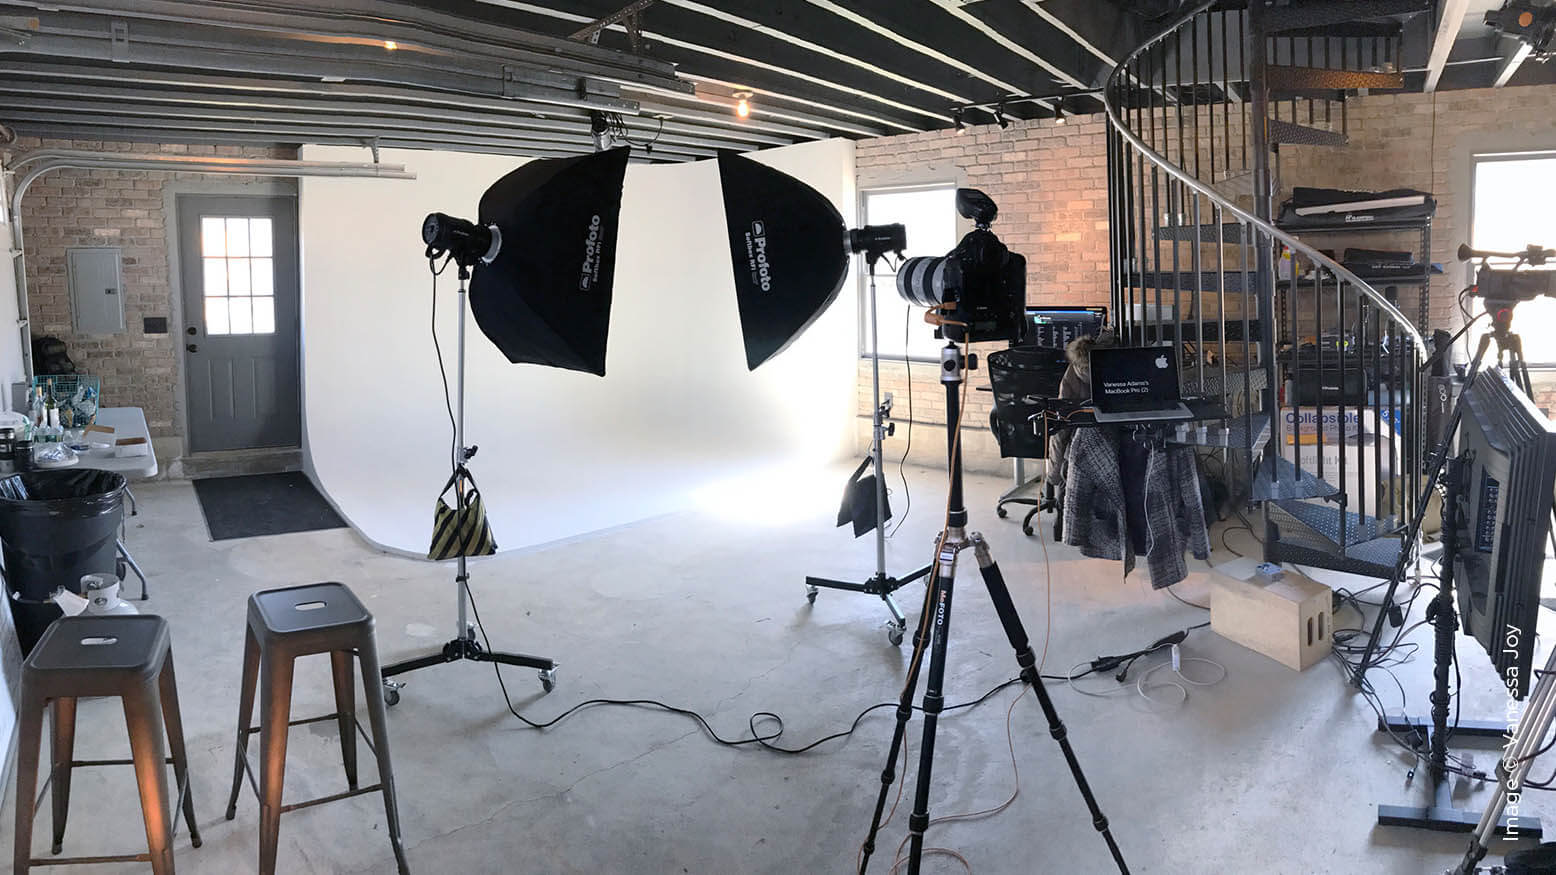
Anytime you’re using strobes, you have the unique advantage of shaping the light to anything you want. When photographing headshots, I’m looking for a soft, even light to complement skin tones and hide blemishes.
My go-to is the Profoto 3×4 softbox. It provides a soft, double-diffused light that is ideal if I need to step back for a three-quarter or full-length shot. I like having the large white diffuser double as a reflector when I turn off one of the lights for a more dramatic, angular look. I use a butterfly setup: two lights on my subject and a third light bringing up the background.
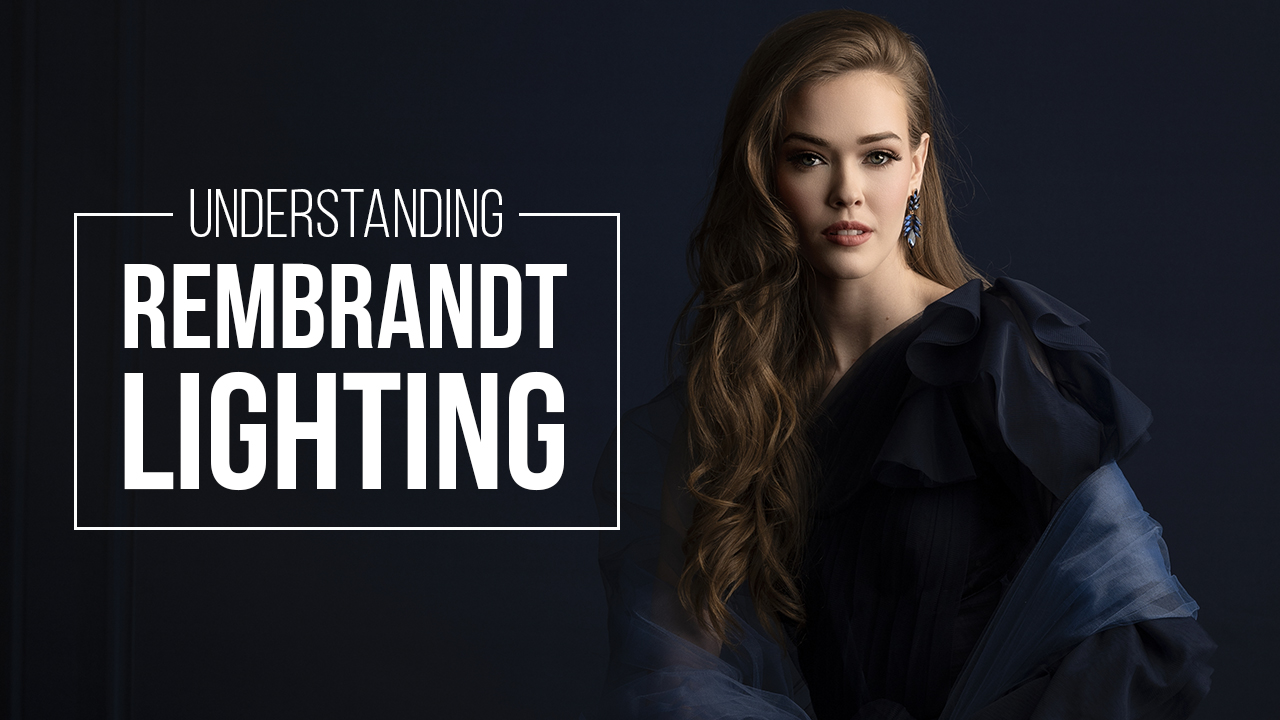
Next to that, I love my Profoto beauty dish for a clamshell setup. I rarely use this setup for the average headshot, but I do whip it out when I have an actor come in. I like using it with a darker background, which I achieve by toning down the power of my background light or turning it off completely.
3. Set your exposure.
Because I’m in a studio with powerful lights (three Profoto D1’s), I shoot all my headshots at ISO 50. My shutter is at 160 and my aperture is usually set to 3.2 because I like the eyes to be in focus, but don’t really need every pore to be (and my clients appreciate that).
I manually set my white balance to the color of my lights (5600K) and start my two front lights’ power at the lowest setting, 4.0 on the D1 and my background at 7.0, so that it goes completely white. I start off at the lowest setting for the main lights so I can slowly manipulate them to where I want them to be.
My lights are set up first in an even butterfly position. They are at about a 45-degree angle to the subject, at an even distance. This casts an even light on them, which I’ll end up changing depending on which is their good side.
4. Pose them on their good side.
Everyone has a good side. If you’re lucky, you’ve got two. After I chat with my client about what they do and have an idea of how I want to photograph them, I still need to determine their best side.
Because I’m tethering during my shoot, clients can collaborate with me on this, which I love. It makes them feel like they’re part of the process, and it’s fun to let them know which is their better side. I have them look at the camera dead on, then turn their head a little to the left and then a little to the right. We end up with three pictures to look at side-by-side. Most of the time we agree on the better side.
After that, I pose them in a relaxed stance with their feet in skateboard position and hands in their pockets, on their hips or folded. My goal is for them to feel comfortable standing in front of my camera, and then work on their head position afterward.
Talking to my clients during the shoot is key to making them feel more comfortable. As I’m tilting and turning their head and making them do weird things like stick their chin out (not up, not down, but pushed forward), they need constant feedback to let them know how they’re doing. Always keep feedback positive and encouraging.
5. Cut the post.
My favorite part about headshots is the post-processing work. Why? Because there practically isn’t any.
Tethering allows my clients to pick their pictures on the spot, eliminating the proofing process. After they leave, I export the pictures from Lightroom, applying only lens corrections (which is actually auto-applied upon import) and maybe adjusting the contrast or exposure slightly. Then I send the pictures to my editors for basic retouching like shine removal, skin smoothening and slimming the face. A few hours later, the images are ready to deliver to my clients. Done and done.
Don’t forget to check out the video for a few more headshot tips. If you’ve never given headshots a try, now might be the time to get your foot in the door.


This Post Has One Comment
Except for the tethered part, my process is similar. Are you seeing downward pressure on pricing https://uploads.disquscdn.com/images/251626b97277c93fa456e4673c671f7e835f20ad448618b4cb12ee1b9e095e5c.jpg