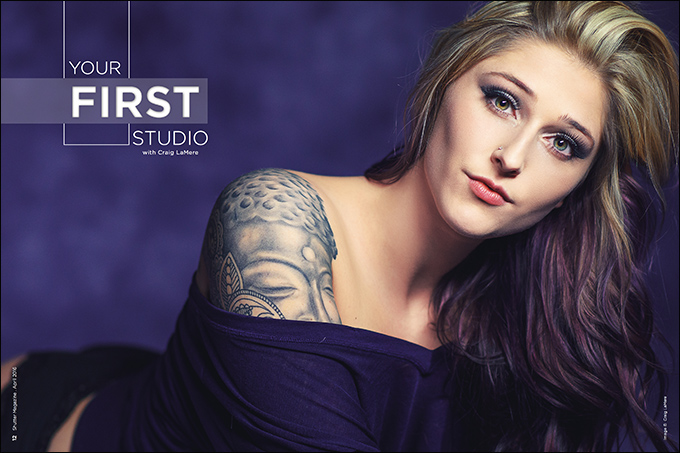
Your First Studio with Craig LaMere
When I decided I wanted to do studio stuff with artificial lighting, I turned my home theater room into my first little makeshift studio. I had two constant lights and a white sheet for a drop. After getting yelled at for the hundredth time for having strangers run all over the house, I decided I better find a place to take Moz Studios because we were getting evicted from Casa LaMere.
I found a place that was perfect for what I was doing at the time. I signed the lease, I moved in and I proceeded to buy everything on the planet I thought I needed to be a real studio. To make a very long story short, I pretty much bought everything having to do with lighting that was ever invented because I thought you needed every tool, modifier and gadget known to mankind to create cool images.
When I got into photography, I was very lucky to have left a career that was good to me, so I really didn’t have to watch my budget. There might be some people out there in a similar situation, but the majority of new shooters who are venturing into the investment of a studio are on a budget, and it is important to get the biggest bang for the buck.
This month, we look at the only four light modifiers you need to start out with. These modifiers should cover around 95 percent of the jobs that come through your door.
Softboxes and Umbrellas
A softbox is a light modifier constructed in either a square or a rectangle design. Because of the depth of the box and diffusion material in it and on the face of the box, the light produced is soft and diffused.
The umbrella came before the softbox. An umbrella is exactly what you think it is: a round piece of cloth attached to a wire frame. You open it up and you either shoot light through it or into it, or bounce it back. Umbrellas, on the surface, are a lot like a softbox in the way they diffuse light, but there are a couple of important distinctions.
The downside of using an umbrella is working with light that is not contained in any way. The light that does not go through the fabric goes out and around, crossing the edge of the fabric. This is what is known as light spill. If you are going to be shooting more open and flat, then umbrellas are a good choice since they are very inexpensive. But if you want to control or feather the light, a box is a much better choice because the light is fully contained and you decide where all of it goes at any given time. I prefer softboxes.
There are softboxes in all shapes and sizes. They come as large as 6×8 feet, taking up an entire room. The smaller 8×12-inch ones sit on top of your on-camera flash. Prices range from close to nothing to as high as “you better sell a kidney if you want it.” I use SweetLight and Larson boxes. The perfect box for me is the 3×4, with which you can shoot groups and individuals. It is a small enough light source to make it directional.
Strip Light With Grid
A strip light is basically a softbox cut down into thirds like a loaf of bread. They come in all sizes. While the softbox is a great tool, it has limitations in what you can do with it practically. Where the softbox starts to fail is in producing really dramatic light or being able to pinpoint light. Because the softbox is so wide, light gets tossed all over. The strip light is so much narrower than the softbox, allowing you to direct the light better. But you do have to add a part to the strip light, or it is not that much different than feathering a box. That part it called a grid, or egg crate.
A grid for a strip light is a fabric insert that sits in the box in front of the diffusion material. The fabric is woven into little cubes and looks like the containers your eggs come in. The grid contains the light so it doesn’t spread like it normally would. Using a strip without a grid is like flipping on lights in your kitchen and lighting the room up. Using a grid is like pointing a laser at something. This is why having a strip with a grid is a must in your lighting kit. It will give you the precision you need for certain shots that you cannot get with a softbox.
Beauty Dish
A beauty dish is a circular metal or plastic light modifier that comes in many sizes. They mostly come in white or silver. Light produced by a beauty dish falls about in the middle range between light produced by a hard modifier like barn doors and a supersoft light modifier like a 4×6 softbox. When you are starting out, I recommend you get a 22-inch white dish.
There are a million manufacturers out there to choose from. I’m a Mola guy, and my 22-inch dish of choice is the Demi. Beauty dishes typically come with a “sock,” which is a piece of fabric that goes over the front of the dish. The sock is used to diffuse hard light. When you put the sock on, you turn the beauty dish into a little octabox. To better control the light, add a grid. A beauty dish with grids is a must-have for your lighting kit.
DIY Medium to Large White Reflector
The last item you must have in your lighting kit is a reflector. There are countless varieties, but if you’re just starting out, build your own. One of the best reflectors I have ever used is a homemade V-flat. It’s super easy to make. Go to the insulation department of a Home Depot or Lowe’s and pick up two 4×8 sheets of Styrofoam. Tape them together with duct tape so they swing in and out like a hinge.
What’s really cool about these reflectors is how efficient they are and how much light they kick back, which is nice when you are trying to make the most out of your kit. For the bang for your buck, you really can’t go wrong with the homemade V-flat.


