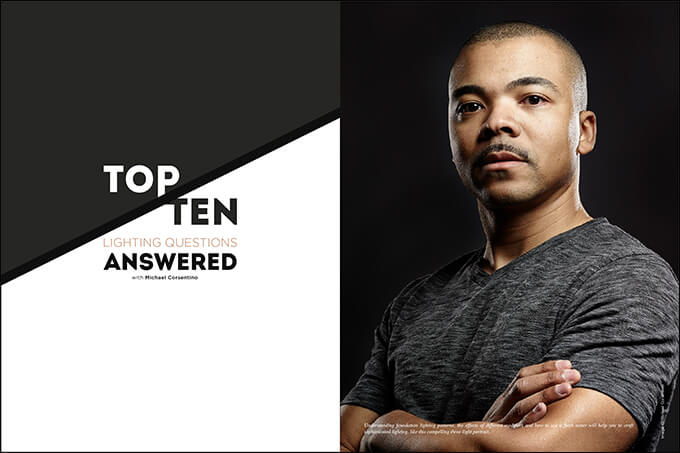
Top 10 Lighting Questions Answered with Michael Corsentino
1. Speedlights or Strobes?
Ah, the age-old question. Should I invest in speedlights or strobes? As we lighting geeks are fond of saying, light is light. However, speedlights and their larger strobe cousins are different tools that come with distinct capabilities that set them apart from handheld flash units. The choice between handheld flash and larger strobes, both battery-operated and studio versions, depends a lot on how you’re planning to use them, what your budget is and what you already have in your kit.
One of the main differentiating factors between handheld flashguns and larger strobes is their power output. With additional power comes additional flexibility and creative options. With more power, you can do things like place your strobes farther away from your subjects, use larger modifiers and overpower the sun. Strobes also benefit from a much wider array of modifiers to choose from.
The recent introduction of lightweight TTL and high-speed sync-enabled strobes, many of which are 10 times more powerful than handheld flashgun units, make the strobe route appealing. Most flagship handheld flashguns from leading manufacturers are in the $500 to $600 price range, while larger battery-operated strobes fall somewhere in the range of $1,800 to $2,000. Good 500ws studio monolight heads can be had for as little as $600 to $1,200. Price can be a determining factor, but I’d rather have one powerful light that’s capable in many scenarios than three underpowered small lights that leave me wanting.
For that reason, my recommendation for general use is one battery-operated strobe in the 400- to 500ws range, with or without TTL. This way you have a tool you can use on location as well as in the studio. Keep in mind you can accomplish a lot with just one light. Having the extra power provided by a larger strobe gives you considerably more options than you’ll have with an underpowered small flash. That said, don’t despair, my small-flash friends: I used only speedlights for years. You can do a lot with these tools; you’ll just be more limited when additional power is needed.
2. How Can I Create Hard, Edgy Light?
Let’s start by defining hard light. Hard light has rapid, crisp transitions between the shadows and highlights, creating a specular (contrasty) look. You’ll want to create a roadmap to achieve it. As with any lighting effect, you will rely on a combination of tools and techniques. I suggest using smaller silver-interior reflectors. Alternatively, softboxes with interior and exterior diffusion panels removed can be used.
The absence of any diffusion material assures a harder light source, while a silver interior provides extra contrast and a cooler-toned light than is possible with a white-interior modifier. The distance between your subject and the light source also plays a vital role in creating hard or soft light. The farther away the light is from the subject, the smaller its perceived size in relationship to the subject, and the harder the resulting light.
3. How Can I Create Soft Light?
With soft light, the opposite is true: Transitions between shadows and highlights are gradual and therefore lower in contrast. In this case, diffusion panels and large modifiers placed as close as possible to your subject is the way to go. In fact, the bigger the modifier, the better. One of my favorites is Elinchrom’s 74-inch indirect octa. This modifier not only gives you the ample size you need to create gorgeous soft light, but it also goes one important step further. By orienting the strobe so that it points inward, toward the back of the octa rather than out toward the subject, it further softens and broadens the lighting.
You could get away with a large white V-fat and a scrim for diffusion to get close to this effect. Feathering is another key technique you’ll want to employ when you’re creating soft light. Here you’ll place your subject just behind the modifier so you’re working with the edge of the light. This is the softest and most pleasing light possible. Regardless of the tools you’re using, choose a modifier with a white interior and lots of diffusion. Get it as close as you can to your subject, and feather it.
4. How Do I Balance Strobe and Daylight?
When it comes to creating the perfect balance between flash and ambient light, remember this simple guideline: Shutter speed controls the ambient light contributed to the exposure, aperture controls the strobe light contributed to the exposure and ISO controls the sensitivity of both aperture and shutter speed.
If you’re using TTL for your flash exposure mode, you’ve got one additional variable in your bag of tricks: flash exposure compensation (FEC). You’ll use this this once you’ve selected the f/stop, but you still want to either increase or decrease the output of the flash without needing to change your aperture. This is very helpful in exterior portrait scenarios, where wider apertures are often preferred.
In addition to understanding exposure and strobe techniques, additional equipment plays a role. Do yourself a favor and incorporate a portable diffusion panel into your lighting kit. This allows you to cut harsh daylight and create a better balance using ambient and fill flash.
5. Do I Need a Light Meter?
Asking if you need a light meter is kind of like asking if you need a car. You can absolutely get where you’re going without one, but think how much faster you’ll get there with a good set of wheels. With a light meter, the days of chimping to see whether you nailed the exposure are gone. You simply decide what your preferred aperture is, meter the output from your flash so it matches that aperture, and boom—you have a perfect exposure the first time you click the shutter.
Metering allows you to work fast, accurately, consistently and repeatably. Moreover, a light meter does things your camera’s meter simply can’t, like meter flash. Your camera’s meter can’t do that; that’s why there’s all that chimping going on. Plus, a handheld meter lets you take more accurate incident light readings rather than the reflective light readings your camera’s meter takes. Incident light is the light falling on your subject rather than the light being reflected from it. Different surfaces and materials reflect light at different intensities, providing a less accurate reading. This is why your exposure is off sometimes.
A handheld meter also allows you to easily determine a ratio or the power relationship between different lights, like in a three-light setup. Again, that’s impossible with a camera’s built-in meter. Once you have these settings, you can easily and quickly recreate the same lighting setup with a meter.
6. What’s the Perfect Modifier to Use on Location?
I get this question a lot, and I always answer it the same way. The perfect modifier is the one that produces the look you’re after. I wish I could give you a simple one-tool answer, but there is no one-size-fits-all modifier. It’s a myth. The trick is to figure out the effect you want to create, be it on location or in the studio, and then plug in the modifier and techniques that will create that effect. It’s that simple.
There are important considerations where location work is concerned, chief among them modifier weight, size, portability and the effect of windy conditions. Large softboxes can be a significant challenge on location when the wind kicks up. You just need to plan accordingly and have enough assistants to wrangle the modifier so it doesn’t take off like a sail.
7. What Power Setting Should I Choose for Manual Flash?
Many people find manual flash intimating because, unlike TTL flash, the camera’s meter isn’t calling the shots for them. It’s up to them to determine the amount of flash and ambient light contributed to the exposure. While this intimidation is understandable, it’s actually unfounded because manual flash couldn’t be more simple once you understand a few simple concepts.
The main thing people seem to struggle with is understanding where to set the power of their flash. The simple answer is “somewhere.” I’m not being cheeky—you just need to start somewhere. Determining the right amount of power depends on variables such as the distance your strobe is from your subject, the maximum power output possible with your strobe and how it’s being modified. The place I start is typically at 50 percent power. This gives me a solid starting point, with 50 percent flexibility either up or down.
I’m a big fan of handheld meters, but with manual, it is as simple as dialing it up or down for more or less light. Once you become more familiar with your strobes and modifiers, how they operate in various scenarios, choosing the right power setting will become second nature.
8. I’m New to Lighting. What’s the First Thing I Should Know?
The most important piece of advice I can give anyone new to using artificial light is to get their light off-camera ASAP. Why? The minute you introduce angle and direction to your lighting is the minute you take your lighting to the next level. It doesn’t matter whether you’re using speedlights or strobes, creating beauty light or looking for a more dramatic effect. Directional light introduces shadows, and shadows create a sense of dimension, volume and drama. So…don’t be afraid of shadows.
On a related note, you need to be familiar with the six classic lighting patterns: Paramount (also called butterfly), clamshell, Rembrandt, loop, split and rim (also called accent).
With these two simple things under your belt, your lighting game will be in a whole new league in no time.
9. What Lighting Accessories Do I Need?
You need reflectors, diffusion panels, subtraction panels, V-flats, flags, nets, grids (hard and soft) and triggers to get light right. These are some of the least expensive but most indispensable tools you’ll invest in.
Let’s start with reflectors, diffusers and subtraction panels. At a minimum, you’ll want a portable multipurpose tool, such as Lastolite’s TriFlip 8-in-1 Grip Reflector Kit 30″ (LL LR3696). This one tool allows you to reflect, subtract and diffuse light. I always have at least two with me.
In the studio, you can’t beat V-flats. These 4×8-foot reversible white- and black-faced pieces of foamcore are the omnipresent reflectors and subtraction panels in any studio. They’re inexpensive must-have items, usually purchased as a pair.
Flags are another useful addition to any studio. These are frames with black fabric stretched over them that come in various shapes and sizes. They allow light to be blocked exactly where it’s needed. The same is true with nets, except these tools, also available in a variety of shapes, sizes and strengths, allow some but not all light to pass through them, essentially knocking down the intensity of the light by a specific amount. Nets are very helpful for taming hotspots on skin and reflective surfaces.
You’ll also want grids (also referred to as grid spots) and soft egg crate grids. These are used in conjunction with reflectors and softboxes to create a constrained and narrow pool of light. Grids are specified as 10, 20, 30 or 40 degrees. The smaller the number, the tighter the pool of light created. Once you start using grids, you’ll wonder how you ever got along without them.
I won’t spend a lot of time on them here, but wireless triggers are another must-have. Radio-based wireless triggers allow you to trigger and control your strobes/speedlights from the camera position with no line-of-sight limitations.
10. If I Can Afford Only One Modifier, What Should It Be?
Build your stable of modifiers slowly and steadily. This way, you get to know them and what they’re capable of. One of the least expensive and best modifiers to start with is a convertible umbrella, like Lastolite’s 41″ 8-in-1 Umbrella (LL LU4538F). This $129 tool does a multitude of things. It can be used as a shoot-through umbrella, bounce-back umbrella or makeshift octabank. So when you’re starting out or on a tight budget, look for tools that can do more than one thing.
Umbrellas are great general-purpose tools that provide a lot of flexibility. Just note that they lack the light-shaping control of modifiers, like softboxes, that have more edge to work with. In other words, umbrellas put light everywhere.
Let’s talk about your lighting questions on the ShutterFest Facebook page. Post your questions and tag me.


