
Retouching Senior Portraits in Photoshop CC with David Byrd
Retouching is as much of an art form as photography itself. It is a complex skill to master but comes with a great sense of fulfillment. If you are truly gifted, it can be very rewarding as a career.
Before we go any further, let’s establish that retouching is complex, time consuming and downright hard. True masters of retouching, like Nino Batista and Pratik Naik, take several hours, even days, to complete a single image. There are countless ways to retouch skin or enhance an eye. There are several third-party programs that can help you achieve your goal to varying levels of success. Don’t let this discourage you from trying various methods and making them your own. It takes time to learn all the tricks to problem-solve every unique image you retouch, but with consistent practice and dedication, you’ll soon be on your way to mastering this art form.
I began teaching myself how to retouch images with Photoshop version 4.0 (Photoshop CC 2018 is considered version 19). To this day, I still use some of the original processes and tools for retouching. In this article, I discuss the most important step in retouching, then explore the basics of retouching skin, enhancing eye color with blending modes and layer masks, and, finally, problem-solving stray hairs.
I recommend that you use the most current version of Photoshop (which is available as a monthly plan from Adobe). I also strongly advise using a pen tablet over a mouse; your art will only improve with the control a pen allows you.
Using the Right Language
One of the first and most important steps to retouching—especially if you will be representing your work to the client—is to use the right language. Being in front of the camera is a vulnerable process for any client; having all of their perceived flaws on display can be frightening. I always use words like retouch or enhance rather than fix or correct when speaking with a client. A common request you’ll hear is, “Photoshop can fix that, right?”
Take the time to give credit where it is due and remind them that you are the artist who will use your skill. The tools in Photoshop will enhance the image, but you are the artist behind those tools. We take the time to make them feel comfortable in front of the camera; do the same to make them feel comfortable with the retouching process.
The Good Old Healing Brush
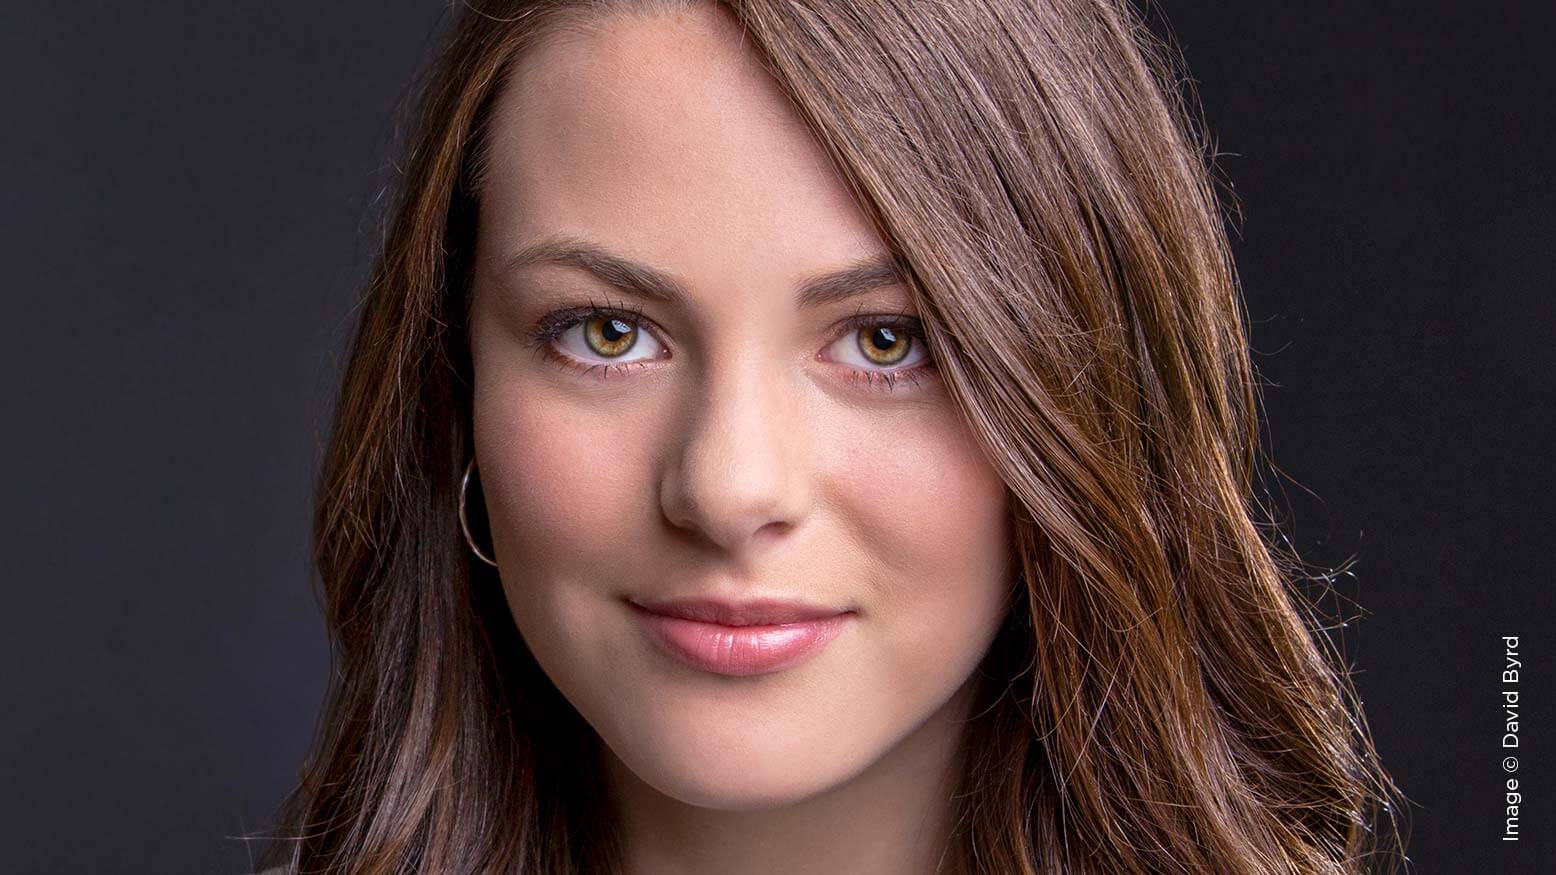
To begin our journey, we’re going to retouch some challenge areas on our model’s skin. You’ll notice that she has a few freckles: I strongly advise that you ask the client if they would like pigmentations like freckles, moles or other areas to be retouched or removed. If you decide for them, it could be hurtful and offensive. She has opted to have the freckles around her mouth removed from the image. The easiest way to do this is to use the Healing Brush.
To select the brush, hit the letter J on your keyboard. If you are using the most up-to-date version of Photoshop, the program will default to the Spot Healing Brush rather than the traditional one. To select the Healing Brush, right-click the Band-Aid-looking icon on your Tools palette. This will bring up the fly-out menu where you can select the Healing Brush.
To use this tool, you must select a “target area” of the image that Photoshop will use as a reference to begin transferring the data. To do this, move your cursor to an area that is near the section you want to retouch, hold down the Alt or Option key, and left-click once. Now with your target area in place, you can begin to use the tool to retouch.
The best use of the tool is to keep the target area in the same region as the skin you are retouching. If you move the target area to a section of skin that doesn’t have a lot of detail (it’s out of focus or in an area of shadow), Photoshop will transfer that blurry data to the sharp area you are retouching. This creates a visual disparagement that will not look very pleasing. The key is to make the texture of skin you are retouching resemble the texture of your target area. Stay in the same zone, make small movements with your brush and go over the entire surface of the skin looking for challenge areas to retouch.
Enhancing Eye Color
Eyes seem to be the first area that gets overly retouched and can be the cause for some very unrealistic-looking images. We’ve all seen an image where the white of the eyes has been brightened to the point that the client no longer looks human. Remember that small, subtle adjustments are the key to creating a realistic final result with Photoshop.
When you begin to retouch the eyes, zoom into your document so that both eyes are visible at the same time on the screen. This allows you to see how your efforts are affecting both of the eyes and you can adjust accordingly. Let’s start with the iris and use one of the oldest tricks in the retouching book to brighten them. (Don’t worry about that stray hair over her left eye—we’ll get to that in a moment.) Select your Background layer in the Layers window and duplicate it by hitting the hot-key combination of Control or Command and the letter J. This makes a new layer entitled “Layer 1.”
Now go to the Layer Blending Modes dropdown menu and select the Screen option. The image will become very bright as a result of this blending mode change—we want to hide this effect and only show it through the iris. To do this, we are going to make a layer mask and have it “hide all.” To make your mask, go to the bottom of the Layers window and select the Layer Mask icon. This makes a “reveal all” mask on the layer, indicated by a white rectangle next to the Layer 1 thumbnail. (insert file close up layer mask itself) To change this layer mask to “hide all,” click on the mask itself and hit the hot-key combo of Control + Command + I. Now the mask will be filled with black and your document should be back to normal.
Select your brush tool by hitting B for brush. Make sure you are using a soft brush. To change the hardness of your brush, right-click anywhere on the document to bring up the Brush Preset window and move the hardness slider to 0%. Now change your foreground color to white, and, with the black layer mask selected, begin to paint white around the iris.
To get the best effect, paint only the lower half of the iris, leaving the very top center of the iris unaffected. As you paint, you are revealing the effect of Layer 1 at 100% opacity. This will be too much and make the eyes look otherworldly. To reduce this effect, simply lower the opacity of Layer 1 itself to 50% and continue to reduce the opacity until you find the right brightness blend for your image.
To enhance the white area of the eyes, you will go through the same process. Duplicate the Background layer and again change the layer blending mode to Screen. Create a layer mask and invert it to hide all and then paint with white on the layer mask around the lower two-thirds of the eye. Reduce the opacity of this layer to 40% and continue to reduce it until you have a natural, subtle brightness to the eye.
We can also enhance the dark outer ring of the iris (called the limbal ring) with this process with one minor change. Instead of using the layer blending mode of Screen, switch to Multiply. This will make the image much darker, and when you selectively paint in this effect on your layer mask, you will reveal the darker tone of the limbal ring. As with the other steps, reduce the opacity of this layer to 50% and experiment with further reduction.
Consider further enhancements to the eye by sharpening the iris itself using a Vibrance adjustment layer to add more tone or even change the color with a Hue Saturation adjustment layer. Always make sure you are working on a duplicate layer or an adjustment layer so you can lower the opacity of these effects and achieve a subtle, natural look.
Spot Healing Saves the Day
A great addition to Photoshop was the invention of the Spot Healing Brush. The function of the brush is to take a targeted area that you have selected and use a process called Content Aware to adjust or heal the area. Content Aware directs Photoshop to look at the surrounding data of your selection and mimic it, much as the Clone Stamp tool does. We are going to use this process to adjust the common issue of stray hairs, which we can see in this image over her left eye.
Return to your Spot Healing Brush by right-clicking the icon in the Tools palette and selecting Spot Healing. Now make sure that Content Aware is selected as the sampling option. The tool functions best when you take small sections of your image and adjust them with a single small brush stroke. In this case of the stray hair, I’m going to start with the eyebrow and just make a brush stroke in that area. Photoshop will sample the area of her eyebrow around my brush stroke and then paint in that data. I’ll then move to the area of skin just below the eyebrow and make a brush stroke, but I will not pass into the eye with this stroke. I’m taking it in small sections to let Photoshop make the minor adjustments. I will repeat the process, taking each section of the iris, the pupil and so forth until the hair has been completely removed.
If your results look bizarre, go a step or two backward in your history and repeat the process and adjust your brush stroke. It’s inevitable that this process won’t work on all challenges you may face in an image. That is why as a retouch artist, you must learn alternative ways of adjusting elements of your image and practice them consistently.
Final Thoughts
Retouching your images connects you to your own artwork and brand as an artist. As you begin to explore more complex procedures of retouching, your artistic style will begin to take shape. It is that visual style that clients will be drawn to. A Sal Cincotta image is a reflection of his artistry and brand. A fantasy image by Reality Reimagined is a reflection of my own brand.
Keep practicing and experimenting with the various tools in Photoshop. With hard work and dedication, you’ll be able to create some beautiful art.


