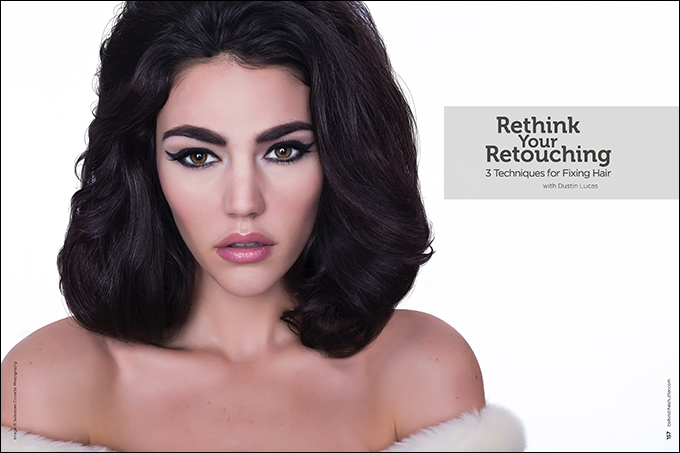
Rethink Your Retouching: 3 Techniques for Fixing Hair with Dustin Lucas
Whether you’re shooting beauty, fashion or glamour, hair can be a huge distraction. Hiring a makeup and hair artist can be a game changer, but there is still plenty of work to be done after the shoot. Things like stray hairs can really draw attention away from your subject’s face and cause them to get tangled in the hair. It doesn’t have to be this way.
Some familiar tools, like the Clone Stamp and Healing Brush, are great for removing flyaway hairs. Removing these distractions is easy, but making it look realistic can be difficult. That’s where a technique called “frequency separation” can be crucial. Adding hair seems odd but can keep your editing looking as natural as possible. As we all know, when using Photoshop, if something is off, it looks fake.
We will be working with layers so that the file remains nondestructive. Although creating layers increases the file size, I highly recommend it. Along with layers come masks and clipping masks. Masks allow specific areas of an image to be affected by increasing the transparency of the effect. With a black layer mask, none of the effect is applied, and white means it is 100% transparent. This is where brush opacity allows you to apply subtle amounts of the effect as well. Blending modes relate to how the effect is applied rather than the amount.
The Clone Stamp
Now let’s get working in Photoshop. Open your image and create a blank layer. It is best to do all your work on a separate layer so that your original image, or base layer, is not affected. Select the Clone Stamp tool to remove the flyaway hairs. Navigate to the sample setting and set to Current and Below. Adjust your brush to have a softer edge; hard edges make the cloned areas look patchy. Before you begin painting, you must select a sample source—I suggest making your brush smaller and choosing an area similar to where the hair you want to remove is. To do this quickly, hold down Option, click and then paint over the hair. To resample your source, repeat the previous step. Remove all the flyaway hair.
Create a layer mask by holding down Option and clicking the emblem at the bottom of the layers palette. This makes a black layer mask that hides all the work we just did. Select the paintbrush with a much harder edge and chose white as your foreground color. You can now paint back in the cloning work. Choose a lower-opacity brush to help blend everything together.
To remove crosshairs, select your sample source and begin painting. This is a very tedious and difficult process. There are a couple of blending modes that can help with lighter and darker hair. Set it to lighten for lighter hair in darker backgrounds, and darken for darker hair in lighter areas. It is hard to be precise with this tool, and this type of editing should be saved for a different technique. I’ll get into that later.
The Healing Brush
For seamless backdrops and continuous backgrounds, this works well, but I want to work a little more precisely. Create a new layer, grab the Healing Brush and set the samples setting to Current and Below. Select a soft-edge brush so that the blending is less noticeable. Choose a sample source and begin removing the flyaways. You will notice as soon as you get too close to the edge, the blending goes to crap. This is where you can use the Clone Tool to swap back and forth with the Healing Brush. Use hotkeys to do this quickly; the Clone Stamp is “s” and the healing brush is “j.”
Once you remove the unwanted hair, it is a good idea to add some back in so the cleaned-up areas don’t look fake. Create a new layer and choose the paintbrush. Adjust the brush’s edge to 100% hardness, set the brush size to 1 to 3 pixels, and color-pick a section of the hair toward the edge. To quickly toggle colors, hit the “I” key and click in an area, then hit the “b” key to switch back to the brush. Begin drawing long strokes around any curves or to fill in gaps in the hair. Stay close to the edge and draw from inside outward. Repeat strands in an area to create some volume.
Now you need to blur these strokes to create depth. From the menu bar, choose Filter > Blur > Gaussian Blur. Set the radius to match the sharpness of the surrounding hair—I used 2.4 for this example. Then add noise by going to Filter > Noise > Add Noise. I zoomed into the image at 100% to try to match the background, and settled with 9.5% noise. These two adjustments make all the difference in creating realistic strands of hair.
Frequency Separation
This technique is built around the same process for softening skin and image sharpening. Using the Gaussian Blur and High Pass filters, you can start to remove crosshairs much more accurately than our earlier technique with the Clone Stamp. First we need to duplicate our image layer. From the menu bar, choose Filter > Blur > Gaussian Blur. Set the radius to 14 pixels and click OK. Then duplicate your image layer again and choose Filter > Other > High Pass. Set the radius to 10 pixels. Make an action for this. I downloaded a free one from FX-Ray.com. No need to make this step any harder—set an action to quickly create these layers.
Once I have the layers built, I am ready to attack the crosshairs. These can be difficult to remove, as we saw when we used the Clone Stamp on an empty layer. That is why we created the frequency separation layers. Select the high-frequency layer and strike Command + J to immediately duplicate the layer. Then we need to convert it to a clipping mask by striking Shift, Command + G. This allows the Clone Stamp to affect only the layer below in specific areas. It’s a much more precise technique for cloning crosshairs. Strike the “S” key, choose a sample source and begin painting in the direction of the hair strands. Resample and move the cursor to get the right look. You will need to change the blending mode to Normal for the layer and the Clone Stamp tool. You also need to change the sample setting to Current Layer.
Take your time and learn to sample. I like to remove a large piece of hair by sampling next to it and painting over it entirely. You do not have to be precise at first, because you can clean up by dragging the cursor the same direction as the rest of the hair afterward. Painting in the same direction is crucial to creating continuity with the cloned strands of hair.
The Results
Retouching hair can be as stressful as you want to make it. Get used to the tools and the sampling technique to get more precise with your editing. A Wacom tablet is extremely helpful, but I completed this tutorial with a mouse.
Remember, when working in Photoshop, it’s more about what looks right but also not spending days on end to perfect an image. These techniques will get you in a good place, and building on them can revamp your retouching abilities.


