One Window, Multiple Shots with Meg Loeks
The versatility you can achieve with just one window is amazing. I’ve often heard the excuse, “I don’t have a beautiful space or home to shoot in.” At one point in my life, while my family was in the middle of building a home, we lived in a tiny, old, drafty apartment. It was far from picture perfect, but in the right light none of that mattered.
So what’s the secret? How can you mask a less than pleasing decor/home, while also capturing versatility in a single space? The answer is two-fold and it’s a simple concept, but something I often need to remind myself of. It’s just a matter of moving your subject and yourself, and it can be just the slightest adjustment that makes all the difference.
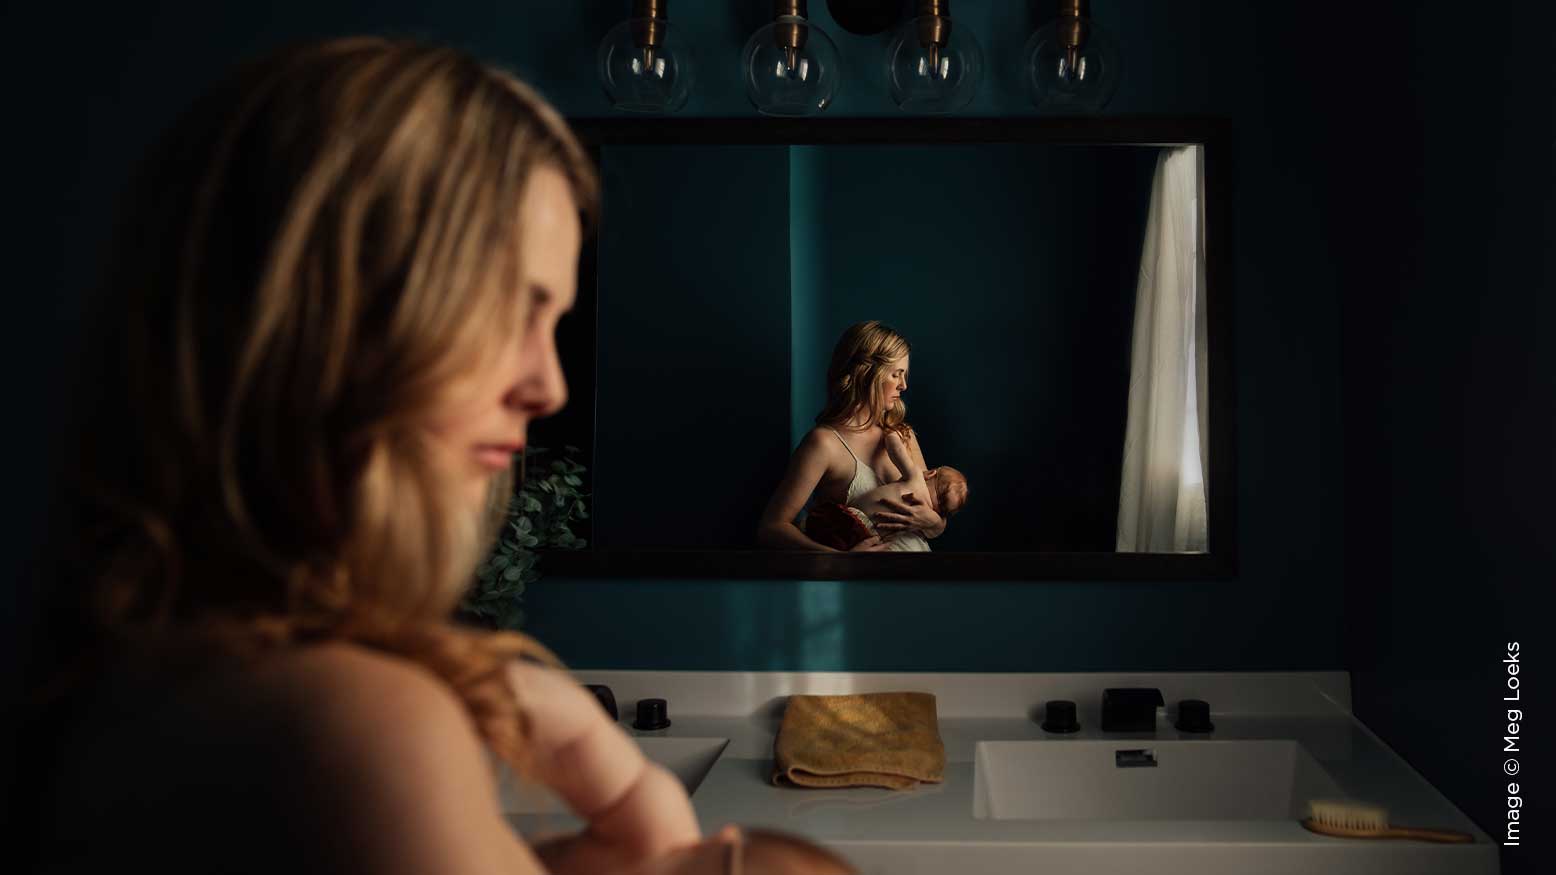
I love working with just one light source. The reason why is because I love the dramatic, directional light I can get from just a single window. The smaller the window, the more dramatic the light tends to be, too. Despite what some people may say, bigger windows aren’t always beneficial… especially if you are drawn to moody light. Larger windows means there will be a lot of light flooding in, which also creates shadows that are less dramatic, unless of course you are able to manipulate that light with curtains. It’s truly amazing the amount of light you can still get from a small window!
Whether you are working with a large or small window, how do you go about masking a less than ideal space while photographing your subject? One solution is to consider placing your subject close to the light source. The closer you place your subject to the light, the more dramatic the light falloff. That means your background is going to be nice and dark, which drastically hides any distractions you may have. This type of strong tonal contrast between light and dark is called chiaroscuro. With your subject close to the window, your background will not only be dark but you will have strong shadows and high contrast as well. The further you pull your subject away from the light, the softer the shadows and lighter your environment and background will be.
Now, how do you go about obtaining versatility in a single space? As I mentioned earlier, an easy solution is to unglue your feet. I always encourage photographers to get their safe shot first. Maybe that’s a simple portrait next to the window. Then move your feet. It can be the slightest adjustment that makes all the difference in both light and composition.
One shot I always love to get is a shot from above. Wide angle lenses work great for above perspectives because it allows you to easily capture more of your subject and the environment while working in a tight space. I prefer to use my Sigma Art 24mm, the widest prime lens I own. Again, I like to place my subject close to the window for a dramatic light falloff. This is also another way to eliminate distractions and an unpleasing environment.
Versatility in the use of light while working with just one window can be a simple matter of just changing your perspective. Instead of placing yourself parallel with the window, consider moving perpendicular to the window for backlight. Making slight shifts with your position can have dramatic results.
So you captured your safe shot first. Maybe it was a classic portrait by the window, or a detailed shot from above of your child working on a craft. Now it’s time to get creative. Challenge yourself to pause, slow down and think of a new way to capture your subject that you haven’t done before. One perspective I love to do that’s unique and unexpected is to shoot from the outside in. Place your subject right in front of the window, get outside and photograph them through the window pane.
Pro Tip: Having a dark background like a treeline behind you is going to make your subject more visible through the window. If you don’t have trees near any of your windows, consider strategically placing your body in front of your subject. Your dark reflection will make your subject pop.
Think of ways to creatively frame your subject by utilizing the environment around you. I love to frame my daughter with the curtains in her room. Children are naturally curious and playful and she loves to play with the curtains. This gives her something to do and more time for me to compose my frame the way I want to.
While I’m primarily a natural light photographer, I do rely on created light from time to time. If I have good natural light, I’m definitely going to use it. However, we know that natural light isn’t consistent and I do often find myself in situations where I need to create my own light. While I don’t consider myself an expert by any means with studio lighting, I do find that working with created light that mimics the natural light I’m drawn to is best. This often means one single light source and then using modifiers to soften the light if I need to.
I have a small window by my kitchen sink. Outside the window is a covered porch, so the light isn’t very strong in this location. Not only that, my sink is very deep and while I love it, it’s not great for photographing my daughter laying down in it for her bath. The solution was to place a Profoto A1x outside my window. I placed the A1x on a light stand with a large deep white umbrella. You can see in this pullback the light has been placed high to allow for more light to fall down into the sink. Since I couldn’t leave my daughter alone to adjust settings on the A1x, I was able to change the strength of the light by using the Profoto Connect app on my phone. Having the A1x bounce off the umbrella helped soften the light, and then again through the lace curtains as well, making the lighting look natural on my daughter.
I would have never been able to get this shot in beautiful light if it wasn’t for using my A1x. This is a great way to make created light look natural by using it in, through or around a window with modifiers. I absolutely love when I share an image and receive questions asking whether the light is natural or created. That’s the whole idea, right? I want my work to be cohesive and I want the created light I use to look natural!
There’s a lot you can do with a single window and space. Simply by making slight adjustments to your subjects position or your perspective, you can eliminate distractions and add versatility to your session. I’ve found that often my second or third shot from a different angle or perspective ends up being my favorite, even more than the image I had first intended to capture. Never underestimate the power of slowing down and moving your feet.

