
“Needle In a Haystack” or “Stick Out Like a Sore Thumb”? with Jeremy Chan
To start off, let’s be honest. In today’s modern world, social media is where we share our lives, and everyone only cares about their own photos. Rarely they will care about another’s photos unless those images have interesting content. If you want to showcase your photography within this overly saturated market, it will be even harder unless it has something special or different, something that makes them ask, “How?”
As professional photographers, we do have a couple tricks to make our photography just a little more special and different. Although there are ways to achieve the same result though composition, lighting and posing, this time I will focus on post-processing techniques. I find that if we can post-process and transform an image into more than straight-out-of-camera, then it will have a higher chance to stand out from the rest.
One of my favorite tricks is to convert a modern-looking photo into a vintage, cinematic, film-like image. I do this by using color toning and texture effects.
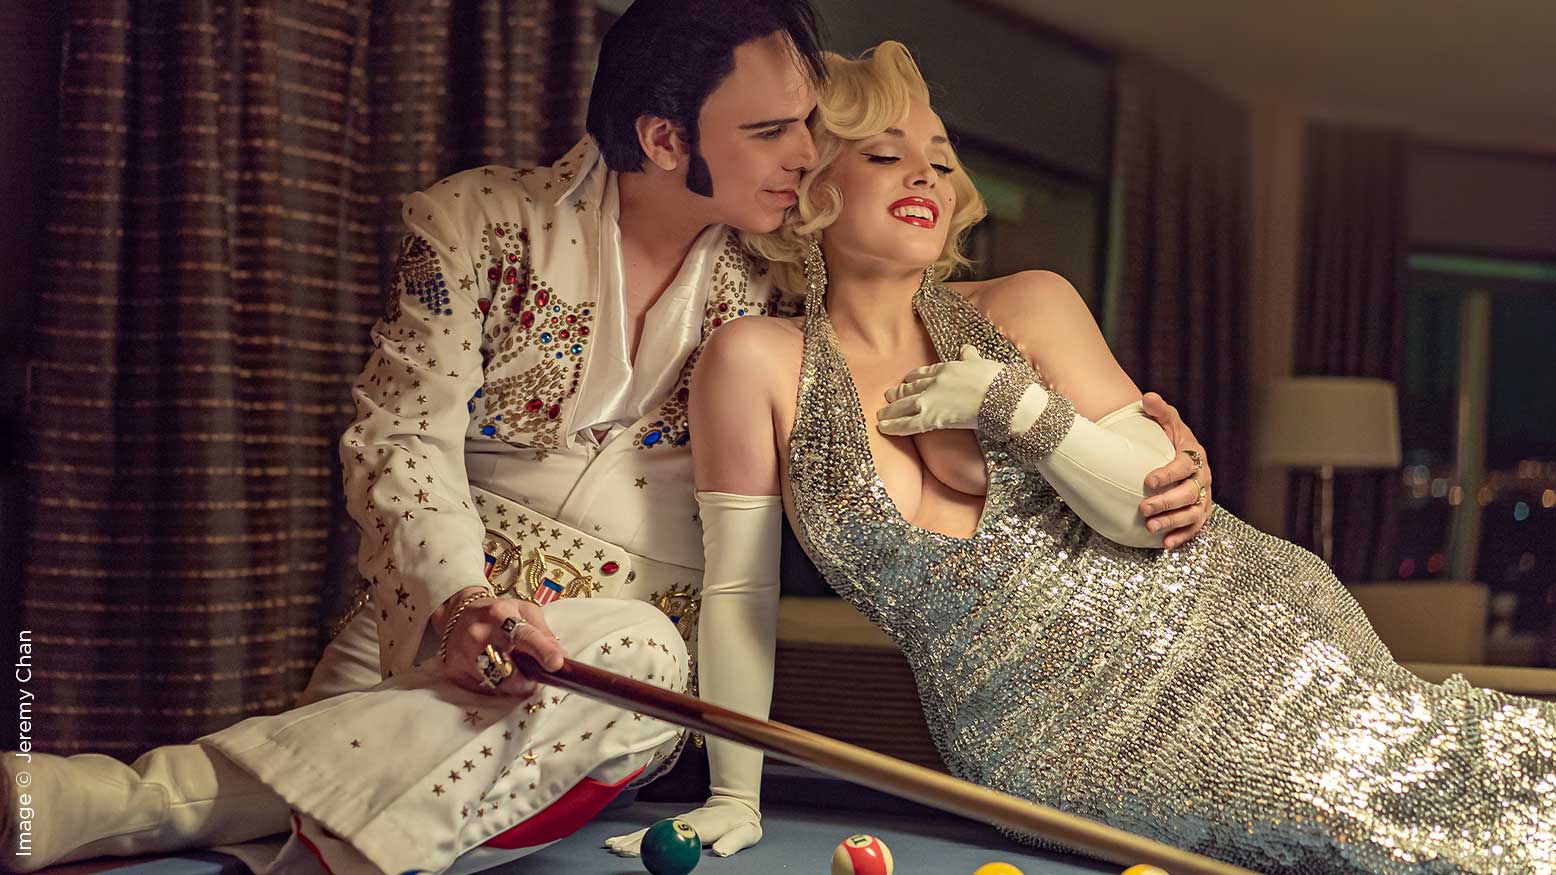
When I shot this image, I already had vintage and the 70s in my mind. So, to further convert it into a fine-art vintage picture is the next step to finish my vision.
The three tools in Photoshop we will be using: “Curves”, “Gradient Map” and “Selective Color.”
First, we add a curve adjustment layer to adjust the contrast and color. Curve is one of the most powerful tools in any photo-editing software. There are so many different uses of curve. Most people use curve just to adjust the exposure of their images. But let me tell you, curve is much more powerful than that. Did you know you can color tone using curve? Here is how we’ll use it to color grade this image.
- Readjust the black-point output in the RGB channel from 0 to 62.
- In the RED channel, add a center point at 128,128 to lock down the red curve, then pull down the shadow to 61,18.
- In the GREEN channel, add a center point at 128,128 to lock down the green curve, then pull down the shadow to 61, 31.
- In the BLUE channel, add a center point at 128,128 to lock down the blue curve, then pull down the shadow to 75, 40.
Then, add a Selective Color adjustment layer:
Selective Color allows you to add and subtract color values in individual color channels using sliders. This allows you to add blue hues to your shadows, gold/yellow tones to your highlights, and everything in between to help you fine-tune color in your photos to the highest detail. If you as a photographer use Manual mode because you want full control of the camera, then you also want to have full control when you edit your images.
- In the black channel, we’ll go with +12 black, +7 yellow, -1 magenta and +6 cyan.
- In the red channel, we’ll use -5 black, +30 yellow, 0 magenta and 0 cyan.
- In the white channel, let’s select +48 black, -62 yellow, 0 magenta and 0 cyan.
- In the yellow channel, we’ll do +25 black, +15 yellow, 0 magenta and 0 cyan.
Then, we’ll apply a texture on top of everything and convert the texture layer to a smart object.
One of the benefits of a smart object is having nondestructive filtering. You can edit filters applied to smart objects at any time, and this is why we need smart objects to create smart filters.
Then, we can add a Gaussian Blur filter within the smart object and blur the texture using ratio 18. After that, we’ll hide the blur with a black mask.
Now, let’s change the blending mode from normal to soft light. If you see the color and texture overlaying the whole image, including on the subjects’ skins, this is not too pleasant, and it’s the reason we convert the texture layer into a smart object, applying a blur effect and hiding it behind a mask. Now all we need to do is go into the smart object mask and use white color on a paint brush, and paint onto the skin areas. Then, we should get a mask look like this—the texture will be gone from the skin, but the color remains. And that is the power of smart objects.
At this point, after all the color grading and texture applying, that we have added too much yellow onto the subject’s skin tone. So, to remove some yellow and brighten up their skin, we’ll use a Gradient Map adjustment layer.
Then, we’ll change the blending mode to soft light and the opacity to 50%.
Their skin tone is a bit cooler now, standing out from the yellow tone surrounding them.
Then, we want to darken the corner to give it a vignette event, so we’ll use a different texture.
And finally, we’ll change the blending mode to Multiple and the opacity to 50%.
This way, we get a more vintage, fine-art vignette rather than just a film-look vignette.
By using both curve and selective color in Photoshop to create different levels of color grading, and applying texture to transform the original pixel, we managed to convert this modern-looking image into a vintage, fine-art, film-like image. This will stand out amid a lot of “normal and clean” images.
I hope you enjoyed walking through this process with me. If you have any questions about it, feel free to DM me at facebook.com/jeremyretouch/


