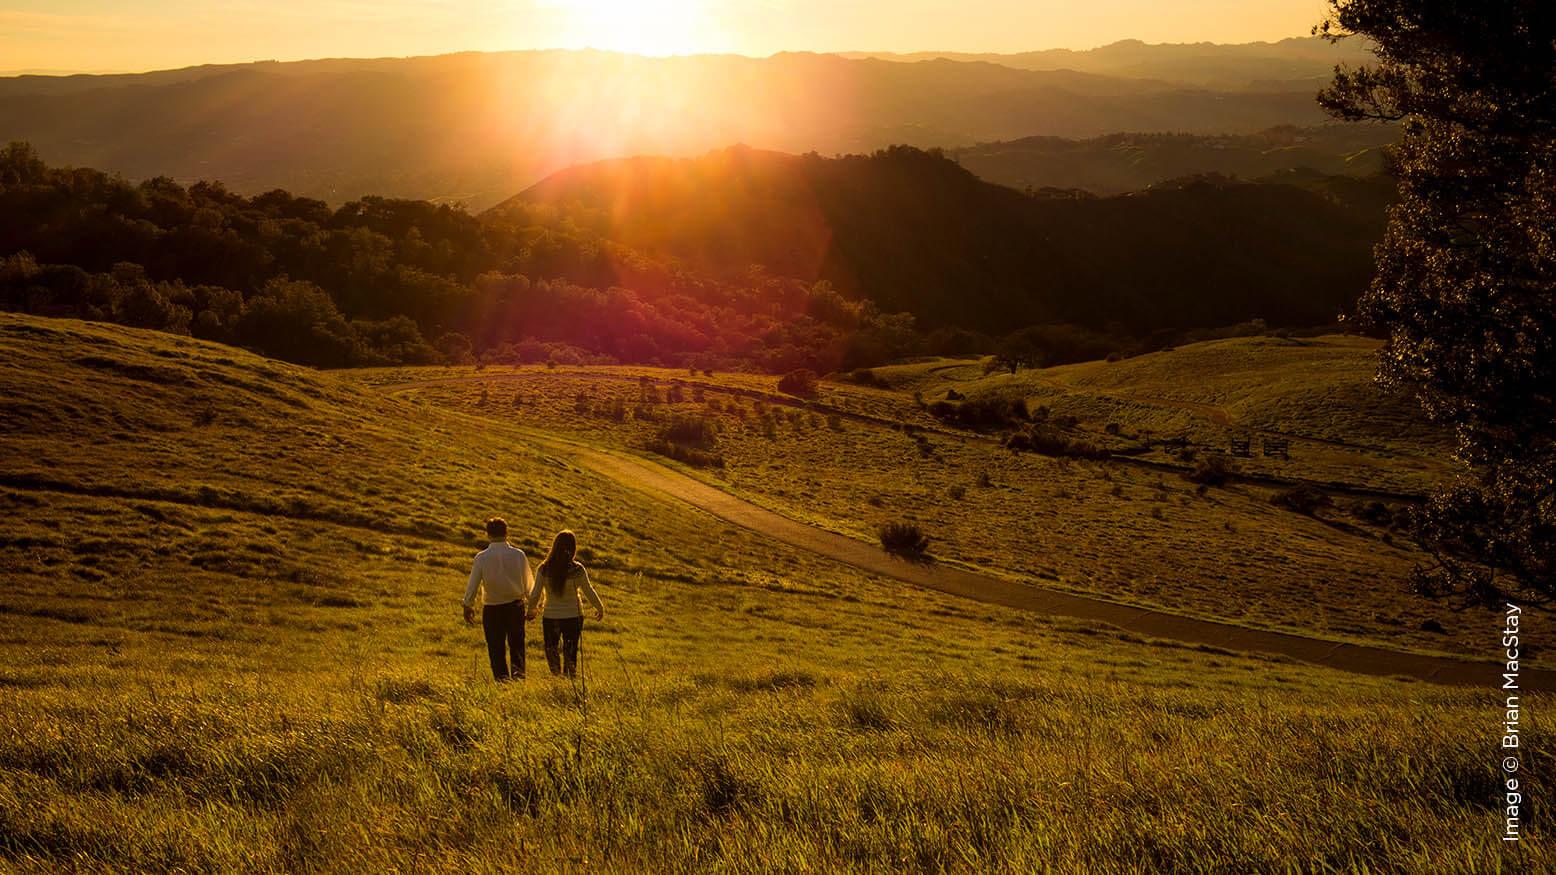
Mastering the Golden Hour with Brian MacStay
Want more information on this article? Get access to video content and additional supporting images. Launch the August 2017 issue of the magazine by logging in or signing up for a free account. Shutter Magazine is the industry’s leading professional photography magazine.
Mastering the Coveted Golden Hour
If you’ve been a wedding photographer for any length of time, you’ve surely experienced anxiety during the reception when you’re staring out the window at the sunset of the century, watching it quickly fade while your couple is listening to the groom’s third uncle (who may or may not have had too much wine) prattle on during the toast he surprisingly grabbed the microphone for. You had told them, “Let’s plan to do your portraits in the evening when it’s cooler and the light is prettier,” so your golden-hour portraits were slotted on the timeline for 7:30 p.m. But now the 30 minutes you had planned on the timeline is 10 minutes. It’s 7:50 p.m. and the sun is going to go behind that mountain very soon. What are you going to do?
The Versatility of Golden Hour
Why do we covet those last few minutes of light at the end of the day? Obviously, the golden light is much easier to work with. It’s the beauty and versatility of the light that we cherish. Most importantly, it provides us more options for creatively capturing our couple’s love story.
Have a Plan—Well, Sort Of
The key to successful wedding portraiture at golden hour is flexibility. You must think and work fast on your feet. Draw from your experience by creatively customizing deliverable portraits using previously practiced and planned techniques.
In all honesty, I hardly ever have a plan for exactly what I will do during my couple’s golden-hour portraits—meaning I have no idea where I will take them, how I will pose them or what the composition will be until a few moments before we start shooting.
Why don’t I have a plan? Two reasons. First, as you see from the example above, plans change. Often. Weddings aren’t a moving portrait session. You are often at the mercy of the time that’s been handed to you. Setting the timeline for “sunset portraits” is merely a guideline. It’s not set in stone, so you don’t actually know how much time you will be given with the couple until the moment they step out the door of the reception venue with you. Second, you don’t know what light you are dealing with until you actually see it. So, although I don’t have a plan for exactly where and when I will take my couple during their golden-hour portrait session, I have a list of go-to scenarios and techniques I use to take advantage of the beauty and versatility that this light provides.
The Not-So-Golden Hour
Again, we are at the mercy of a changing timeline. Catering is suddenly saying that the food is not ready, so the planner is asking if I can take the couple out an hour early for portraits since there won’t be time later in the evening. I am now shooting at the very beginning of golden hour, when the light can be more difficult to work with. It’s time to improvise and make the best use of the light and time I am given.
The key to working with the beginning of golden hour, when the light can be harsh, is to put the sun behind your subjects and set a dark backdrop behind them. This does two things. A dark backdrop, such as trees or a structure, filters the light a little, providing relief from the light entering straight into your lens, still allowing the backlight to hit your subjects. A dark backdrop provides a nice canvas for your couple’s background. As the light hits them from behind, it makes your subjects pop off this background for a beautifully rim-lit portrait. (Please reference images #4, 6, 7, 8, 15.)
Now what? I have fallen back on my go-to back-lit sun-behind-the-couple light-filtered-through-the-trees technique. This always works, and it only improves as the light falls. But what else can be done when the light is still harsh to maximize our time and give the couple some variety in their portraits?
Creating Drama
Harsh, direct sunlight is a great tool for creating drama. When the sun is too high in the sky to look at, you can still use the light on your subjects’ faces, as long as their eyes are closed. The hard directional light is also great for creating lines that lead to or frame your subjects. Don’t be intimidated by harsh, direct sunlight. Use it to create visually impactful images.
Silhouettes
The sun can still be very high in the sky, and with some creative compositions and exposure settings, you can create unique and beautiful natural-light silhouettes. I have three techniques, based on the light that I’m given, for creating a silhouette of my couple.
First, when the sun is still in the sky, I include it in the image, perhaps using a smaller aperture of f/16 or less to create a star. I then use creative posing and an artistic composition to give the image impact.
My second technique is to not include the sun in the image, but simply to place the dark outline of my subjects in the brightest area of the image. I then expose for the highlight, creating the extreme contrast of dark and light.
The third technique I use is a rim-lit silhouette. I place my subjects in front of a dark backdrop, like a tree or a building. I allow the very bright backlit sun to hit them, while increasing my shutter speed to its maximum setting. This makes the image almost entirely dark, except for the light outlining my couple.
A Flair for Flare
As the sunlight falls—and if your style calls for a bit of sun flare in your images—you can use the light entering your lens to produce interesting and dynamic images. Use trees, buildings and other structures, or even the couple, to block the sun. Allow only a bit of light to enter your lens to create sun flare. This technique is perfected with a lot of practice, but can often be hit or miss. The key is to wait for moments and constantly move and shoot as you search for the right balance of light entering your lens, based on your manually set exposure settings. My preference for these photos is to use prime lenses—35mm, 85mm, 105mm, etc.—shot wide open.
In Your Face
As the sunlight hits or falls behind the horizon, it not only changes color and gets softer, it also allows you to turn your couple around to face the light. The sun is no longer as blinding, so their eyes can be open as their faces turn into the light. With your couple’s faces in the sun, you can create that warm romantic glow on their faces, which provides a completely different look, feel and mood from your prior images.
Same Place, Same Light, Different Exposure, Different Mood
Sometimes simply changing your exposure can create remarkably different images. Images 1 and 2 are examples of using the same light, in the same location, at the same time of day, but adjusting exposure settings to get a completely different look.
Be Ready to Run
Chasing light is a real thing, especially for wedding photographers. And I don’t mean just “Look, the good light is over there. Let’s wander over.” I mean running to get to it. A few weeks ago, I had a wedding where the couple decided at the very last second they wanted to do sunset photos. I ran to the window to see how much light was left. Not much, and the light I wanted was a good 300 yards away. So we bolted down the elevator and ran, with my gear clanking on my sides, the dress bunched up on the bride, to get to the light before it was gone. When we all got there, completely out of breath, we had three or four minutes of light before it was gone. We captured some beautiful sun-filled portraits. It was worth it.
The coveted golden hour and time crunch at a wedding can be stressful, no doubt. The light is beautiful, and the couple’s expectations are high. After all, they hired you to make them look amazing. Having a handful of ideas and techniques that you can draw from when (not if, when) the timeline for your golden-hour portrait session goes haywire will help guarantee your success.