Lighting 1, 2, 3! with Leonardo Volturo
To build on my article last month on off-camera flash systems, I want to introduce you to some easy off-camera lighting setups featuring one, two and three lights. I’ll lay out the pros and cons of each, and break down some of the images from the two shoots I did for this article. These are all very easy, and will work with speedlights, strobes and constant light sources.
One Light
Most of us start out working with one light. For many, this is due to the intimidation factor, while for others, it’s simply a matter of budget. I’m betting the deeper you delve into OCF, the faster you’ll discover more lights equals more flexibility and creative options. That said, working with one light is not only very flexible, but also portable, allowing you to create tons of great images as you learn the ropes of off-camera lighting. Because it’s the most accessible for those starting out with OFC, I’ve kept the focus on one-light examples.
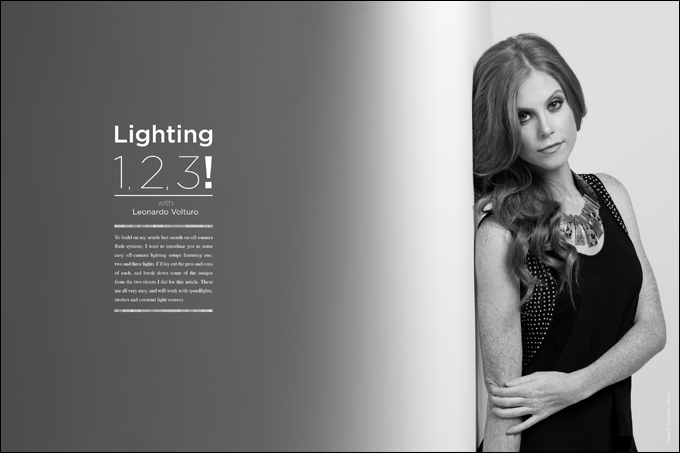
Images 1–3 demonstrate a simple one-light portrait look. I shot these using the white cyclorama wall at our studio as a backdrop. For the keylight, I placed a Profoto B1 with a 3-foot octa directly above the subject and angled down 45 degrees. In each of these images, you can see the even lighting created on the model’s face and how the area under her chin falls into shadow. Also take note of the catchlight’s position and the shape it creates in her eyes.
The term catchlight describes the reflection created in the subject’s eyes by the keylight. The sparkle it creates in your subject’s eyes helps bring them to life. Without catchlights, your subject’s eyes can look a little lifeless. So in most situations, you’ll want to make sure you’ve got a solid catchlight around the tops of the eyes. If your light has a modeling lamp or if you’re using a constant light source, it’s easy to see the positioning of your catchlights before you start shooting. A modeling light is also very useful for showing you where the light from your flash will fall when it’s triggered.
There are potential downsides to working with one light, depending on the look you’re trying to create. In the first example images, those drawbacks are deep shadows and the darker background, with only one light illuminating the subject and no light providing separation. A separate light on the background helps add depth and dimension.
Let’s look at a full-length image lit with one light (Image 4). Note the fairly evenly lit face, the shadow under the chin and the gray background. The other issue you should be aware of is light fall-off. While our model’s face is well illuminated, her clothing and the rest of her body are dark. This is the result of the light from our one source falling off, its power dissipating as it radiates out from the center.
Now for this shoot, it wasn’t about the garments. If it were a fashion shoot, if the clothing were more important or if we wanted more open shadows, we could lessen the fall-off by using a much larger light source/modifier, backing up our light, adding a second light from below or using a reflector to add fill light in the lower part of the image. We left it as is in order to illustrate the fall-off that can happen when you’re using one light source.
The easiest, most cost-effective way to open up the dark shadows under the model’s chin is to use a reflector to add fill light. By simply placing a reflector close to our subject’s midsection, we were able to fill in the dark shadows and create a more evenly lit look (Image 5). Our model now has double catchlights in her eyes. The top two are coming from our keylight, and the bottom two are coming in from the reflector.
For another option, see Image 6. For this shot, we placed our subject against a side wall in our studio. We positioned the main light camera right, and our model’s head was angled in a way that allowed us to cleanly light the left side of her face and minimize the contrast below her chin. Additionally, because she was placed against a white wall, the light reflected off it provided additional fill.
To tackle the issue of the darker background, you have two options. One is to move your subject close to the background, as shown in Image 7. Doing this could add an unwanted shadow, or not allow for the depth of field you’re looking for by being so close to your background. In this image, you can see how, by bringing the subject and light source closer to the background, we’ve whitened it up a bit. Additionally, we’ve moved our light over to camera right to give a more contrasty look to our subject’s face, another great option for portraits.
Your second option allows you to pull your subject off of the background because you’re going to bring in a second light.
Two Lights
In Image 8, you see the previously mentioned main light with our second light used on the background. Here, because of the second light, we are able to pull our subject off of the background, which eliminates any shadow being cast on our background. If you were using a backdrop or were on location, you would be able to leverage your depth of field and blur or compress your background because your subject is pulled off.
Beyond simply lighting your background, using two lights is where you’ll really start to get creative. Bringing in a second light allows you to add dimension to your images, to shape and sculpt your subject, and to create fill light.
In the next example, we set up a cross-light pattern using an octa as our keylight and a 1 x 3 strip box as an accent light. We placed this camera left and behind the subject (Image 9). The keylight helped create the contrast we wanted on our model’s face, while the strip box added dimension and shaping around the edge of her hair, side of the face and along her neck and shoulder. Notice how the accent light on the right arm creates separation from the background. These are the kinds of exciting effects possible with this lighting pattern. You can also “feather,” or aim your lights slightly past the subject, for a subtler look, or adjust power on the accent as desired. See Image 10 for a closer look at the strip light and its effect on our model’s hair and shoulder. Remember, if you need some fill light under the chin, just pop in a reflector and you’ll be in business.
Additional two-light setups include clamshell lighting. In this arrangement, the second light replaces the reflector previously used for fill light, allowing more flexibility and control over the results. You can also keep using the reflector for fill light and use the second light for the background. Working with two lights really made me want three.
Three Lights
Next up is classic three-point lighting, a method that provides considerable flexibility. This popular style is used in film, video and still photography. It comprises a keylight, a fill or accent light, and a background light.
In Image 11, we fitted our keylight with a 2 x 3 softbox and placed it above the model. A 1 x 3 strip box is providing fill light from below in a classic clamshell arrangement. We fitted our backlight with a 10-degree grid spot. This setup lets you dial in the exact look you want. You can see how the backlight not only creates separation but also adds shape to the model’s right arm and a highlight on her hair.
For Image 12, we did something a little different. Instead of using the backlight in a traditional way to create a highlight on the side of the subject, we used it as more of a kicker light for the hair. This achieved two things: It provided light but also added definition. Alternatively, we could have used a strip box or wider-degree grid spot to create more of an edge light and add dimension.
Moving around to the front of the image, we again used the 3-foot octa as our keylight, and in this case we wanted only a hint of fill light on the right side of our model’s face. For that, we used a 1.3 x 1.3 softbox. If you wanted something more evenly lit on the front/right side for the clothes and/or couch, you could use a strip box there.
All of this is “season to taste.” Once you have the basics and the rules down, you can get out there and break them. Just don’t forget about reflectors. They offer an inexpensive way to add light to any setup. If you have three lights, you’ll be able to use a reflector as a fill for your main light, your second light as your backlight or your third light on the background.
The main thing is to get out there, experiment, have fun and make great images.

