
LED Lighting For Seniors with David Beckham
The lighting technology world is changing more rapidly than ever. LED is no exception. I absolutely love the advances—anything that makes my job easier, convenient, and more fun. But I won’t sacrifice quality for any of that. If you know my work, you know I strive to get it right in the camera. I don’t use presets or extensive Lightroom or Photoshop processing to get my finished images. The images shown here are almost straight out of the camera, save for removal of blemishes and clutter.
The LED lights I am using are the 6” diameter, 9”x12” Savage Universal Edge Lights. These have variable power and temperature, but I set it for 5500K. The Edge Lights have a unique design. Many small lights are mounted inside a channel that makes up the perimeter of the unit so that the LED lights shine in toward each other. There is a diffuser panel in front of them that creates a very soft glow instead of the hard light that is typically generated from the panels of tiny LED lights. They either use rechargeable batteries or can be plugged in. These are small and easily hand-held by a mom or assistant. They aren’t powerful enough to replace typical OCF, but I’ll show you how I use them.
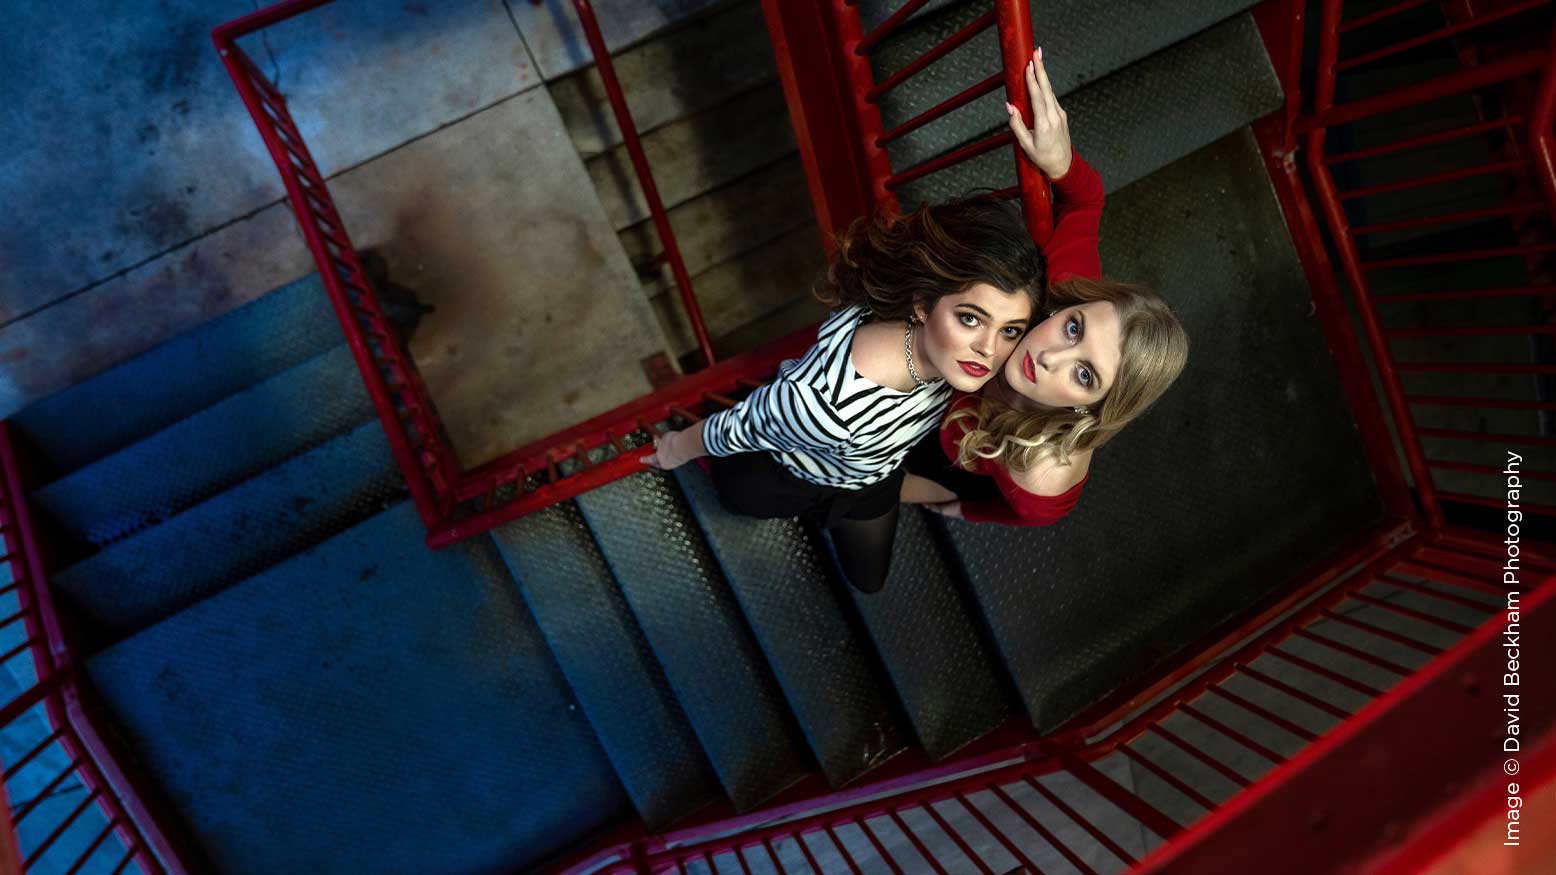
The opening photo in this article uses the 9×12 Edge Light. I hung it over the edge of the stairwell camera right so that there would be drop shadows under Alexa and Genavive’s noses. All the colors you see were there already from the sun setting and the lights in the parking lot. I shot this with the G Series 24-70mm lens to get that killer perspective.
The next one, of Alexa on the table, uses the 9×12 as well. I have mine mounted to a Manfrotto Light Stand that, when closed, is very compact, so that I can take it easily inside places. Shooting with OCF is so tricky after dark or in low-light situations. It is difficult to find the right balance between light power and shutter speed. The problem with flash is that the light drops off and leaves the background quite dark. The beauty of continuous LED light is that you can see exactly what you are going to get before you take the shot. In this shot, the light head is about four feet from her face, and the light looks great!
We took the light inside to shoot Genavive and Alexa together. When you are in a location with overhead light, eyes disappear in the shadows of their eye sockets. Shooting with OCF would irritate everyone around us. Using the 9×12 created the perfect fill light to get great photos without taking away from the great bokeh of the surroundings. Of course, we asked for permission before shooting in this location.
The close-up of Genavive was taken with an LED Wand. All we needed was a touch of light to fill her face, and this was perfect. Alexa could hold it just above her, about two feet away. It makes for cool catch lights too!
I used the 6” diameter Savage Edge Light for the outdoor shots of Caitlyn in front of a little shop in town. We had to keep the light lower to get under the rim of her hat, but it worked great. It was a partly cloudy day and the sun was setting behind her, which left us with nice rim light on her. You can see how dark her face was without the light. The key with this (and any) lighting is to keep it close. You wouldn’t put a flash 12 feet away in your studio, so why would you do that outside?
My window light is magical until about 4 p.m. this time of year because the front of my studio faces west. If I were to use OCF, the light color wouldn’t match, and it is so obvious that flash is being used, the reflections of the light on the window become obvious as well. I used the 9×12 Savage to light Caitlyn’s face and get a great, natural look.
The only light in this photo with Bailey sitting in the egg chair is from the LED fairy lights and the 9×12 Edge Light that I put on a boom stand. I centered the light source above her about four feet from her face. I shot this one with my G Series 85mm, which gives us perfect proportions and focus only on her. The floor in my white room is white high-gloss laminate, which is great for reflections in the image and for bouncing light around my subjects as well. The greatest advantage of using continuous lights is being able to see the results before you take the shot. I was able to shoot at f/1.8 at ISO 320 and 1/160 ss. Not typical studio settings, but this isn’t typical light.
For the rest of the article, my tools of choice are the Godox SL Series 100, 150, 200 LEDs. They have variable power and are set to 5600K. The Godox has a Bowens mount, which means no new modifiers. I have always looked for strobes and lights that have the element protruding into the modifier, not recessed into the case of the unit. This makes the best use of the light filling any modifier. So far there aren’t any 200w LED “bulbs,” but the Godox flat LED element does go further into the modifier than the others I looked at. That way, it can fill any modifier quite well.
I used a Godox SL 200 for the angel wing shot of Bailey. This gives us way more light, and when it is directed through a deep parabolic soft-box, it creates killer illumination. For the reflections in the floor to look as good as possible, I needed to have the light at a low angle and pointed at her face. If too much of the light were to bounce on the floor in front of her, the reflection would get blown out. As always, the closer the light source is to your subject, the better.
For the sports shots of Olivia, I used an SL150 and SL200. I put a 14×42 gridded strip box behind her and a 12×36 as the main. This allowed me to direct the light so the shadows were just right. The larger box behind gives you a more consistent rim light.
With Kamya, we used two different three-light setups. The first one used a Glow 20” beauty dish (a much cheaper alternative to the Mola Demi) and it worked great. Paired with a Westcott Eyelighter, with the white panel, it makes for beautiful, even light across her face and nice catch lights too. I used the other two lights behind her at 45-degree angles to serve as hair and edge lighting.
In the second image, we set the main opposite the kicker and used a 7” cone to put a light on the wall behind her. This gives her great separation and a natural vignette.
For the last shot of Kenzi, we put a gel over the two 7” gridded cones and used them as back-lighting to create the cool effect. I used a 12×36 gridded soft-box over the main to control the light on her face.
The obvious advantage to continuous LED light is that you see the shot completely before you take it. The handheld lights are more portable and very versatile. The two Edge Lights can never replace OCF or even work on a sunny day. But they are the best light to me for very low-light and night shooting. I have four Godox Lights and use them with every studio session now. They are great for teaching live demo classes so that everyone can see how the light affects the subject, and they can take photos without sharing triggers as well. Another advantage is you never have to clean your sensor! I rarely shoot higher than f/4.0, and the dust doesn’t even show up. The downside to LED is that they just aren’t bright enough yet. It means you are always shooting soft, and often at ISOs from 200-640, or maybe higher. When I’m in the studio, I typically shoot at ISO 80 and anywhere from f/8 to f/18 with flash units.


