
How To Push the Limits of Light With High-Dynamic-Range Editing with Dustin Lucas
Want more information on this article? Get access to video content and additional supporting images. Launch the October 2017 issue of the magazine by logging in or signing up for a free account. Shutter Magazine is the industry’s leading professional photography magazine.
Whether you are a huge advocate of or are appalled by high-dynamic-range (HDR) photography, we can all agree that it looks Photoshopped. Even the term Photoshopped starts to sound bad because we equate it with an image looking fake. If the camera didn’t expose the image that way, we should just let it be natural, right? I am not going to go down that rabbit hole—let’s focus on the task at hand.
A commercial or editorial client will likely require editing images for a greater dynamic range. In that case, you will want to know what your editing options are after the shoot. Ideally, you want to work with a tripod to give yourself the most flexibility in stopping down your aperture, staying at a low ISO and taking long exposures. Long exposure sometimes removes your option to shoot handheld.
If you are unable to bracket multiple exposures, expanding the dynamic range in post-production becomes limited and can result in a low-quality image. On the other hand, working from one exposure reduces the risk of ghosting and chromatic aberration, as opposed to merging multiple exposures with HDR software. Let’s look at some options for multiple exposures and how we can merge these files.
Multiple Exposures With Lightroom HDR Merge
In Adobe Lightroom, the Photo Merge to HDR option is quick and allows a lot of fine-tuning options. Select the two images you want to combine. Right-click, hover over Photo Merge and select HDR; or simply hold Control while striking the “H” key. As it’s creating an HDR preview, you’ll notice the options on the right side of the screen. Auto Align and Auto Tone are checked as default preferences, which is fine. When unchecking Auto Tone, you’ll notice the image get quite darker, losing its dynamic range. Let’s leave this checked and examine areas of the photo where “deghost” issues are happening.
Deghosting is the effect when merged areas combine from your bracketed exposures, rendering translucent and unnatural information. The effect makes it look like information in the image is partially erased. It’s like when you remove Chromatic Aberration and the leftover area turns white or transparent. Without being able to zoom into our image, we have to determine this with the overlay tool to identify what amount of deghosting is appropriate.
A good place to look for this effect is in a photo where obvious movement would occur between exposures. Clouds in the sky or tree limbs, for example, are the first areas to get corrected. If we strike the “O” key, the deghosting overlay shows us in red what’s being corrected with each stage, from low to medium to high. Due to the amount of tree branches in the image, I will choose medium. Remember, you do not get to readjust deghosting like the toning option applied with Auto Tone. It’s important to choose the right setting before merging. The result is a merged DNG file that we have flexibility in editing.
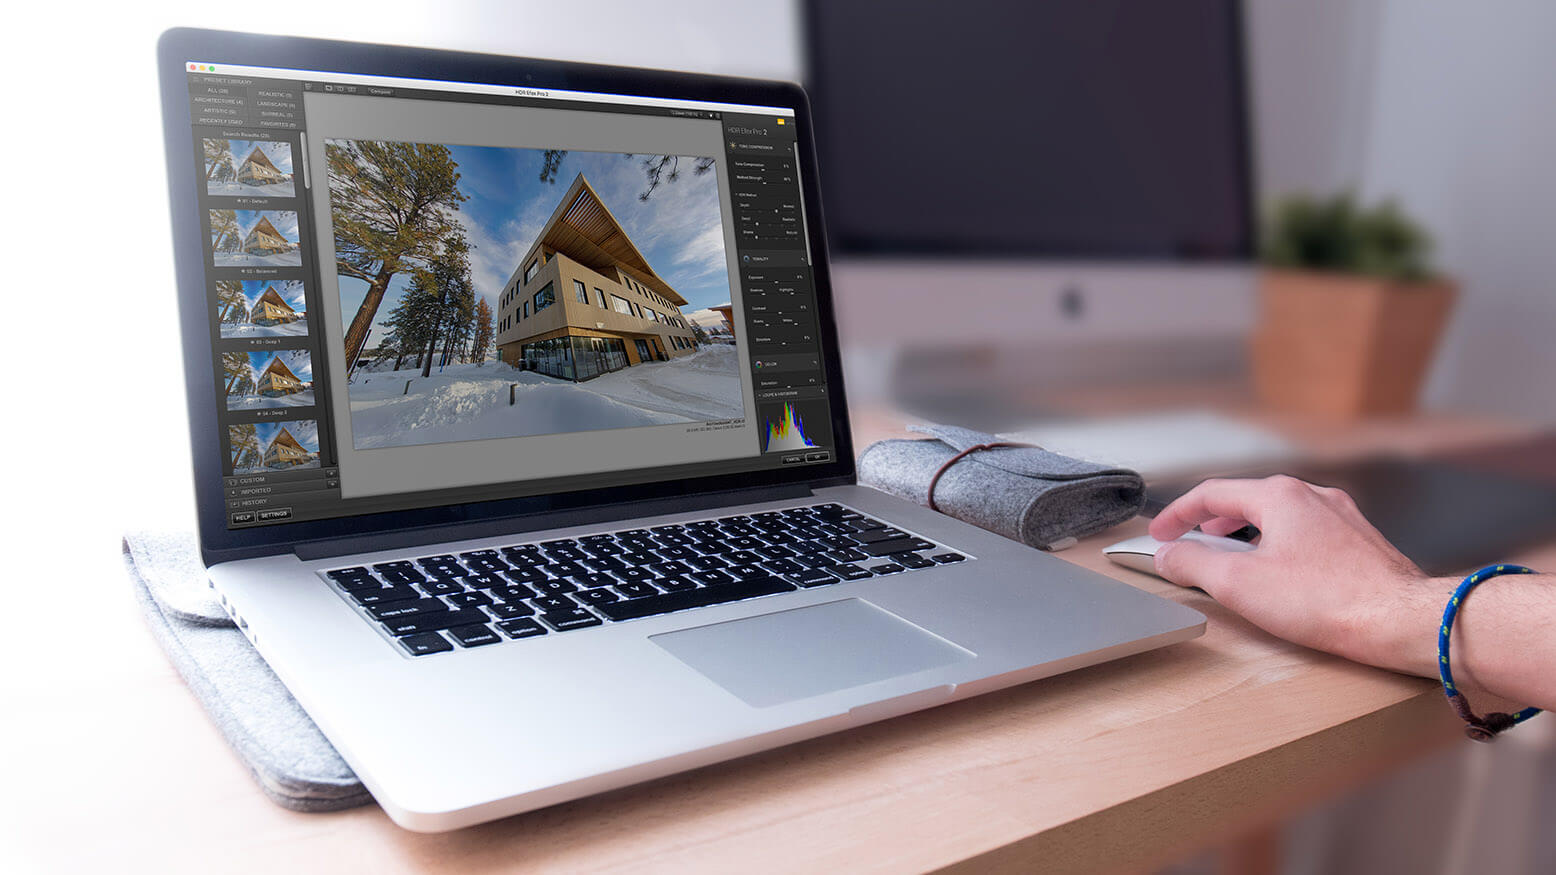
Multiple Exposures With Nik Merge to HDR Efex Pro 2
Now that we have our first HDR merged file, let’s compare it to some third-party plugins to see some tone mapping options. I am a long-time fan of the Nik Collection. If you haven’t done so yet, try it free. Just keep in mind that it’s discontinued, meaning it will probably not be compatible with future updates to Photoshop.
Let’s move on to the important topic at hand, merge to HDR. Access this feature of the Nik Collection by opening Photoshop. Choose File in the menu bar, click Automate and select Merge to HDR Efex Pro 2.
In the first dialog box, we can choose our multiple exposures and create a Smart Object. The advantage to doing so is that you can revisit the setting made in this plugin much like a nondestructive edit. To save space, have more access to editing and gain performance, uncheck this box and live with your decisions. Let’s leave it checked for now, and proceed to the Tone Mapping and editing features of this plugin.
What I already like better than Lightroom Merge to HDR is the ability to zoom in and actually examine areas for ghosting and chromatic aberration. This tells you what to adjust. Let’s start by lowering the Ghost Reduction strength to 20%. On the left side of the image, the edge of the tree is awkwardly splitting at the edges. This is due to movement between the shots. The auto-aligning of the images can’t line this up.
At the top, choose the Ghost Reference image. The first image seems to have the best results when comparing the tree to the limbs at the top right of the image. I do not want distracting halos. The trees in the background get very muddy, so I’ll stick with the second image and deal with any additional ghosting in Photoshop. Chromatic Aberration isn’t bad, just a little spot on the building to the right. I’ll leave this at 0 for now, and fix it manually later.
Once we merge files, we have a lot of options. Presets on the left can be selected, tweaked to perfection on the right and custom-saved for later use. The default settings are a great place to start, because a lot of the presets start to look hyperstylized. My goal is to push the dynamic range as well as the details in this image. Nik HDR Efex Pro 2 is detailed-oriented and the interface is simple to use with sliders. Start on the right side panel and work your way down. Tone Compression adjusts the dynamic range in our merged images. We can move this to the right to add and to the left to reduce this effect, getting us closer to the original exposure.
I like the more realistic approach to adjusting the HDR Method, including the Depth, Detail and Drama. Let’s move down to the Tonality section. Here we have some familiar tools with which we can adjust exposure, contrast, shadows, highlights and structure. Structure is a great option that brings in some fine details and overall grit. Once we make some final touches, we are ready to open it in Photoshop.
Multiple Exposures With Photomatix Pro 6
This is hailed as one of the best merge HDR programs, so I would be crazy not to demo it. Of course, I am using a trial version, so we’ll end up with a watermark in the end. But we can get a solid comparison for the results sections. After we open an image, we have quite a few options to choose for alignment and crop. I am going to leave all of these at their default settings and move on to the Ghost Reduction tool.
On the left-hand side, I can choose the base for reference when adding Ghost Reduction. When we zoom into the image, it gets fragmented and pixelated, which makes it hard to review. The areas in my previous merge do not seem affected, so I can leave the Ghost Reduction turned off. This must be a better alignment tool, because there were certainly issues with the tree on the left. Click OK, and let’s move to the Toning section to fine-tune our image.
This section looks similar to Nik HDR, but it’s a bit more limited. There are presets or styles you can preapply to get your image close to perfect. Realistic seems to be the way to go for me as I dial in some settings on the left. At the top there is an HDR section with a dropdown menu. Currently it’s set to Tone Balancer under the preset we selected. If we change this to Details Enhancer, our image immediately changes. In order to maintain the same look from our preset, we have to work in this HDR panel.
Much like Nik HDR, we have the Strength setting to allow more dynamic range in the merged images. This setting can take this image from a realistic edit to an overly processed one. I am happy with the Realistic preset overall, but might need Lighting and Brightness Boost to extend the shadows a bit further. Color Settings allow you to manipulate individual colors much like HSL. I recommend making these adjustments in Photoshop so you can work in a nondestructive environment. Blending allows you to brush in specific exposures, but this tool is a bit clunky. It doesn’t allow you to view the mask or tell you where you’ve painted. I recommend blending layers in Photoshop, where you have more control with layer masks.
Now we are ready to click Finish and put on our final touches. The Straighten tool allows you to transform the image to correct the leaning-building effect caused by the wide-angle focal length. The peak of the roof falls outside our canvas area, which we can fix in Photoshop as well. You have options to push the Contrast and Sharpening further with a tone curve and unsharpened mask tool. The last step is to save our image.
Working From Single Exposures
Now that we’ve merged bracketed exposures, was it worth all that trouble considering the dynamic range produced in modern-day digital cameras? We can test this on the Canon 5D Mark IV in Capture One Pro 10. Open the darker exposure into Capture One and start matching the dynamic range with the merged images.
After a few minutes in Capture One, I can get the image pretty close to the Photomatix edit, but the shadows still look better in the merged edit. I have a lot of flexibility with Capture One in the High Dynamic Range panel, but where this program excels is in the Levels and Curves tool. I can push the RGB curve to give the image color contrast with a simple S-curve. Now my image looks much closer to the Photomatix color tone. With the Levels tool, I open up shadows while adding back in the dark tone contrast to keep the image from looking flat. Last but not least, my Clarity tool comes to the rescue to push this image to the limits of sharpness. Overall, I am very happy with a single-exposure edit in Capture One.
Another amazing tool for single-image HDR toning is Macphun’s Intensify plugin. You can do a fully nondestructive edit with this plugin working with Photoshop Smart Objects. Once we check this option in the Adobe Camera Raw (ACR) window, we can apply the Intensify tool as a Smart filter. This allows us to save and make further adjustments in ACR and Intensify. Let me show you exactly what we can do with these two tools. If we leave all the sliders in ACR at the default and open as a Smart Object directly into Photoshop, we can apply the Intensify tool as a filter.
Using presets is a great way to enhance your image efficiently. You can star your favorites as I have here. Starting with the Pro Quality, we can use the Adjust panel to pull out details in the shadows. You’ll notice this image needs some advanced recovery that the Adjust panel isn’t able to do. Not to worry: We can reset our shadows and exposure settings and click Apply. Once we are back in Photoshop, double-click the image thumbnail on the Layers panel. This opens the image back into ACR, where you make those advanced recovery adjustments.
After we extend the dynamic range of the image in ACR by lifting the exposure a half stop, open up the shadows all the way and drop the highlights down. Click Open. Exit the ACR menu, and our edit goes directly into Intensify at the default settings. Remember this for the future. If you make custom tweaks to a preset or image, you can always save presets for later use. It’s as simple as clicking the Create Preset button and naming your custom-adjusted image.
Final Touches and Tips
Whether I am merging images or working one exposure in a plugin, I still apply my final touches in Photoshop. First, I need to fix this leaning-building effect. I start by adding grid lines to my image—one for the vertical and one to line up the corners of the building. Here is where working with Smart Object layers and Smart filters becomes a hassle. If I skew my image with the Transform tool, I have to go back into Intensify. This is a huge time suck, and I can’t afford to toggle back and forth. Instead, we can duplicate our Smart Object layer and rasterize it. This allows us to manipulate the pixels more fluidly.
To fix the vertical lines leaning to the left, I use a combination of the Perspective, Skew and Free Transform tools. If I start with the Skew tool and drag the lower left corner to the left, I can fix the leaning-left issue. Now I have issues with the other walls converging, or “keystoning.” This can be quickly fixed with the Perspective Transform tool. Now we will quickly realize the real estate on both sides of the image has become less and less as we fix the skewed building. This requires some content-aware fill and cloning. Then you are done.
High-Dynamic-Range Editing: The Results
Merging images in the ACR engine through Lightroom seems like the go-to workflow for most. This was simple to do and the result is a fully flexible DNG file. I was impressed by the tonal quality rendered after the merge. With some final tweaks, we have a deliverable image. Comparing Lightroom to Nik HDR Efex Pro 2 was not an even matchup because of the fine-tuned adjustments in the Nik software. The result in Nik was a bit over the top. We can start to see the abilities of this program with the multiple stops of light.
A better contender for Nik is the Macphun Intensify plugin. The biggest difference is the lack of HDR merge capabilities in Intensify. It’s my go-to for a single exposure. I don’t lose much detail in the shadows and highlights. Use both of these plugins so you have full nondestructive capabilities in Photoshop with Smart Objects.
Photomatix seemed to be the most hands-off in terms of merging images and making images look presentable. This renders a clean, realistic HDR merge. It’s a top-quality program for HDR merge. In the end, the Capture One edit was a solid single-exposure experiment, but we can’t really compare it with Nik, Intensify or Photomatix.
From these results, you can see how you can push an underexposed image in Intensify without needing to shoot bracketed exposures. A project might require two exposures where you have to expose for the brightest and darkest areas of a scene. In that case, I recommend working with Photomatix for the most efficient and realistic rendering. You can try all these programs for free and see for yourself. (39)


