Ready to see some behind the scenes for real on-location photoshoots? Check out this video where I breakdown some recent shoots from Dublin, Ireland.
You would be amazed at how you can easily turn any location into a work of art. Learning to see the world through the lens of your camera is key to success. Let’s break it down step-by-step.
Equipment Used:
Camera: Canon EOS R5
Lens: Canon RF28-70mm F2, RF70-200mm, RF85mm F1.2
Light: Natural Light & Reflector
Team:
Photographer: Sal Cincotta
Models: Violet & Fin
Hair & Makeup: Brandi Patton, ReFine Beauty
What’s up, everyone? Sal Cincotta here, and recently we had a photoshoot workshop over in the UK and we got some incredible shots.
I want to talk a little bit about the photoshoots, because I feel like when we do these things, photographers get overwhelmed and don’t quite understand how to make something out of nothing. And a lot of times when we’re in various locations with real clients or even a workshop, we don’t always have the luxury of having been there before, right? If you’re doing a destination wedding or something like that, sometimes you just have to adopt that run-and-gun mentality and work through challenging lighting conditions. You got to look at the light. You have to understand the environment you’re in and try to get magic for your client.
So I felt like this was a really good series to start when I’m doing some destination work, again, whether it’s with real clients or a workshop, so you can see how we’re working in real time.
Capturing Stunning Bride Portraits on Busy Streets
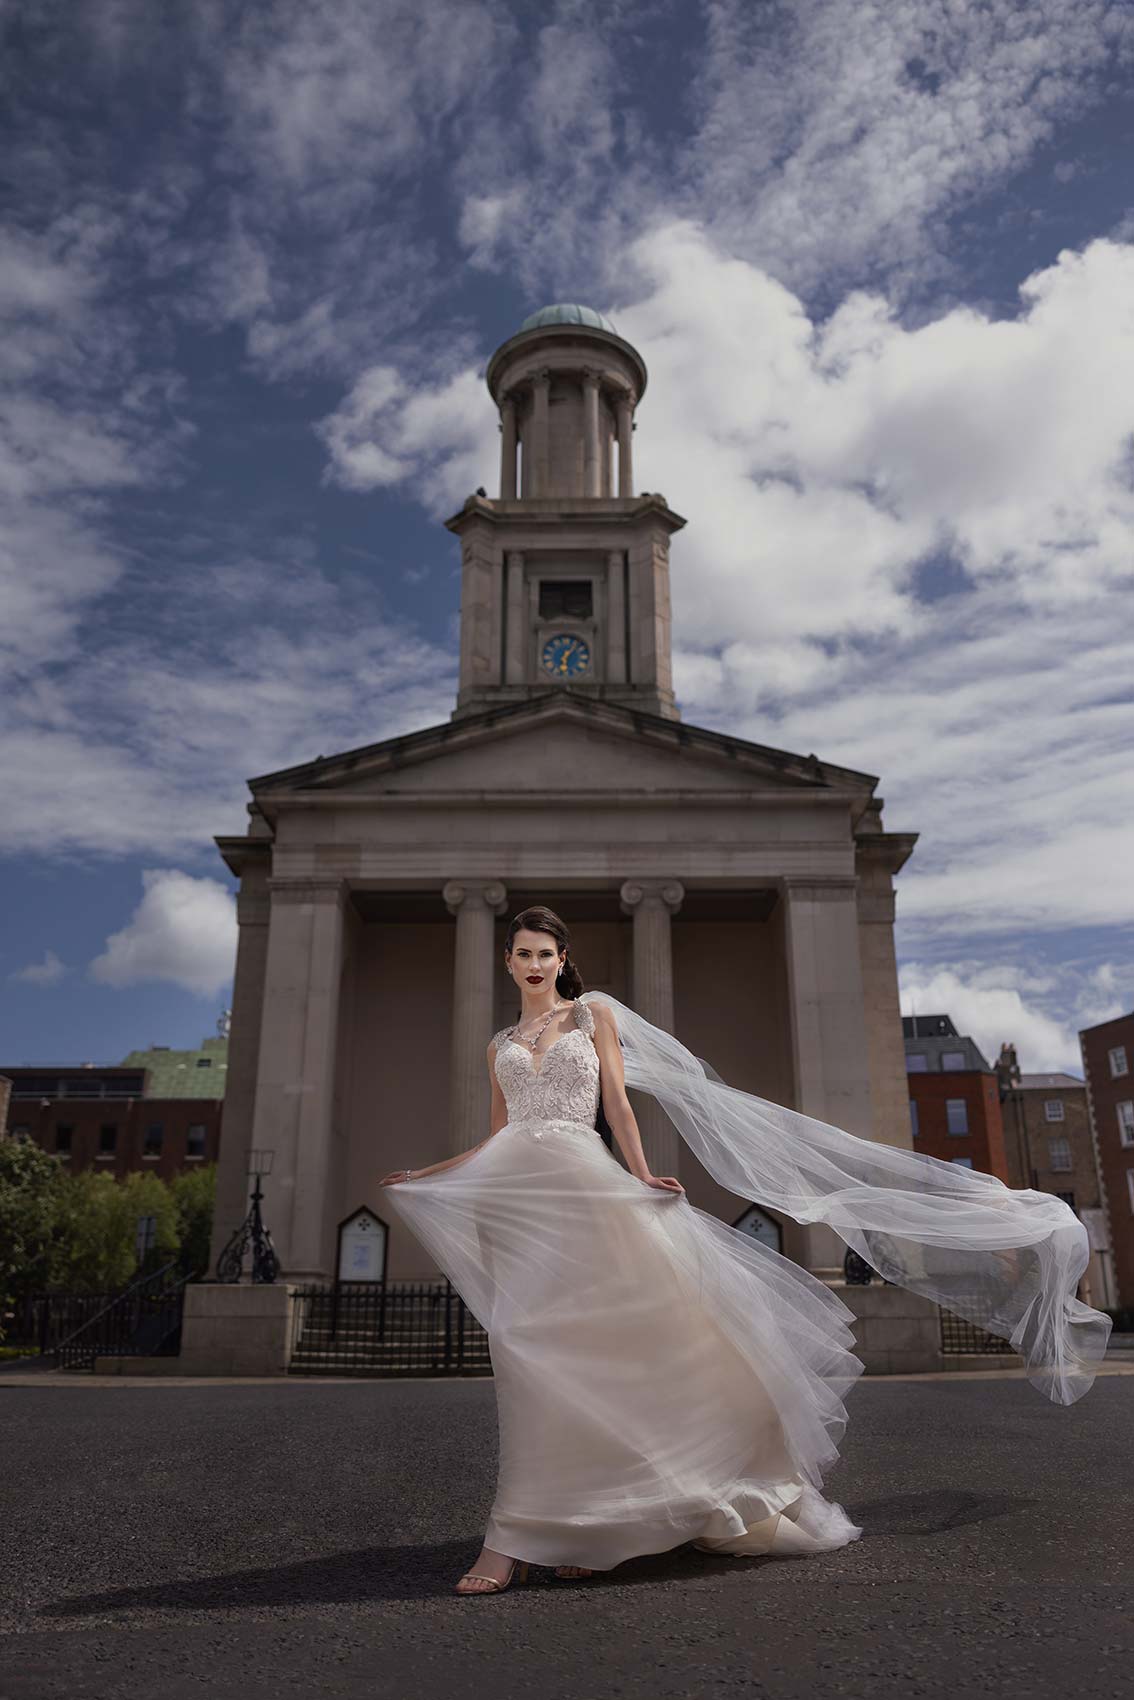
Let’s just start with the first image here. I thought this one was absolutely beautiful. We’re on location, right in the middle of a street, and we’ve got this gorgeous church as a backdrop for the bride. A typical wedding day scenario. You do what you have to do to make it work.
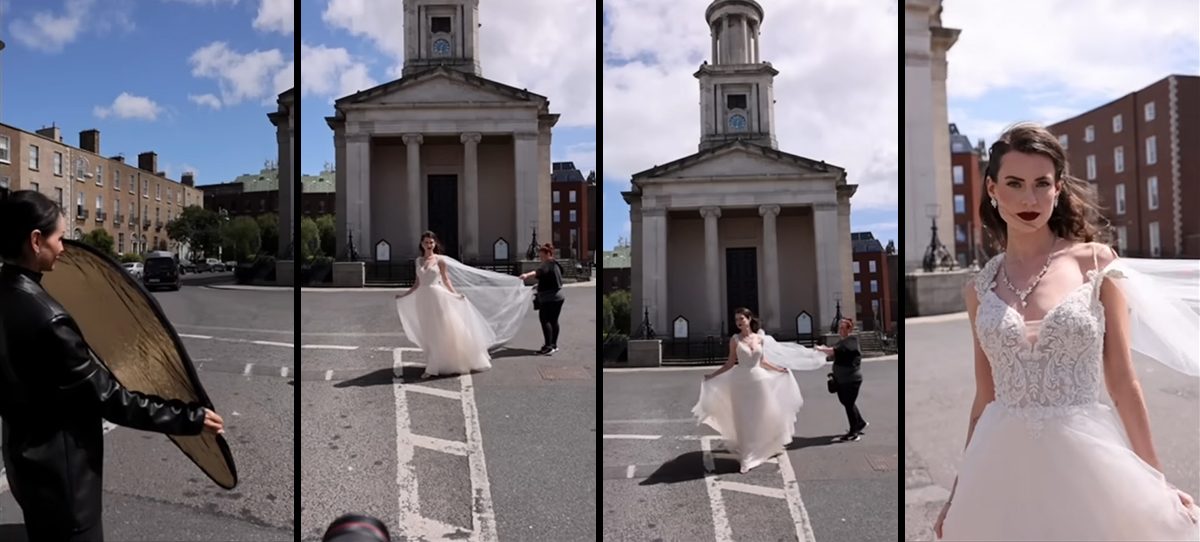
But trust me, this image didn’t come without challenges, particularly when dealing with several challenging lighting conditions. We had crazy wind, the sun was constantly coming in and out, so we had a reflector, but of course, with the wind, the reflector was all over the place. I want you to see what was going on behind the scenes to get that perfect veil, the perfect dress. When it comes to wedding photography, you’ve got to think fast and adjust accordingly. Sometimes those challenging conditions can throw you off, but you’ve got to keep shooting and make the most of it.
Working with the Sun, Shadows, and Wind
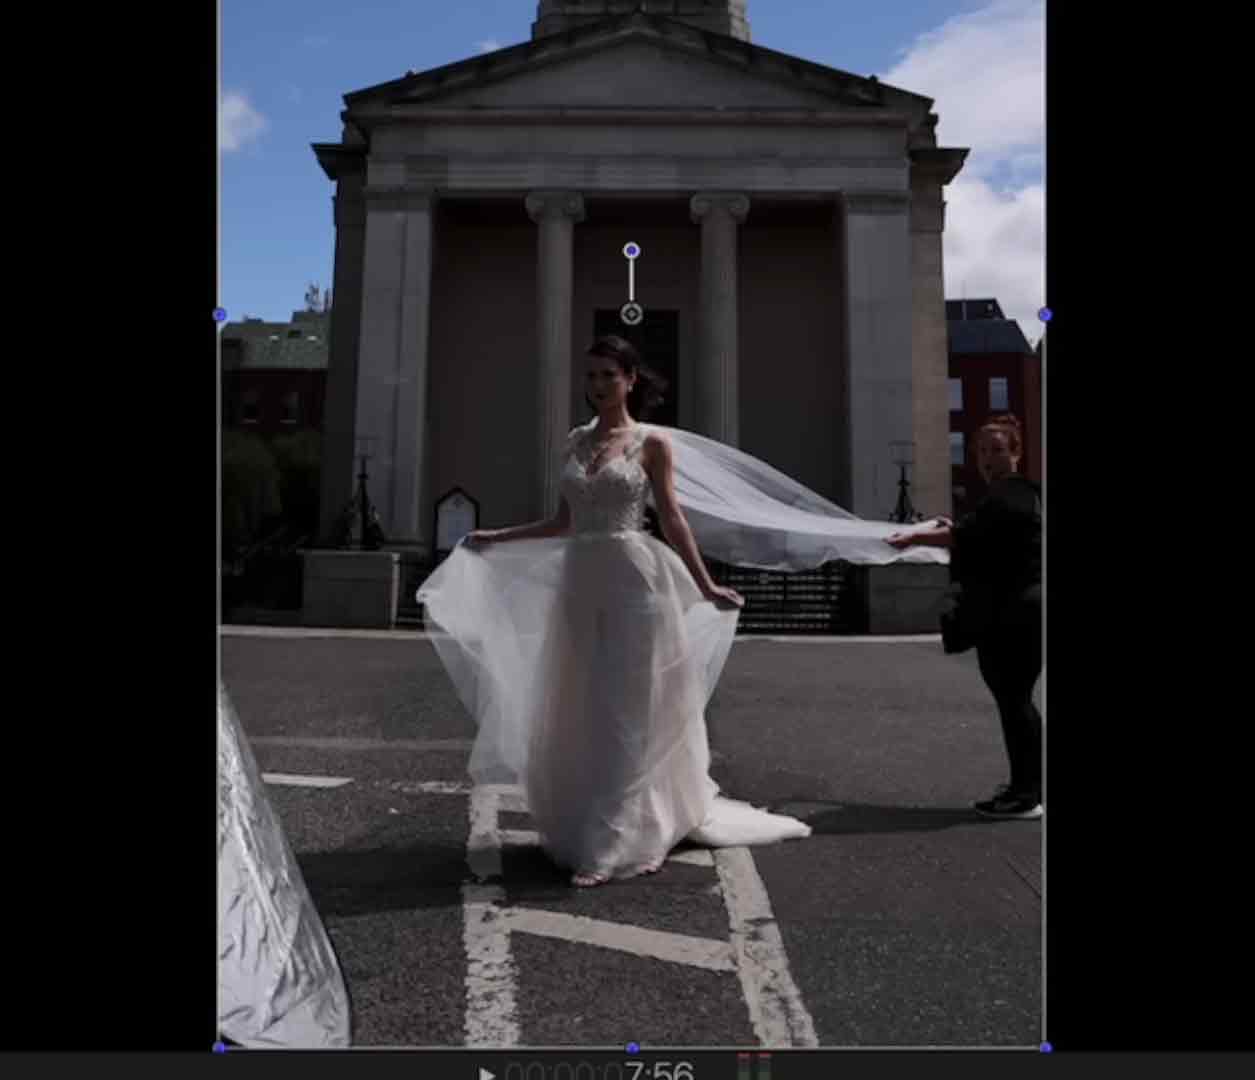
Right away, you can see the reflector filling in some light on her face. I needed that to balance out the edge light from the sun, which is coming from camera right. Then there’s the wind. We’re trying to work fast and efficiently, with the sun constantly fluctuating.
It wasn’t easy—Alissa was just trying to hold that reflector, and it was a nightmare. If you’ve got an assistant, you know what I mean. You can also see the sun coming in and out. Meanwhile, our hair and makeup artist is throwing the veil, cars are passing by, and we’re just trying to move quickly to make it all work.
All while trying to avoid harsh shadows on her face. And we’re shooting through this, working around the wind, waiting for that perfect veil toss while adjusting for the light.
Cleaning Up Outdoor Wedding Photos in Post-Production
Now, here’s something I always recommend. Think about it: your clients are going to hang these images on the wall. They don’t want to see huge street signs or random trash in the background. You want to clean up the scene, especially that asphalt. Anything that doesn’t add to the image, like the crosswalk lines or the white paint, remove it.
I love the final image and the motion in the shot. This to me is something that you should be trying to create for your clients when you’re expecting them to put something on their wall. And I think that has to be your mindset as a wedding and portrait photographer is, yeah, there’s all these great moments that are candid, nothing wrong with those. You have to almost create moments so that you have something that you can position your clients for wall art. That’s what I’m looking for from every event I’m at, weddings, high school seniors, family portraits. I’ve got to give them something that can be big on the walls. That’s how I’m going to make money in the final sale.
Using a Park Location for Your Portrait Photoshoot
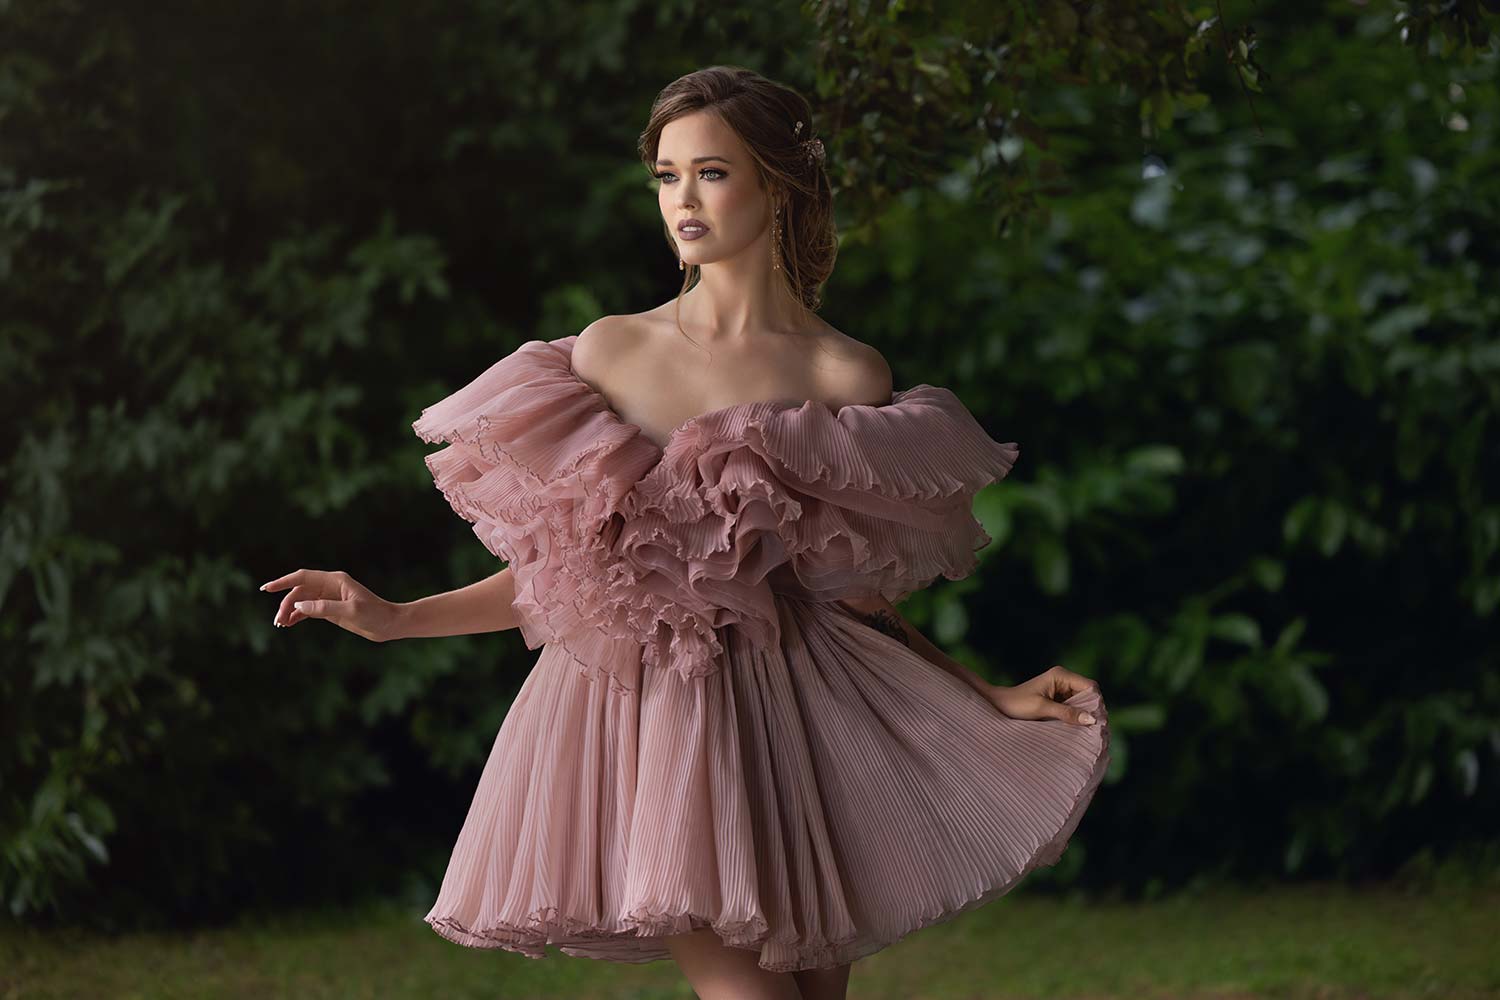
Let’s look at the next series of images. This could be high school senior fashion. Who’s your client? Think about that. How do you take a seemingly boring environment, like a park, and turn it into something special?
But as a photographer, no matter where you are, unless you’re in the Sahara Desert, there’s a park nearby. It doesn’t have to be huge; it just needs some trees, bushes, or greenery that’s going to allow your subject to pop off the background.
That’s a safety net for me. If I’m in a bind and I don’t have places to go, I’m always looking for a park-like setting, where we’ve got light leaking in from one direction. I love putting people under a tree maybe, or they’re being backlit, so the sun would be behind them. I don’t want harsh directional light, which there’s nothing wrong with that, that’s a look as well. But typically I’m going to go for that softer look, where either light is leaking in, open shade, if you will, from one direction or where I can reflect some light to control it.
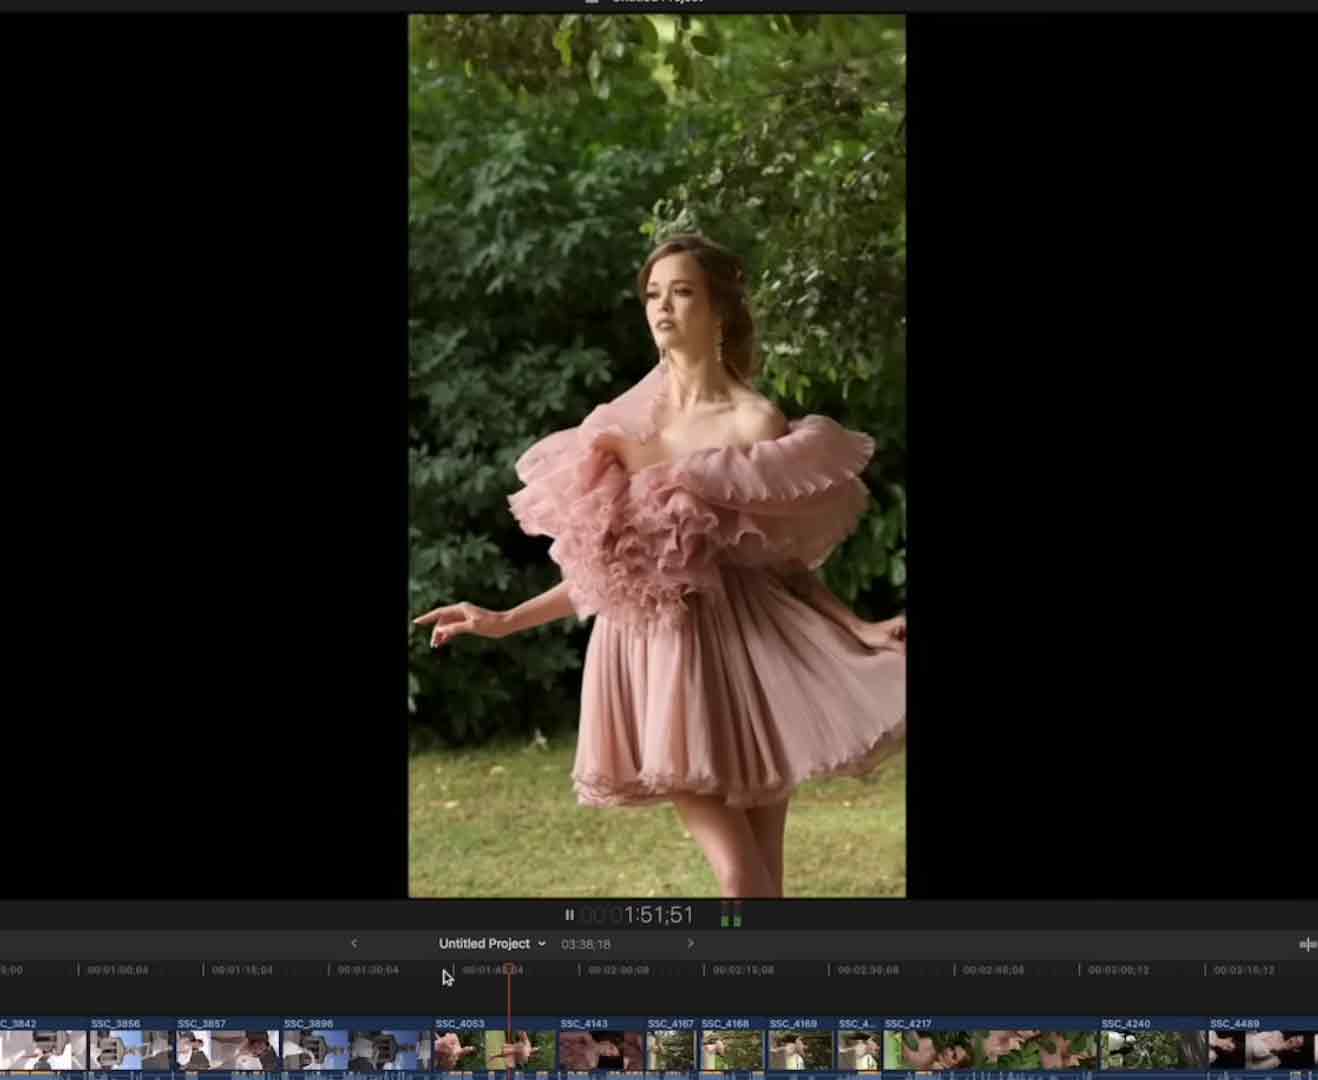
Then I’m going to have them either lit from behind or just again in shade so that I’m controlling the light on their face and body with some edge light from the sun. Which, again, like the previous shot, is being done with a reflector. And then we’re doing dodge and burn techniques in post-production to darken everything around her, but then make sure she’s popping off that background.
We’re just under a tree and it’s a windy day that we’re shooting here. You’ve got bushes in the background. This is not something magical. This is not some gorgeous botanical gardens. This is just a park-like setting. These particular shots, trees are moving. If it was a calmer day and the leaves weren’t moving as much, we wouldn’t have these issues with the wind.
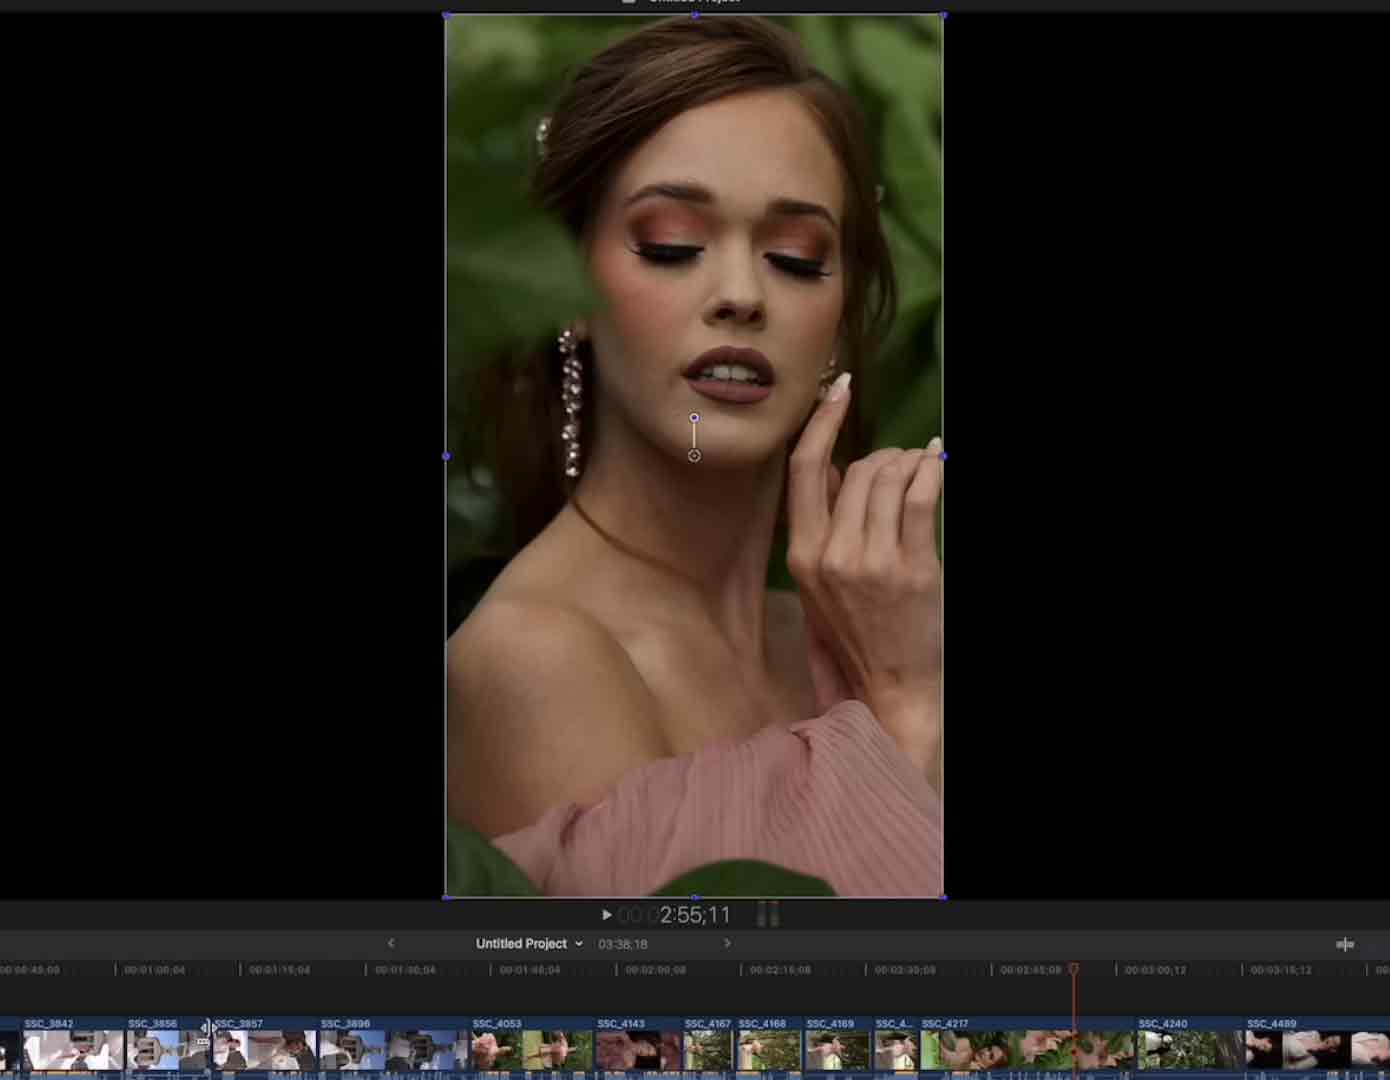
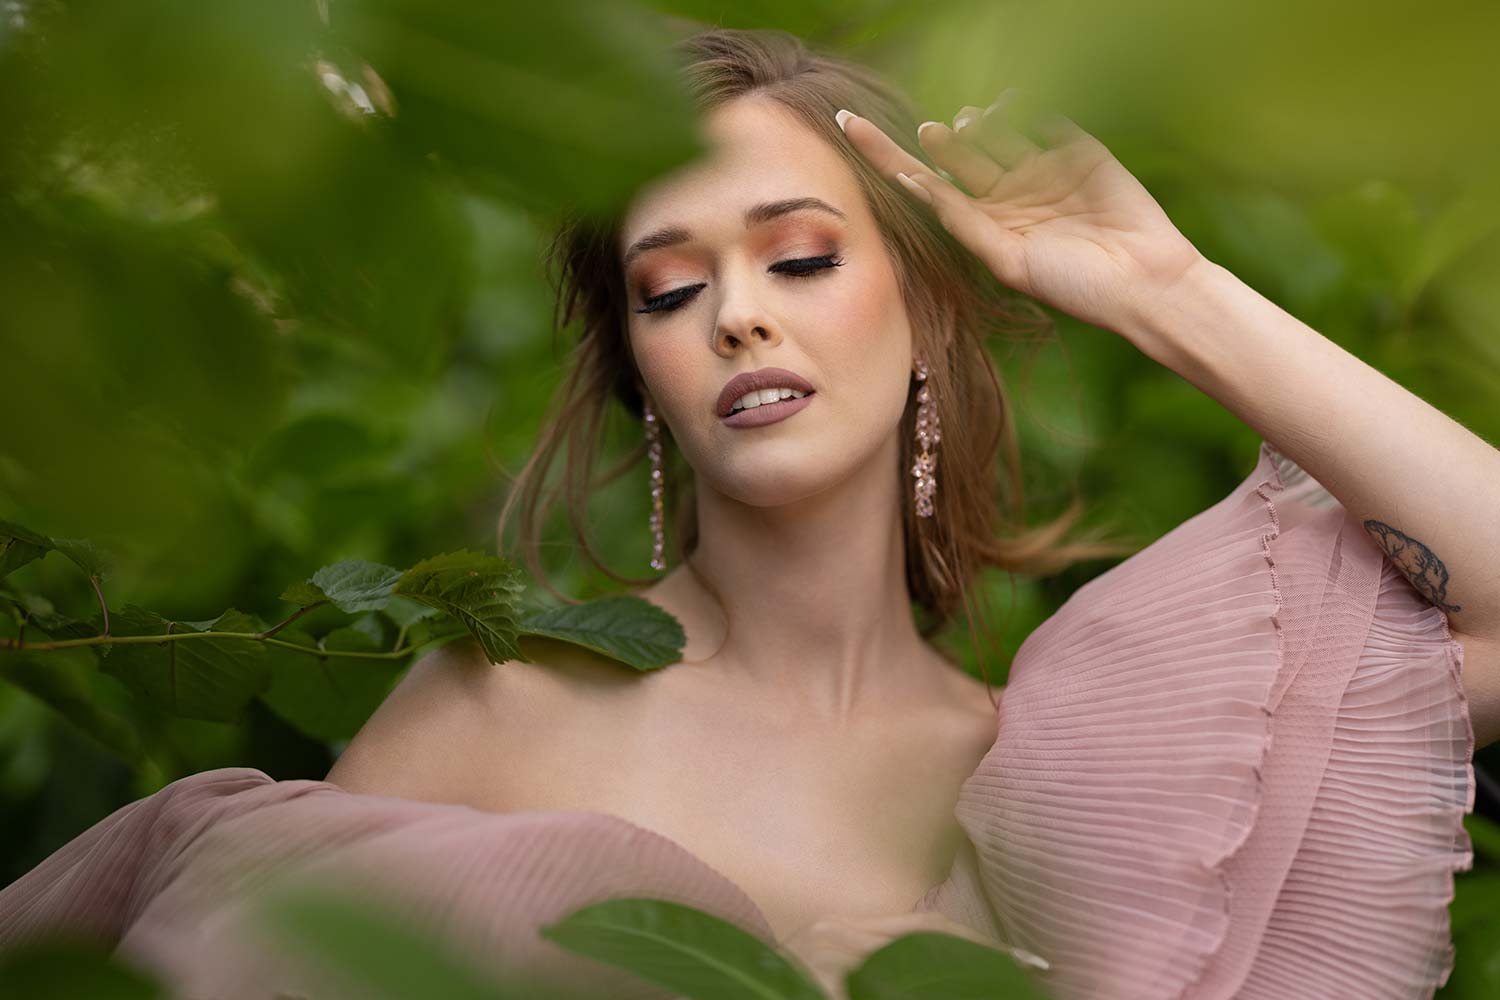
For the next shot, I move her back into those bushes. I position her there to get her out of the wind a bit and gain more control for a beauty portrait. So, I move her back into this spot. I think it’s a really cool looking shot because she’s enveloped by green, and then her skin and skin tone are popping off that.
As you can see in the video, since it hasn’t been color corrected and is straight off my camera, you’re seeing a green cast. Well, that’s going to be in the stills as well, and that’s why we love shooting raw. Got to be able to white balance this to get her skin tones right. That’s natural, and it’s going to happen because everything around her is green and reflecting it.
But now we’re in those bushes and those are the type of images we’re trying to produce. So I’m shooting through the leaves. I’ve got them kind of all around the lens, if you will, to create that kind of bouquet effect, but also just give it that milky look to it. I really love working that way.
So, the takeaway from these images that I want you to have is this: we can take a seemingly innocuous location or something that’s not that exciting, but through color—her skin with a warm orange tone and the background in green—and the pink dress, along with color dodging and burning techniques, the way we edit the image, and the way we light it. We can create some magic.
Lighting Tips for Photoshoots: Outdoor Wedding Portraits
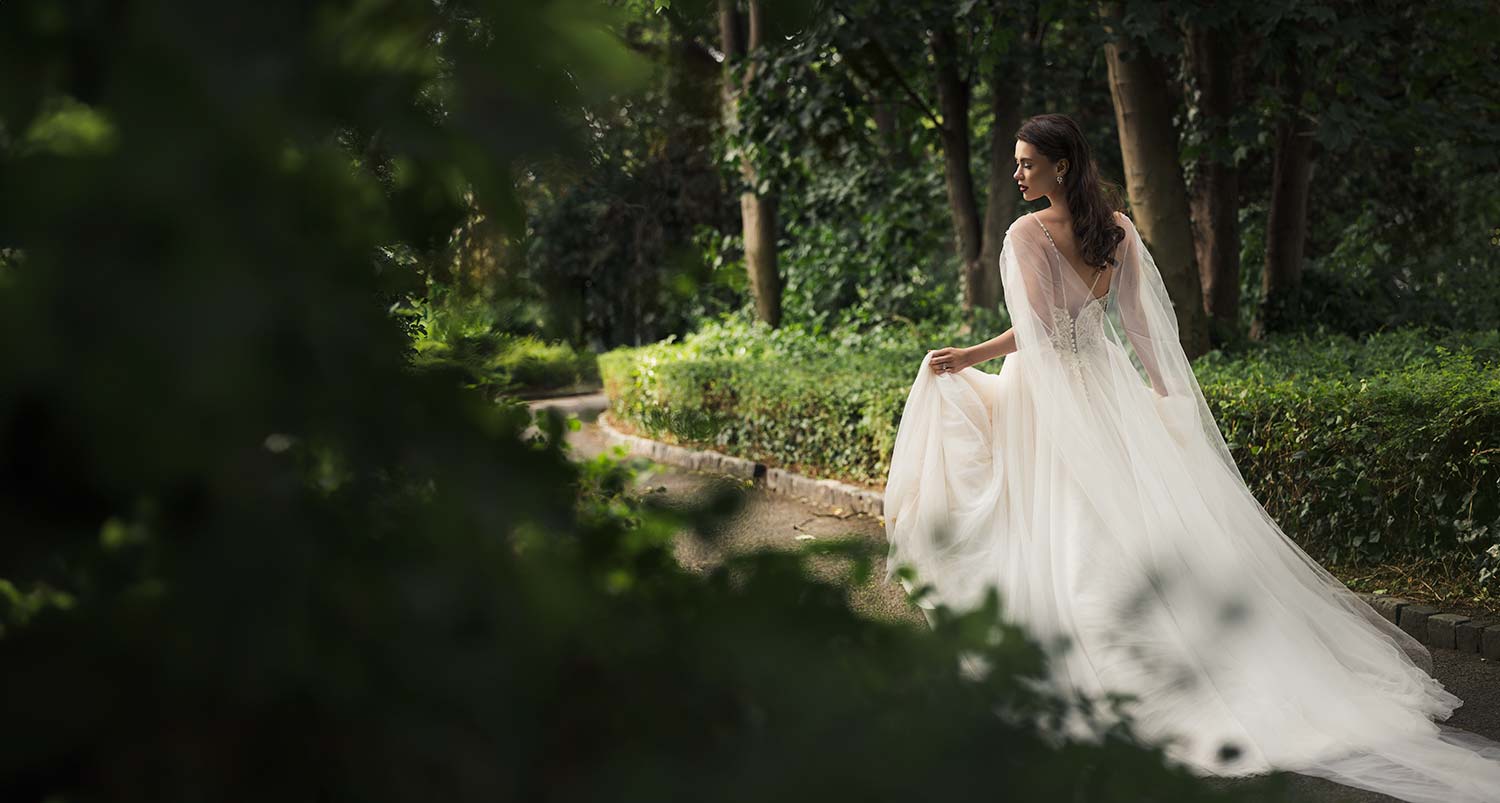
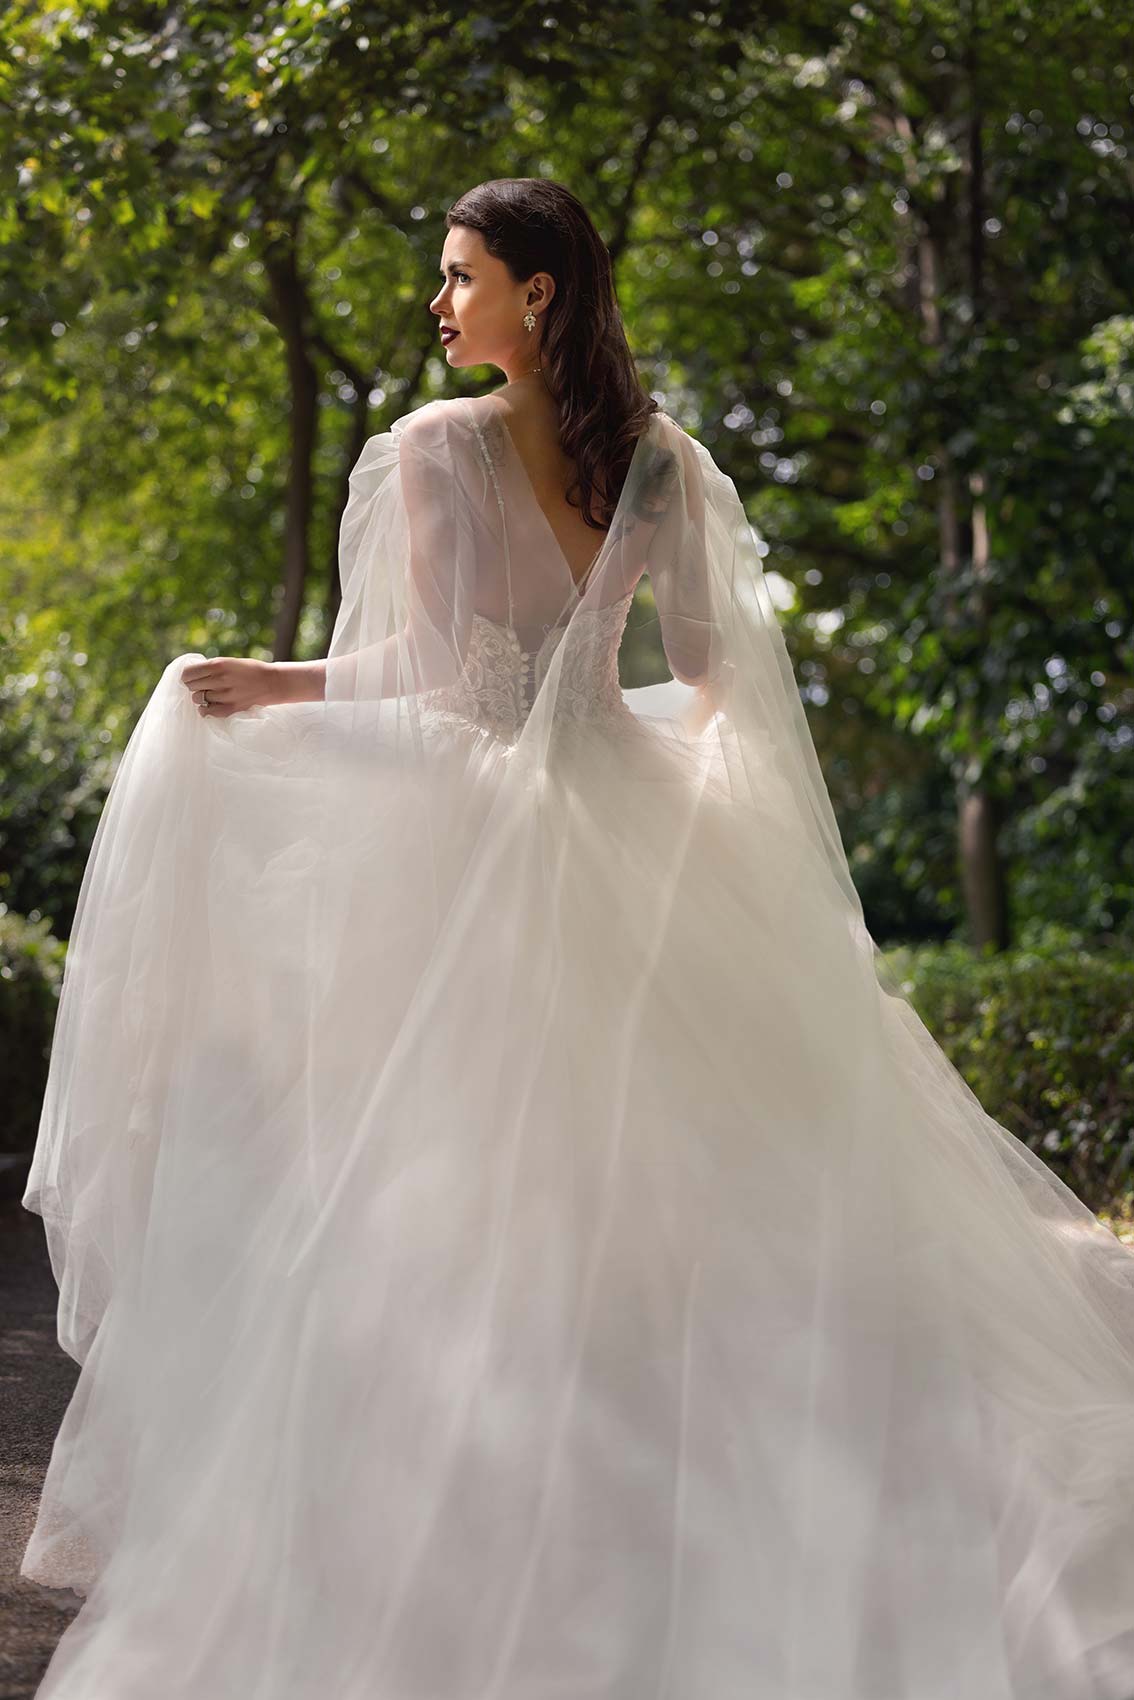
So let me show you the final set of images here. So now we took our bride again, same park. And there was a path and I wanted to get a beauty portrait of her walking down the path, and I think this one will get you guys excited.
I’m framing her up. Your eye is coming in from left to right and she’s coming in from the frame right to left. So there’s a little bit of tension there in the way we have this laid out. And then I’m using the bushes to kind of block the left side of the frame and you’re just seeing a sliver of that path driving. Where’s she going? What’s the story here as she’s moving through? No eye contact in this. I wanted it to feel a little bit more ethereal, a little bit more voyeuristic as she’s walking through that frame. I’m thinking through all this as I’m setting up the shot and that light is leaking through camera left.
So a lot of work going on behind the scenes. What we’re doing here, and we would do this on a wedding day as well. The wind is howling, so the girls are clamping the veil to the back of her dress and we’re making some adjustments there. And then I just have her stopped. You can have your bride walk through the scene to get these types of images, or you can just kind of let your bride sit still, get everything set up so that she doesn’t have to move as much.
I would use this with a real bride on a wedding day. Have her just kind of chill out, stand there, look away, look at you, and you go from there, without her moving too much.
If you’re a wedding and portrait photographer, you don’t want your client moving too much. If you make them move too much, they’re always going to be uncomfortable, especially if it’s a hot summer day on a wedding. You don’t want them moving because every time they move, again, the dress has to be adjusted, the veil has to be adjusted, it becomes a pain.
The best thing for you to do, especially if you’re working with a bride and groom, is for the bride to be your anchor. Have her set, get the lighting perfect and then move the groom around her. Move the bridal party around her. The bride is the one piece of this puzzle that should not be moving. Everything is built around your bride and groom. So hopefully that makes sense.
Here is that same shot but from a different angle.
Perfecting Eye Contact in Portraits with Harsh Light
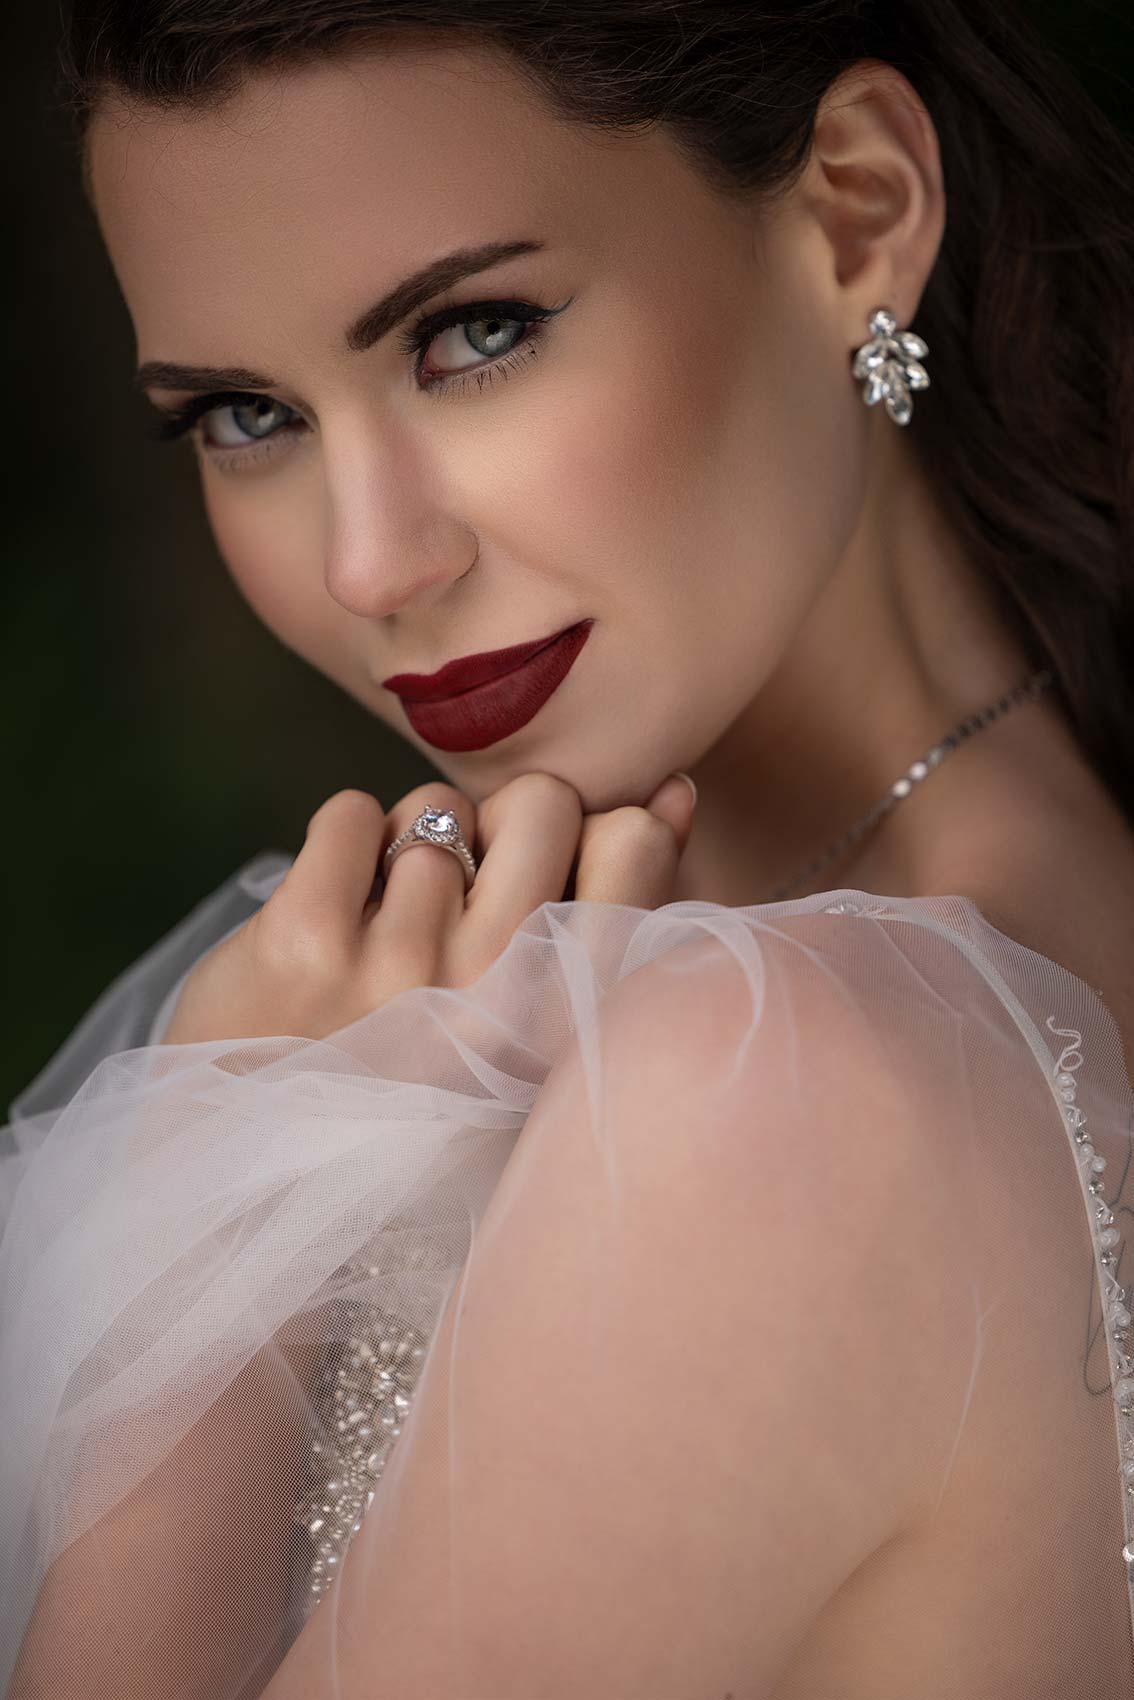
Now with this next image you can see the catch light in her eyes, the reflector that’s creating this gorgeous light on her. But I think what’s interesting in the behind-the-scenes is that she’s struggling to make eye contact because of the reflector, the light, and the wind. We’re not in a studio, we don’t have all this amazing studio light to control it. I’m not bringing out strobe and flash. Just a “keep it simple, stupid” kind of mindset. There’s the angle I want, but it’s too bright for her to look. But I’m looking for that one moment, that one snapshot I can grab here to really give me a beautiful beauty portrait of our bride.
The technique used to get her to look for this shot is worth the price of admission in watching this video. When we are working challenging lighting conditions with any type of harsh light, especially somebody with sensitive eyes, you’re going to get them doing faces and closing their eyes. That is not flattering to anyone. So, one of the techniques we use to work with challenging, harsh lighting is we get everything set up—the light set up, the reflector set up—and then I tell them, “Hey, close your eyes. I’m going to give you a three-count.”
What I’m really looking for them to do is relax their forehead. Get their expression right and give them a countdown, one, two three go. And you’re shooting through that. We’re looking for one frame in all this, and that’s all I really needed.
She did exactly what I just told you to do. She got her expression right, closed her eyes and we did it multiple times. Looking to make sure I got that one frame right. And then of course we’re going to edit it and make it perfect.
But that’s what we’re looking for. Absolutely love the final edit, and just cleaning that image up. This becomes something for your client that’s going to end up in their wedding album, maybe an introduction page in the wedding album. I love to do that. Maybe we’ll do some videos on album design at some point if that’s something you guys are interested in on the channel. But I love introducing the bride, have pictures of her getting ready. I love introducing the groom, pictures of him getting ready, and telling the story in their wedding album.
So I don’t know if you guys liked this episode. Please do let me know in the comments if this is something that is of interest to you. We’ll do more of these, where I’ll just show you behind the scenes, what’s really going on, how we handle overcoming challenges, and then show you that final image so you understand that you create the environment. You have to learn how to see through the lens of your camera. Hopefully, this was a good video, and you can try out some of the lighting tips for photoshoots. Let me know your thoughts. We’ll see in the next one.

