Hard Light—It’s Easy! with Michael Corsentino
The moment you realize you can customize the quality of the light you’re creating to fit the images you’re capturing is the moment you realize there is no one-size-fits-all lighting. With artificial light, we attempt to recreate light that occurs in nature. Absent that, lighting looks unnatural and in this photographer’s humble opinion ends up doing more harm than good. It ends up being a distraction rather than a supporting element.
In nature, we have soft light, hard light, and everything in between, all falling under the umbrella of “quality of light.” Specifically, this term refers to the level of specularity (contrast) or lack thereof. Hard light and soft light can each be replicated using artificial light with a combination of strobe, lighting modifiers, and the distance these are placed at relative to the subject being photographed. A feature covering the elements of hard light and how to create it seemed like a natural follow-up to last month’s article on soft light, as they’re opposite sides of the same coin.
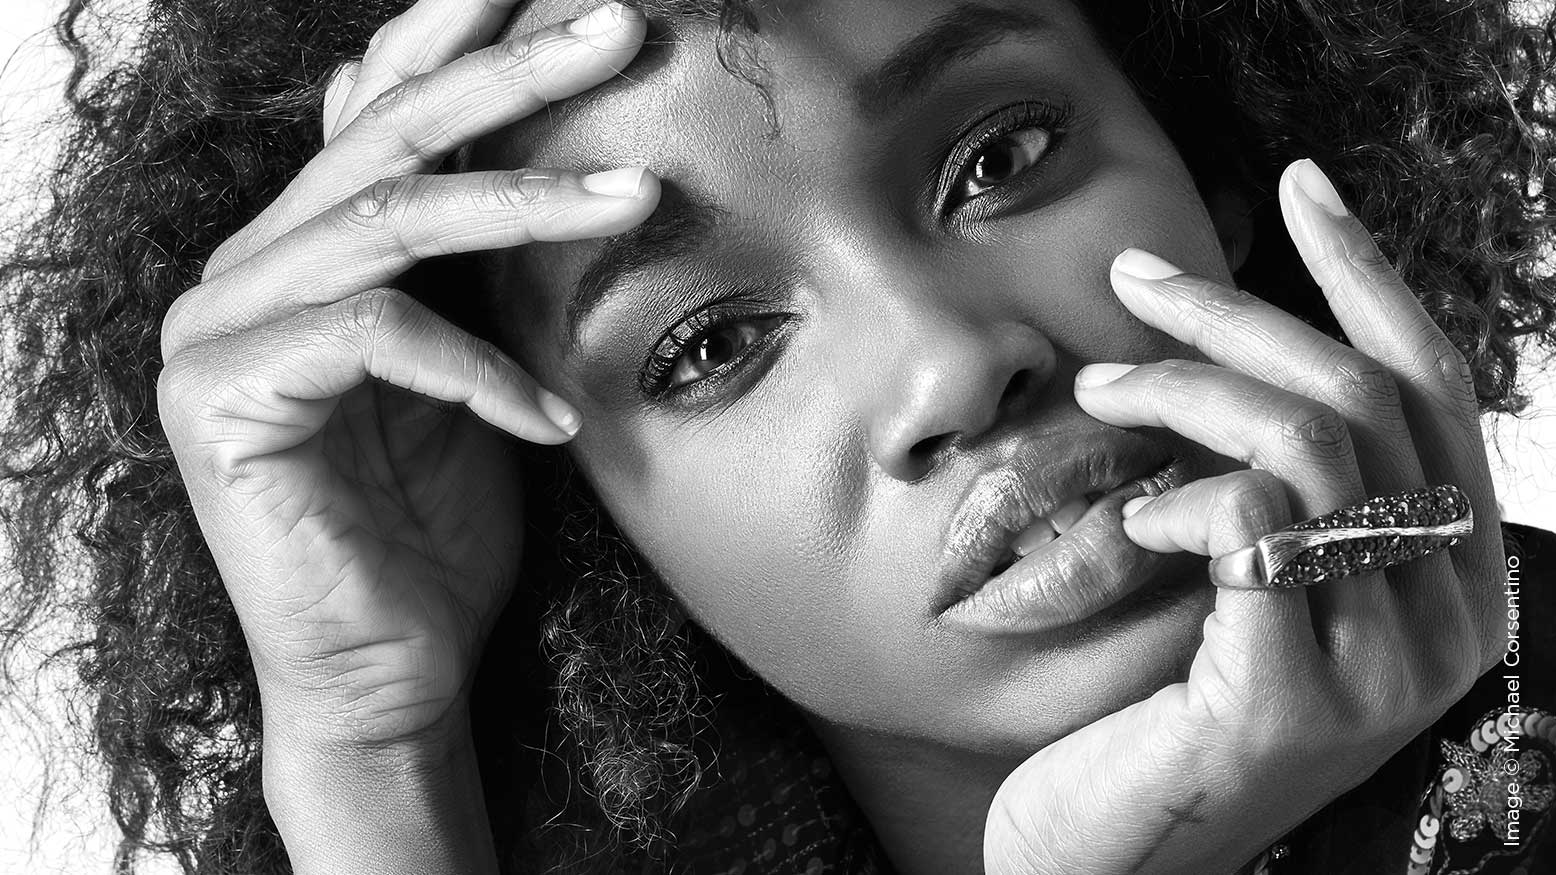
Last month, we learned that soft light is defined by the gradual transition between shadows and highlights. The opposite is true of hard light. Here, transitions between shadows and highlights are rapid. This results in crisp edges, deep shadows, and a harder, edgier-looking light than with soft light. Each style of lighting has its place. Soft light, as its name implies, is very soft and pleasing. Hard light, on the other hand, is the opposite. It’s a style well suited for a multitude of applications, from band promo images, to sports, to fashion, to seniors wanting that “cool” look. Basically, for any images where you want that cool, badass, edgy look, hard light is the way to go. This is why it’s one of my favorite kinds of light to work with.
Creating hard light with strobe is governed by three factors. Let’s look at each of these individually.
Light Modifier Size
The first and most critical piece of the quality-of-light puzzle is the size of the light modifier used. With soft light, large modifiers are the order of the day. Hard light, naturally, uses the exact opposite. The basic rule of thumb is that the smaller the light source, the harder the resulting quality of light. So it follows that for the best results creating hard light, you’ll want to employ a small light modifier. This can be a beauty dish, a small reflector, a soft box or an octabank—whichever modifier you choose, make it small for optimal results. You can easily control the degree of light hardness by using one or more layers of diffusion fabric if desired. Softboxes and octabanks typically have a removable inner baffle and outer diffusion fabrics, providing a ton of options from super-hard light (totally bare), to slightly reduced (with the interior baffle), to an even-further-lessened effect with the exterior diffusion or both fabrics in place.
Light Modifier Interior Finish
In addition to size, the interior finish of the modifier plays an important role in the specularity created by the lighting. For the hardest light, use a modifier with a silver interior, as it boosts contrast, maximizes light output, and creates the crispest edges. If you desire light that is slightly softer, then a modifier with a white interior can be substituted. Experiment and have fun creating different degrees of hard light with various modifiers and their add-ons—there are myriad options across the hard-light spectrum.
The shape and depth of the modifier also contributes to the quality of light and the speed at which the light falls off the initial circle once it leaves the modifier. Deeper, conical, parabolic-shaped modifiers deliver increased contrast, heightened light fall, and dramatic results.
Distance
The distance of the key light and its modifier from the subject is another key factor in creating quality of light. The closer the light source to the subject, the softer the quality. So when it comes to hard light, you’ll want distance between your lighting and your subject. Your mileage will vary depending on the desired effect, size of the modifier, and power of the flash being used, but the basic rule still applies: the more distance between the light and the subject, the harder the resulting light will be.
Distance and size are interrelated, and the reason why is known as perceived size. For example, if you place a 10-inch reflector 2 feet away from your subject, it will have a larger perceived size relative to the subject than the same modifier placed 10 feet away from that subject. The farther away the modifier is placed, the smaller its perceived size relative to the subject, and vice versa. This is good news. It means if you only have a medium-sized modifier, you can still create hard light with it. Placing a medium-sized modifier farther away from your subject will essentially make it smaller, giving you harder light than the same modifier placed closer to the subject. Make sense? Try it!
So you can see, despite its name, hard light is easy. You have a ton of options, regardless of the modifiers you currently have on hand. You can easily convert any softbox into a hard-light modifier by removing its interior baffle and exterior diffusion fabrics and placing it farther away from your subject. There is no perfect distance—it all depends on the quality of light you want and the power of the strobe you’re using. I often end up with around 10-15 feet between my key light and subject, but again, your mileage may vary. Every shoot is an experiment. Have fun, check your results, and season to taste. Post your hard-light images on Facebook and tag me. I can’t wait to see what you come up with!


