From Image Capture to Final Delivery with Matt Monath
As a pro photographer and retoucher with work spanning across many various photography genres, I begin thinking about my retouching workflow as soon as I’m conceptualizing my shot. In successful product photography, image-capture and post-production are synchronously considered. By doing so, producers and creatives often find value in my ability to navigate the intricacies of a commercial stills project from start to finish. Bringing on one person to fill the role of both photographer and retoucher has its benefits for a client: They have the assurance that the project will be as polished and concise as possible by having one creative mind doing both sides of the technical work. Whether establishing your own creative direction or working through creative briefs coming from a team, these quick tips are for the commercial photographers out there that want to streamline their post-production workflow for a great Final Delivery.
I’ve broken this down into five points: Enhancing Surfaces, Combining Multiple Shots, Utilizing Plates and Color Cards, Unplanned Face and Body Swaps, and Creative Edits. All images included are shot and retouched solely by yours truly.
ENHANCING SURFACES
When shooting products, we want them to look as flawless as possible. By thinking ahead and planning the retouching alongside theshooting process, we can smoothly create results with lots of impact and little technical trouble. To get the polished imagery the client usually seeks to represent their products, we often need to enhance the surfaces and details to show off the change in finish and texture.
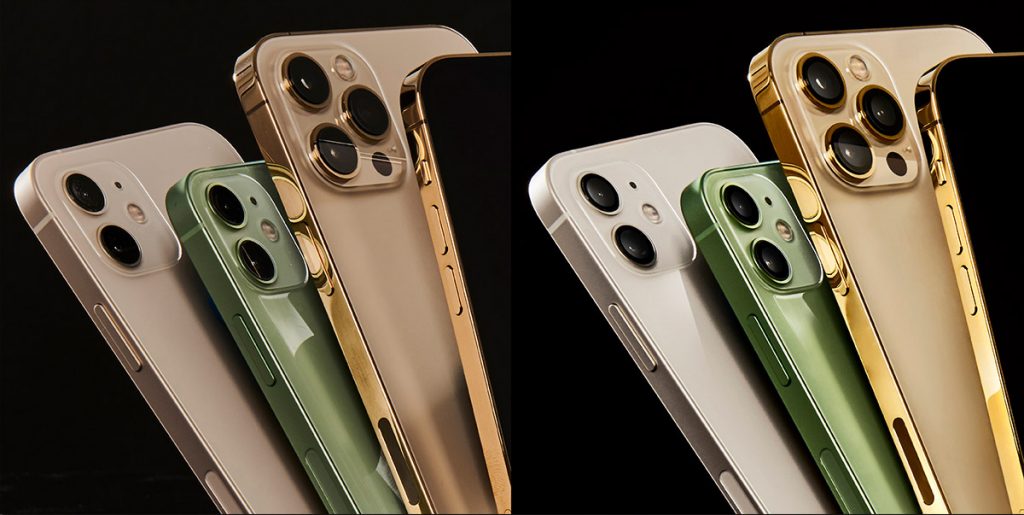
Take a look at the before and after shots below, featuring the latest collection of iPhones, shot for Business Insider. When comparing, you’ll see that the surfaces and reflections have much more depth in the after shot. While the global lighting is beautiful for the overall shot in the before shot, the individual tones and reflections are enhanced in the after shot. By planning ahead, I knew these reflections would need to stand out, so I shot extra options for the reflective edges. I made lighting changes, shot multiple versions, and combined them in post-production. This process, accompanied by carefully but powerfully dodging highlights and burning shadows in these reflective areas, helped to bring attention to the luxurious features of the phones. Ooh, shiny.


