
Continuous lights are capable of creating some amazingly dramatic portraits if you know how to use them. We love continuous lights for one main reason – what you see is what you get. I’ve never been able to move this quickly using strobes. Setting up strobes takes time, and if you decide to move, forget about it—you have to reset everything. And if the lighting changes on you… well, you get the point. Continuous lighting has opened up a world of possibilities for our portrait photography studio, both indoors and out. Watch this live photoshoot where I create dynamic portraits using continuous lights in New York with some of the most amazing models and locations out there. Ready to create some dynamic portraits using continuous lights? Let’s get to it.
Equipment Used:
Camera: Canon EOS R5
Lens: Canon RF 28-70mm F2, Canon RF85mm F1.2
Light: Nanlite
Team:
Photographer: Sal Cincotta
Model: Heather, Corrin, Faren
Hair & Makeup: Brandi Patton, ReFine Beauty
All right, guys, today we’re in Brooklyn. I’m teaching a workshop, and we’re working with Nanlite. We’ve got a plethora of their lighting systems set up to create these incredible portraits. We’re going to do all sorts of cool things with them. We can change colors because they’re bi-color; some of the lights are daylight-balanced, others tungsten-balanced, allowing us to really control color. We’re also using a ton of modifiers, like barn doors, Fresnel lenses, and their projector, which lets us cast patterns against the wall or even on our subjects. There are so many cool things we can do. Let’s have some fun! We’ve got three incredible models here, and we’re going to make some amazing images. Let’s get to it!
First, we’ll be shooting at 5,000 Kelvin on the camera, right? Set your cameras up and avoid using auto for some of the stuff we’re doing today. Outside, I would shoot in auto, but in this environment, I’d like us to control it. So, we’ll shoot at 5,000. I’m also changing my angle to get a better shot. I’m just making sure I don’t have a globe coming out of her head.
Also, one of the things Alissa and I always like to do is look for reflections wherever we go. Sometimes you find them, sometimes you don’t. But you always start with your standard stock shot and then spend a little extra time searching for that “Holy shit! That’s so completely different” moment. The pose also needs to make sense to me; I don’t think she should be making eye contact with the camera. I really like that lean-back pose—it’s sexy and fits everything perfectly. In a scene like this, you could use it for a bride or even for boudoir.
Settings: f/2 @ 1/160, ISO 200
Let’s go to our next scene at the bar. I would shoot down this bar to make it more interesting. The obvious shot might be to just shoot down the bar, but then there’s no context or interesting elements in the foreground. It’s always about finding ways to enhance the shot. So start thinking and working progressively as you shoot. Now, we’ll start building it. I’d have Alissa with me for this, and again, this is another reason I like these lights. We’re going to change the setup to get a blue color. I’ll probably place it over here somewhere. Now, I’m getting a bit of that detail.
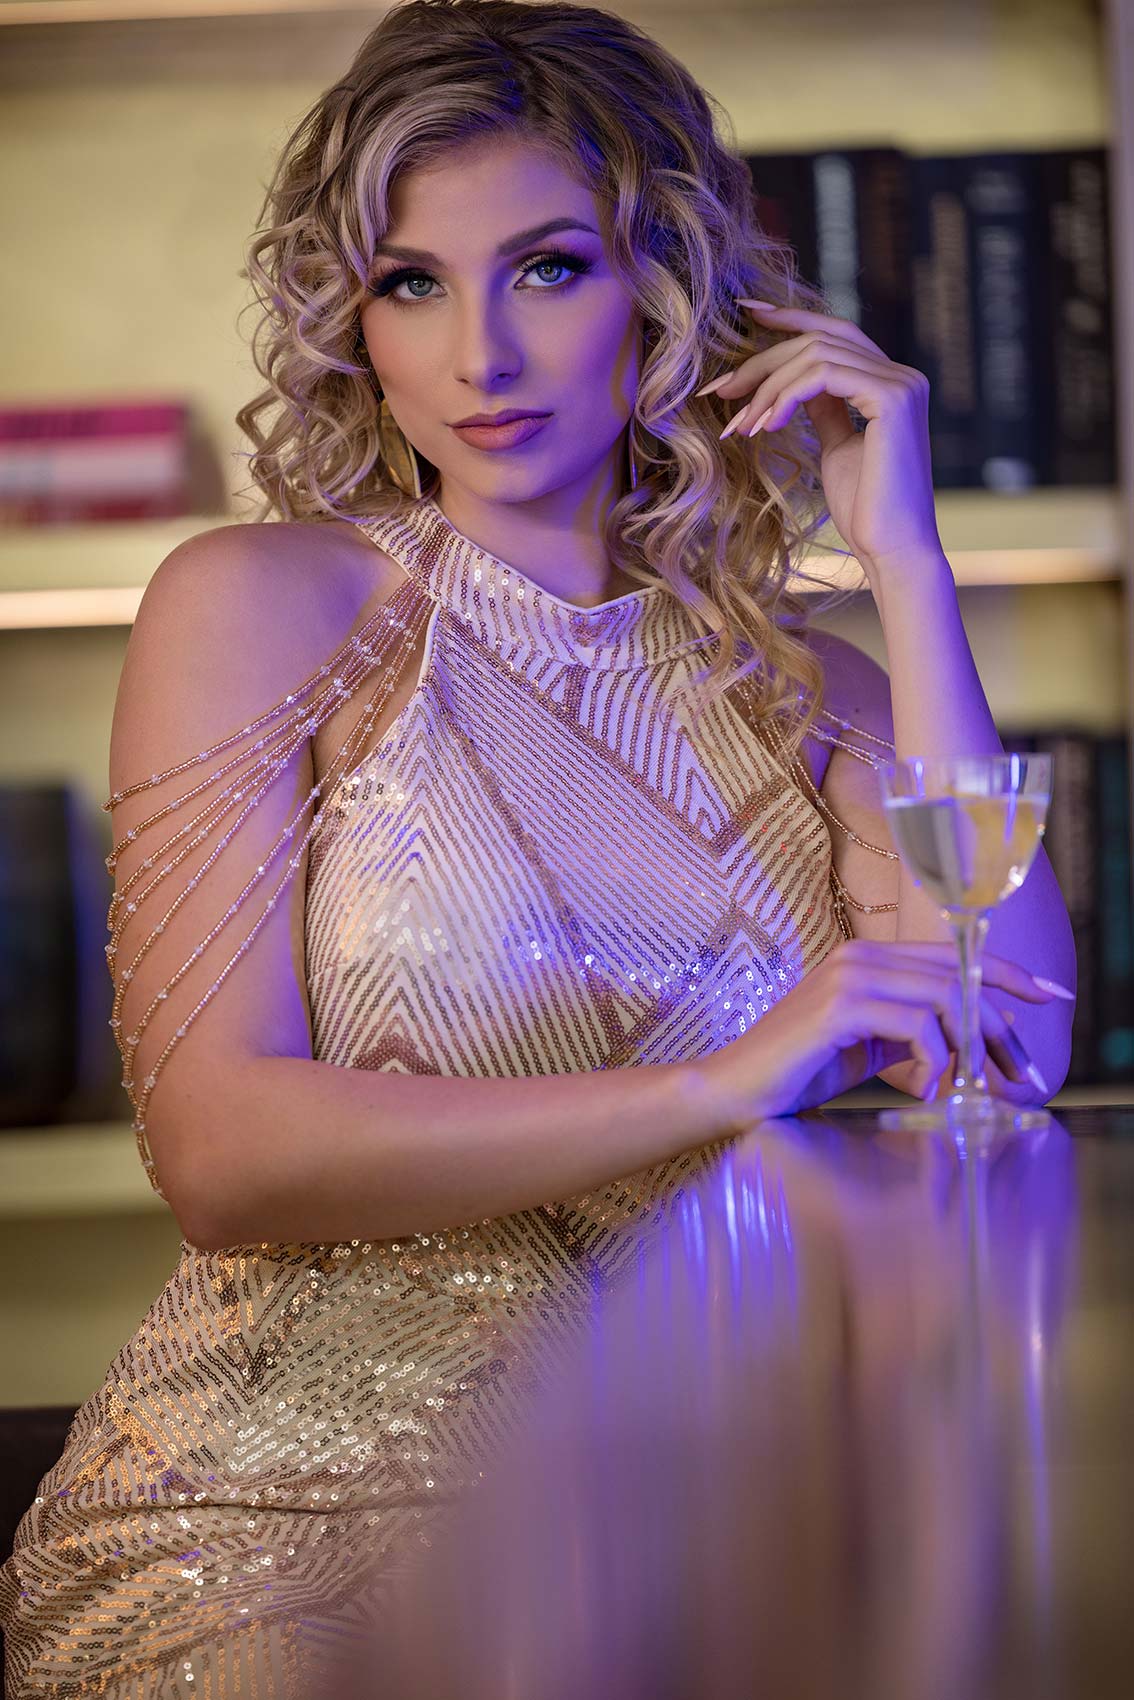
Settings: f/2.8 @ 1/100, ISO 200
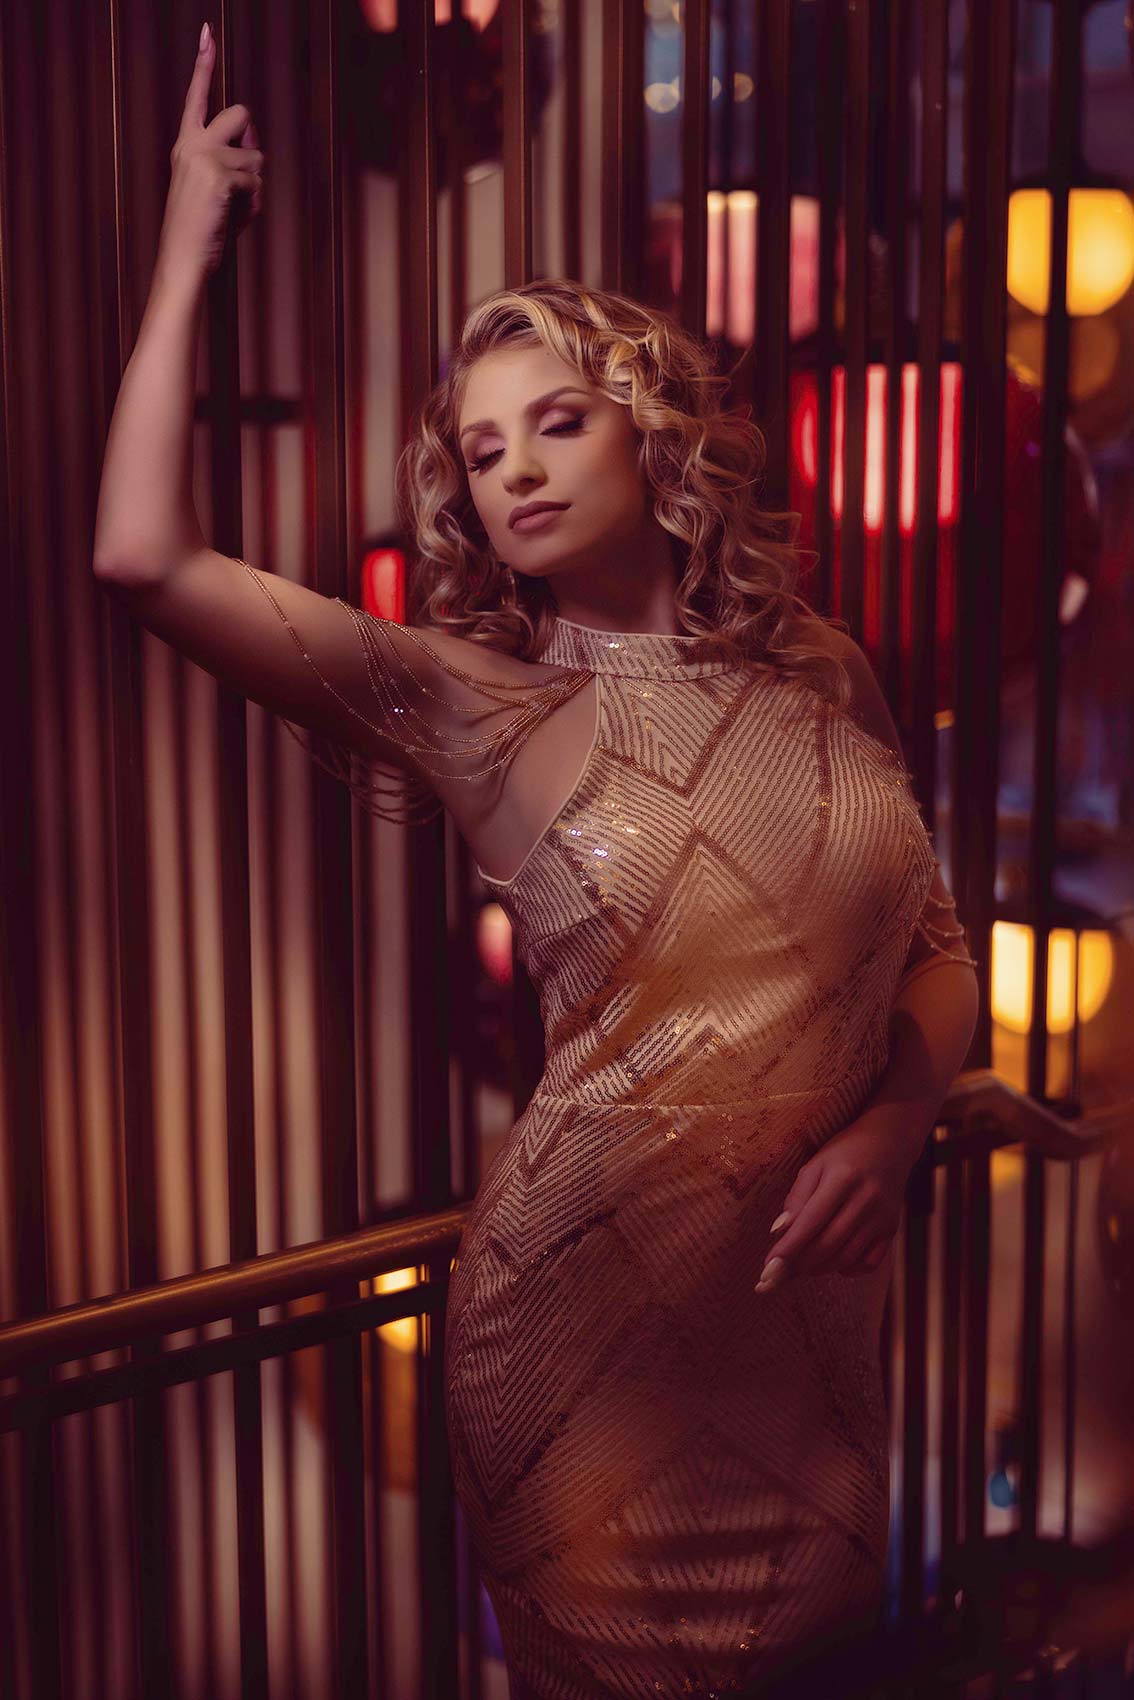
In this third scene, we’ve got several different pieces of lighting equipment. Thank you to the team at Nanlite. What we wanted to do here was use this lighting setup, which offers full color or bi-color options, including tungsten, daylight, and full RGB. We can control the light color here and build on this look. We’ll start with just this setup, using two of the PavoTubes on the background to create color.
But here what we’re doing is creating this high-fashion, old Hollywood look. These will probably look incredible in black and white if you convert them, but they’re also going to look good in color as well. And then what we’re doing here is just setting up two of the PavoTubes, the sixes, which we’re using all day today to create a little bit more of an edge light and separation for her.
In this fourth scene, we’ve got bronze and some green in the head piece. I wanted to go with more yellows on this, so we’ve got a mix of color temperatures going on here.
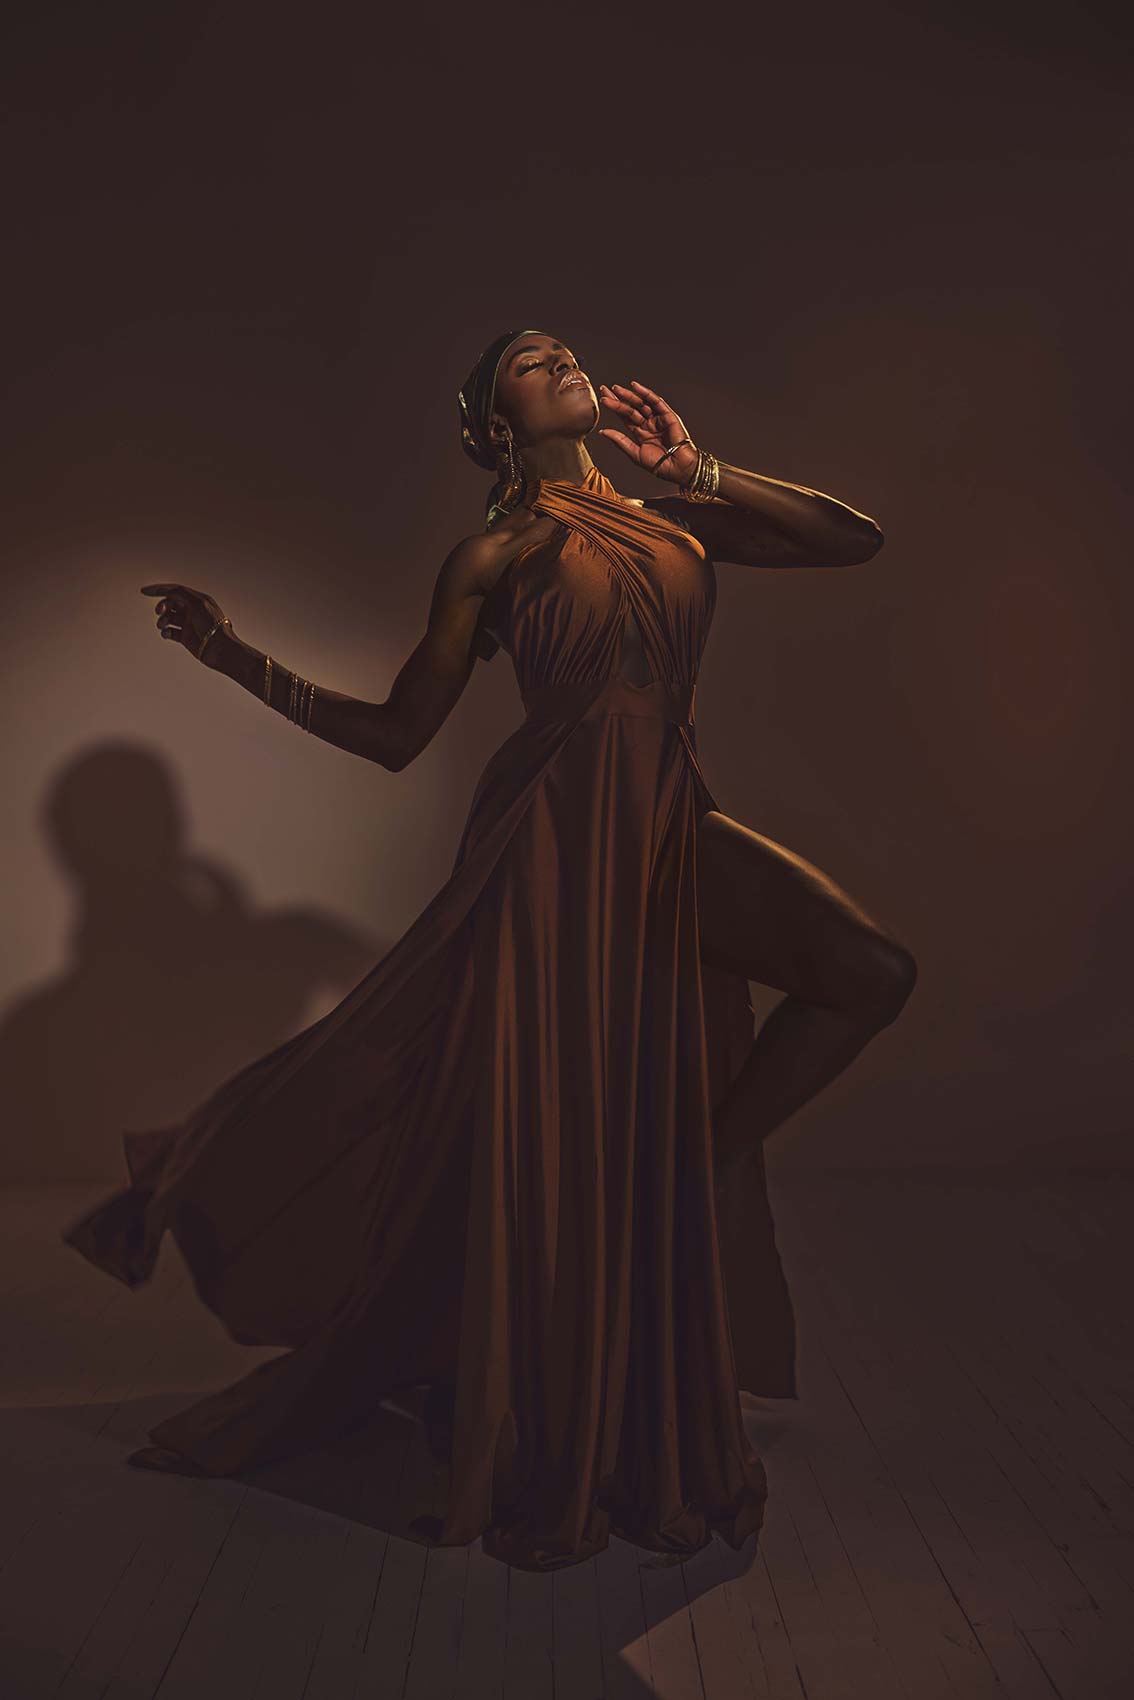
Settings: f/2 @ 1/200, ISO 200
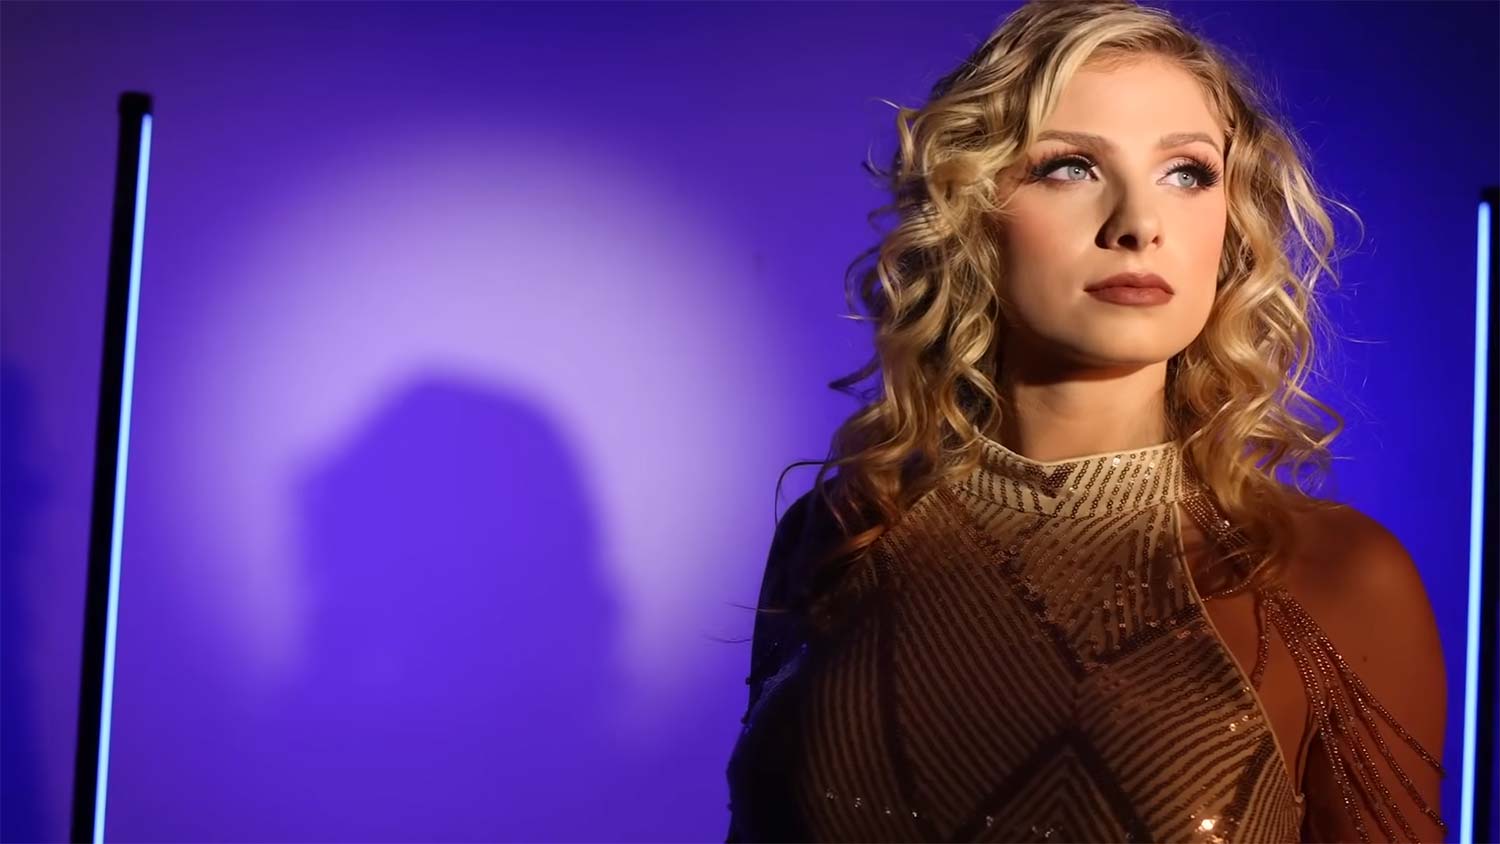
All right, guys, so what we’re going to do now, for the last shot down here using this light setup before we head up to the roof, is create a dramatic ‘Lady in Red’ scene. On the background we’re going to use RGB. We’re going to fire the red continuous lights, and then we will mix up lights hidden in the front as well.
For me, there’s no need to use manual mode right now. I’m shooting in aperture priority and letting the camera make those adjustments. Just to revisit, we have the key light set to 5,500 Kelvin at 50% intensity, which is giving us a strong shadow on the wall. We’re also achieving excellent skin tones. To the naked eye, her skin might appear a bit cool, but if you set your Kelvin to 5,500, it will look really nice.
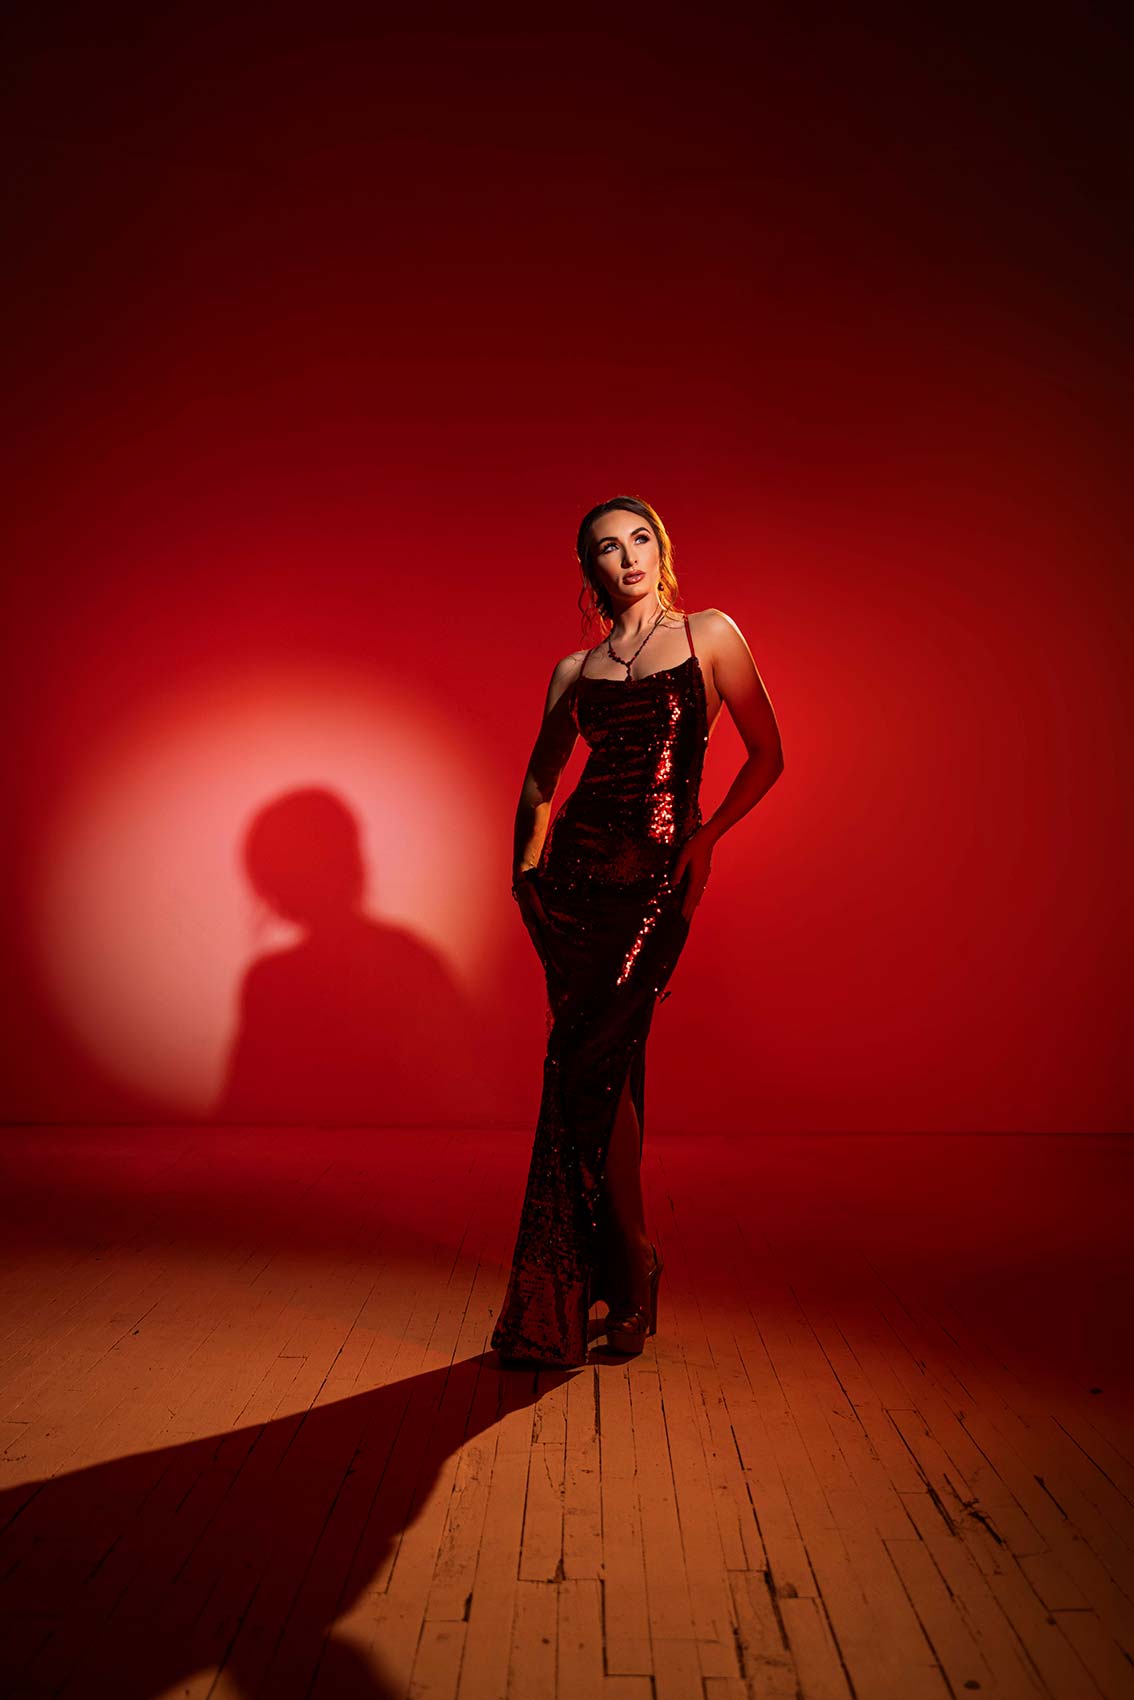
Settings: f/2 @ 1/200, ISO 200
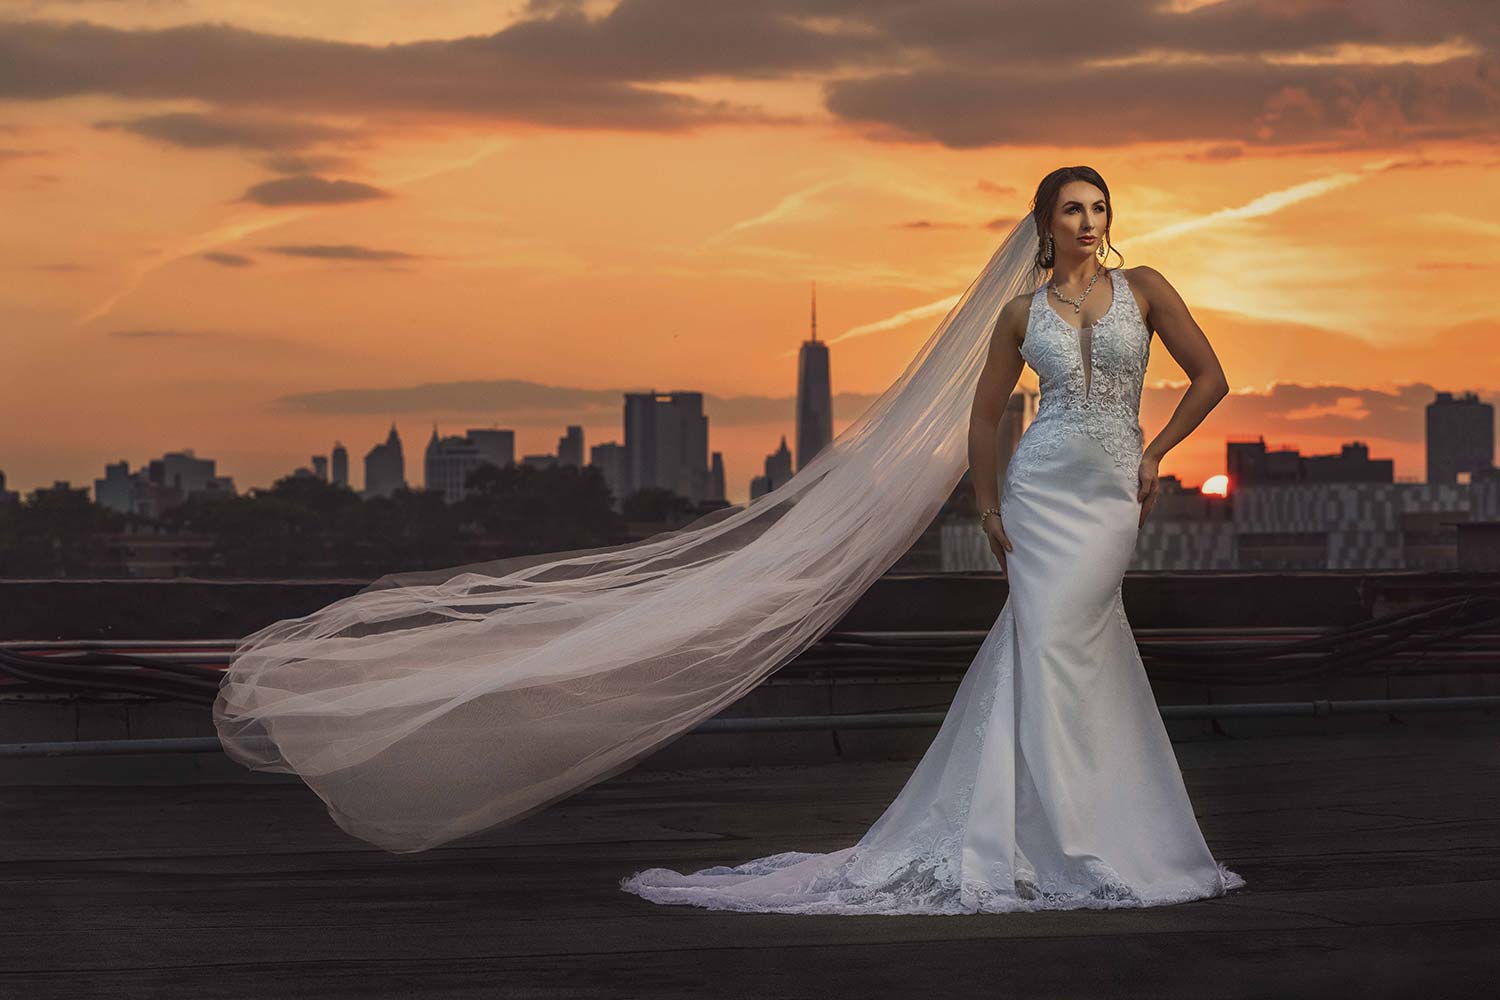
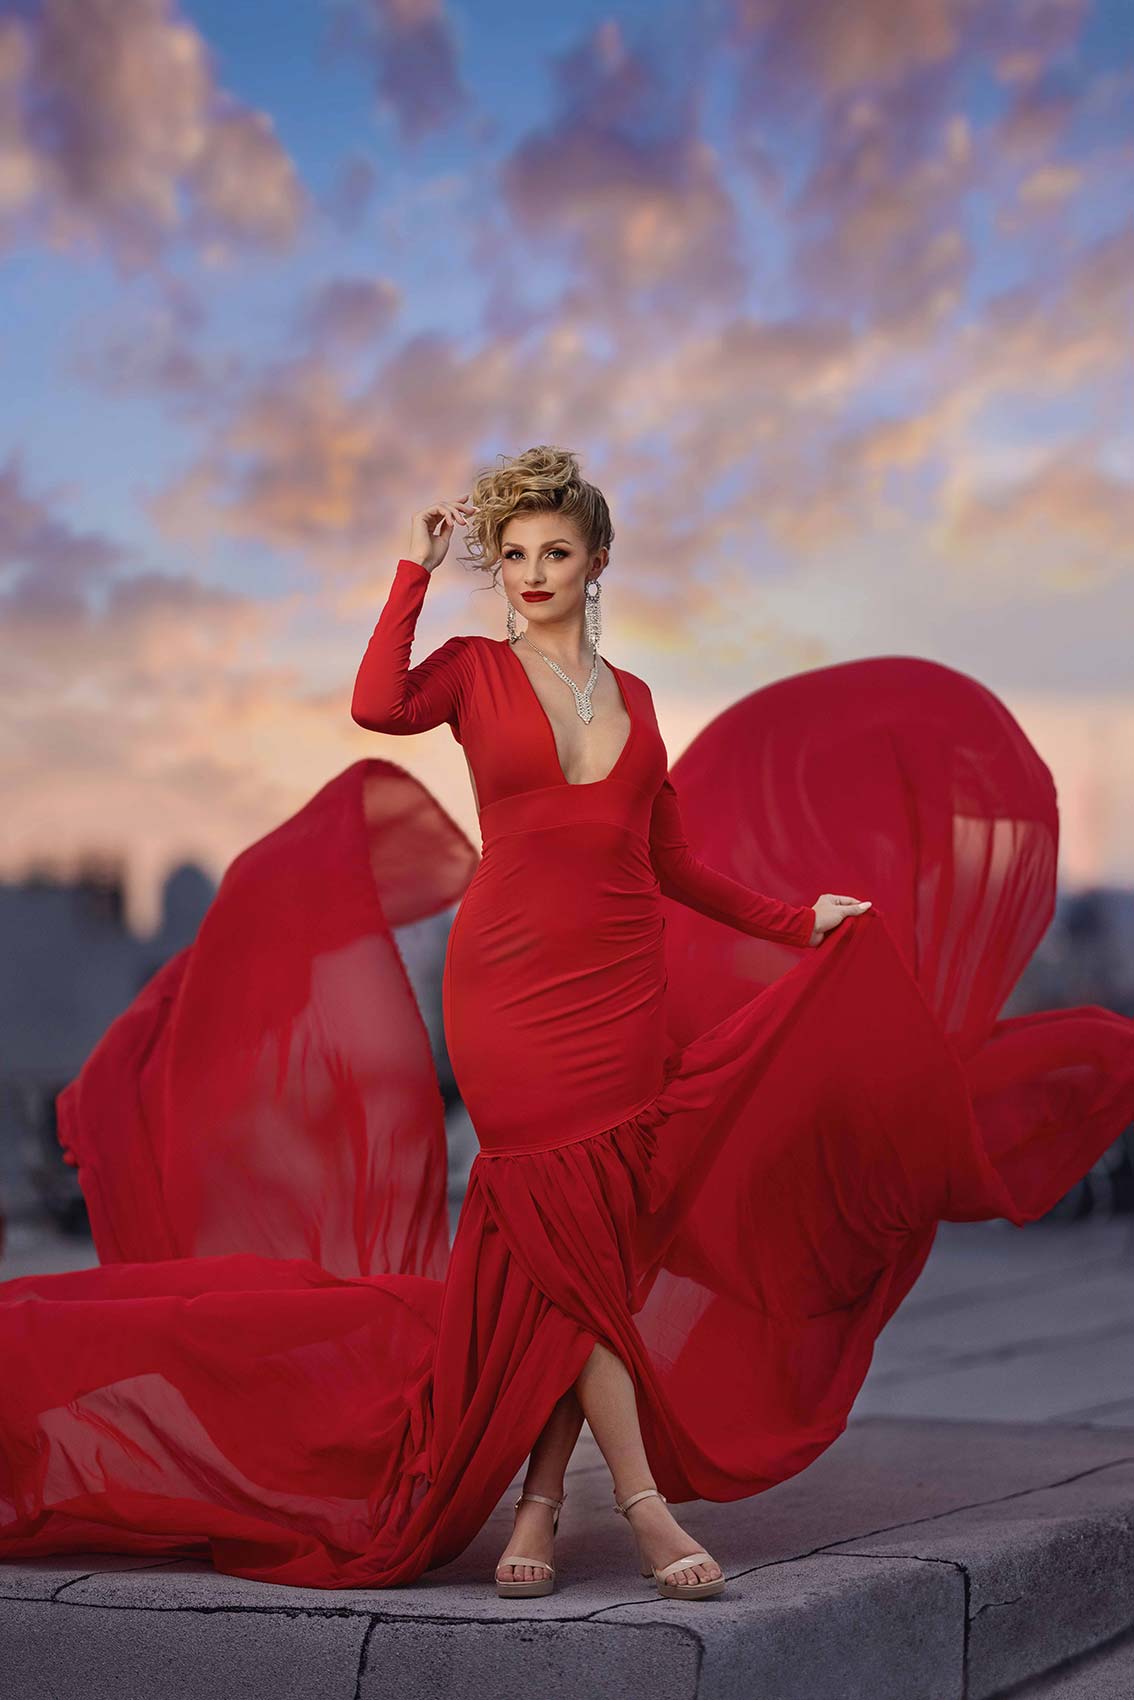
All right, this is the last scene. We’re on a rooftop in Brooklyn doing some fashion portraits. For this second shot, I want to make sure we capture the background, including the skyscrapers and the New York City skyline. I recommend setting the aperture to around f/6.0 to f/8.0 and using a long lens to compress the scene. We’ll use a gold reflector to enhance the lighting. I want to preserve as much of that background detail as possible. While we can always blur it out in post-production, we can’t recover the detail that’s not captured.
Settings: f/1.2 @ 1/2000, ISO 400
Settings: f/6.3 @ 1/400, ISO 400
All right, everybody, that’s a wrap! I hope you enjoyed the video and learned something from it. Which shot was your favorite? We captured so many creative images up here on this rooftop and with our lighting setups. I can’t emphasize enough how important continuous light is for this kind of work. We used the Nanlite Forza 60s (60B and 60C) and PavoTubes (30X and 6C) for lighting, and continuous light proved to be invaluable. If you’re a flash photographer, you might be wondering how you would have set up these shots with a flash lighting system. While it’s possible, you can’t move as quickly as we did tonight. I know you’re watching this on playback, but we had less than 10 minutes as the sun was setting to create some of these incredible images.
So again, hopefully you enjoyed this, learned a little something in the process. Let us know down in the comments which one was your favorite image, and I’ll see you in the next video.


