
Ready for some of the easiest beauty editing on the market using AI? In this photography editing tutorial I show you how I use Evoto AI to edit my photos from a recent photoshoot.
New users can get extra 30 free credits and returning users can get 5 free credits when you using this link for Evoto AI.
All right everybody, welcome back. Today we’re going to take a little detour. Instead of doing photoshoots, it’s time to edit some of those pictures that we’ve photographed. You all know the pain points. As my fellow photographers, we’ve got all these images and we have to sit down and start editing them, retouching them, and there’s always a reason why and we always move on to the next latest and greatest. So today we’re going to work through three images. We’ve got some really cool images here. Let me show you these. And so these are all from recent shoots that I’ve done. This one was from Nanlite. We had a workshop up in New York City and these came out great. And these are all straight out of camera. So these are kind of what you see is what you get.
The only thing in full transparency, I straightened this image, it was a little cockeyed, but these are straight out of camera, no retouching, no editing. So you can see the imperfections here, which is normal. You’re going to have that. Everybody’s got blemishes on their face, but we’ve got to clean them up. And I think that’s part of both the pain point of being a photographer and the realities of being a photographer is you cannot deliver typically straight out of camera to your clients. You’re not going to post that online, right? Today’s client are very used to filtering. Now how much you filter, how little do you filter? Well, we can have a very spirited debate on what’s too much and what’s not enough. And so always, I always say season to taste. So you do you, I’m going to show you how I’m going to edit these three, what I think are very beautiful images, even straight out of camera. But we want to clean up those blemishes and imperfections.
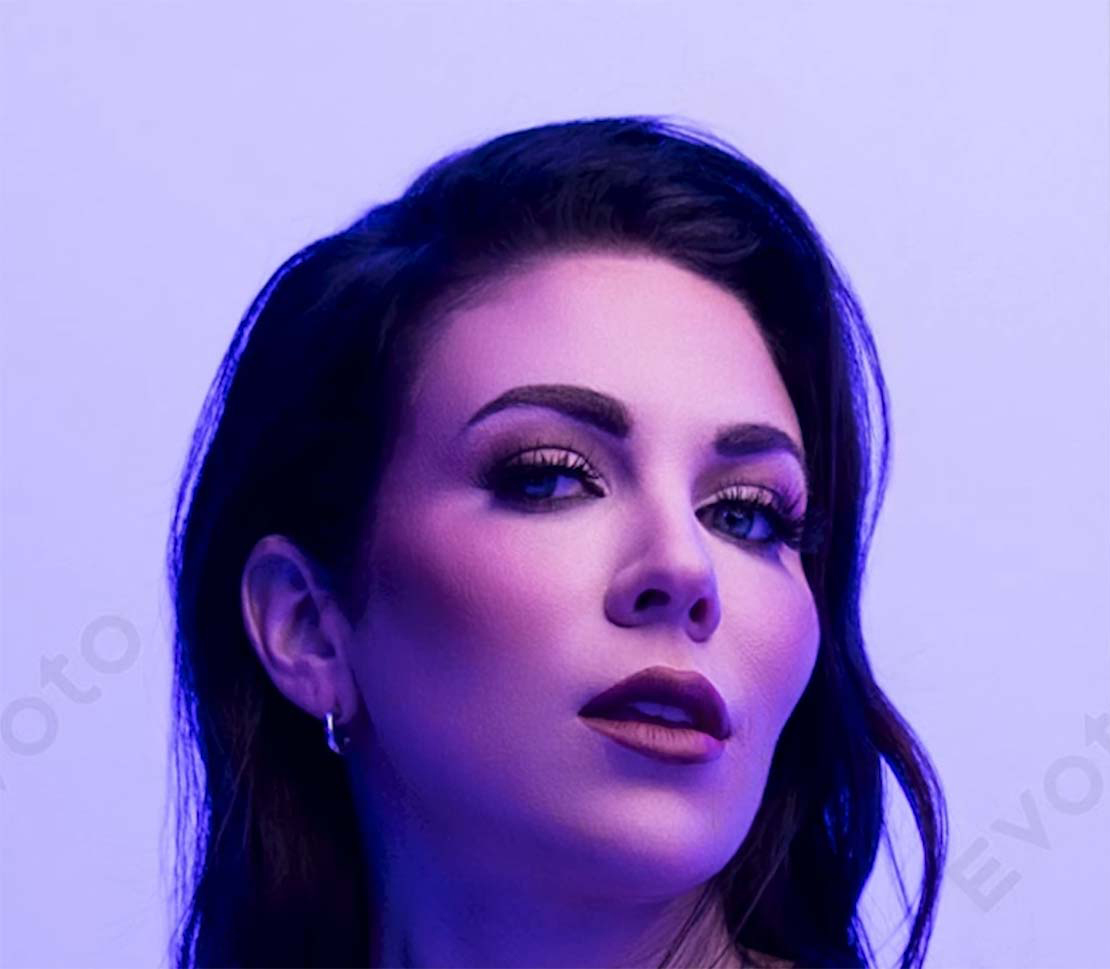
So for this tool, I’m using Evoto. We are using the most current version as of the recording, it’s 3.50 and they’ve added some new features, one of which is called Remove Armpit Fat. And I love it, because as much as it sounds politically incorrect, it is what it’s called, armpit fat. We’ll use that a little bit here today. So first image up, bright, tonal, everything. I went with this warm tone. There’s actually a video we filmed on creating this kind of warm light feel, but absolutely beautiful. Alana is stunning. She killed this photo shoot.
Before Image
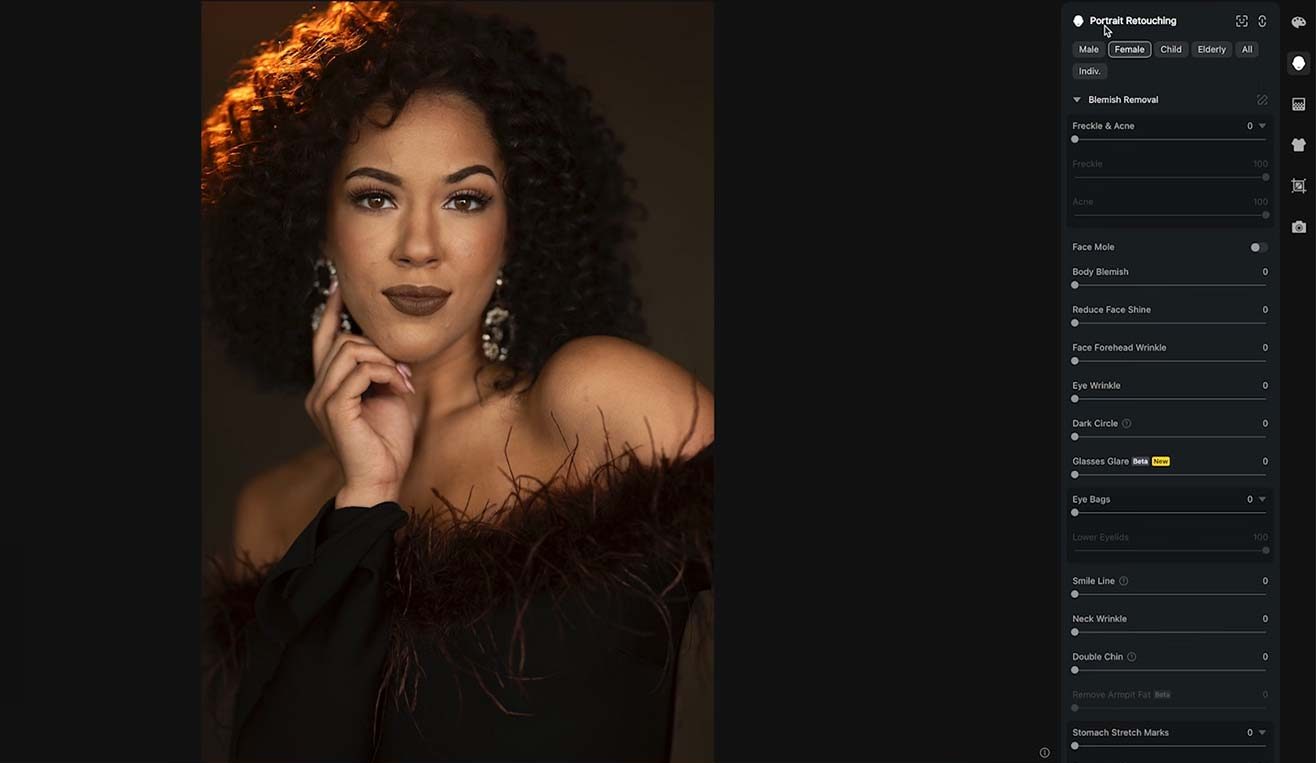
How do we perfect this here? So I love working with Evoto. It’s a very quick, easy tool. It’s AI of course. So everything you do when you’re using AI versus maybe hiring an editor to do something like this is global in nature. It’s going to tend to operate that way.
If you want it to be more laser precision, AI will get better and better. But that’s where you’re going to have to go into Photoshop and do things in a much more granular way. But for quick, easy editing, I don’t think there’s anything better than this. So first thing we want to do is I always crank up freckle acne to 100%. You can already see if we just do the freckle acne, I mean almost immediately the image is better. Now I will apply some skin softening, but almost every single image, I’m 100% on freckle acne. Perfect. We still have skin detail, skin pore, all that other good stuff. Now, something else we don’t have a whole lot of her body showing, but I think your body blemish, you should also, she had a little, just probably just a blemish on her shoulder. You want to get rid of that too. Everything should match, right? I think that just makes sense.
Freckle & Acne Feature
She doesn’t have a whole lot of face shine. So I just kind of go through this slowly but surely. Eye bags, no real change there because she doesn’t really have eye bags, right? Smile line, neck wrinkle. There is a little wrinkle right there. Let’s see how this does here. No double chin, no stomach stretch marks. Now, here’s where you can get a little bit cray-cray when you’re doing this, right? So we can go dodge and burn and that’s really good, cranked up. Now here’s where it’s seasoned to taste, and you can overdo it. If we zoom in, it is really given a very refined approach to retouching. So here’s what I like doing. I like going to about 50 on this. Also do 50 on the body skin smoothing. So if we have none, the problem is if you have none on the body and you have it on the face, they don’t match up. So you want to get that to at least be close.
100% vs 50% smoothing
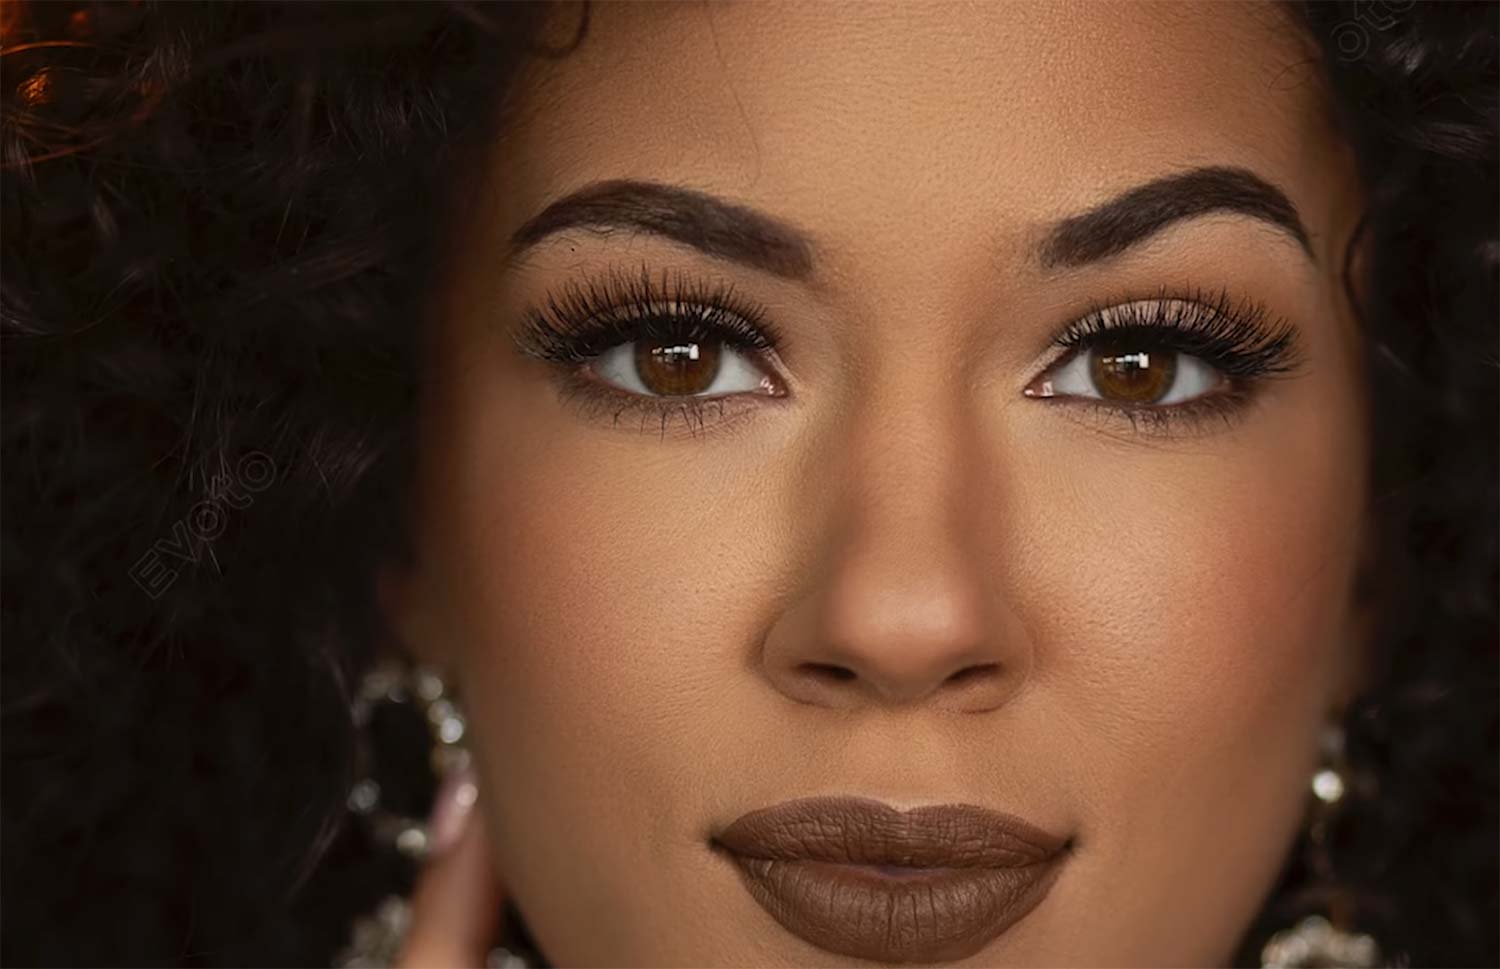
Here’s where we can add some texture here. So now we can add some texture to the face, maybe a little bit of clarity, and that’s going to bring back some of that texture so that it doesn’t look plasticky, right? So we’re seeing here, we still see all that pore detail. To me, that’s good. Look at her forehead, plenty of pore detail. I like the way that’s looking.
Pore Detail
So now we’ll keep going down here. Everything else, I mean you could see how quickly and easily you can get through this, right? I love this almond-shaped face. You can get in here and add to that. Not that I would do it. I promise you we’ve seen people on Instagram, Instagram influencers, and they are out of control with some of this stuff.
But if you want to mess with some of this stuff, and this is where AI to me is outperforming Photoshop, and maybe Photoshop will catch up at some point, but it’s just not there right now. So it can make the face longer, the face shorter, all sorts of facial details. I don’t really think we need much here. You could see how this starts becoming a bit addicting and obsessive. All tools are like this. Eyes, I like increasing the brightness of the eyes and then the iris flare there. I really love the way that looks. We’ve got some hair controls. I’ll show you on another image.
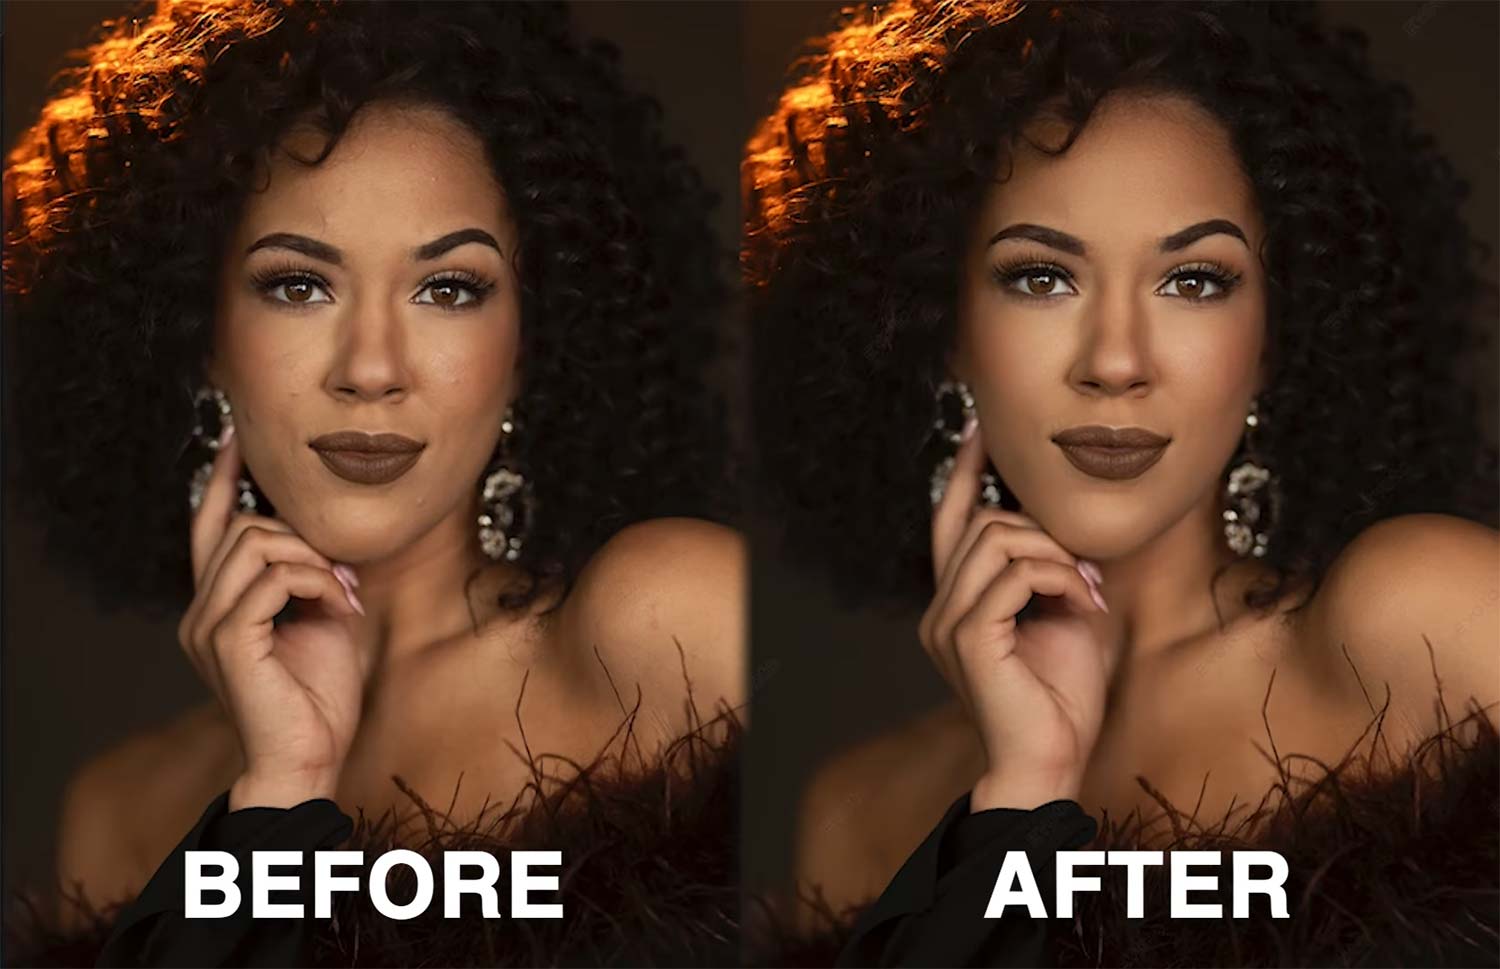
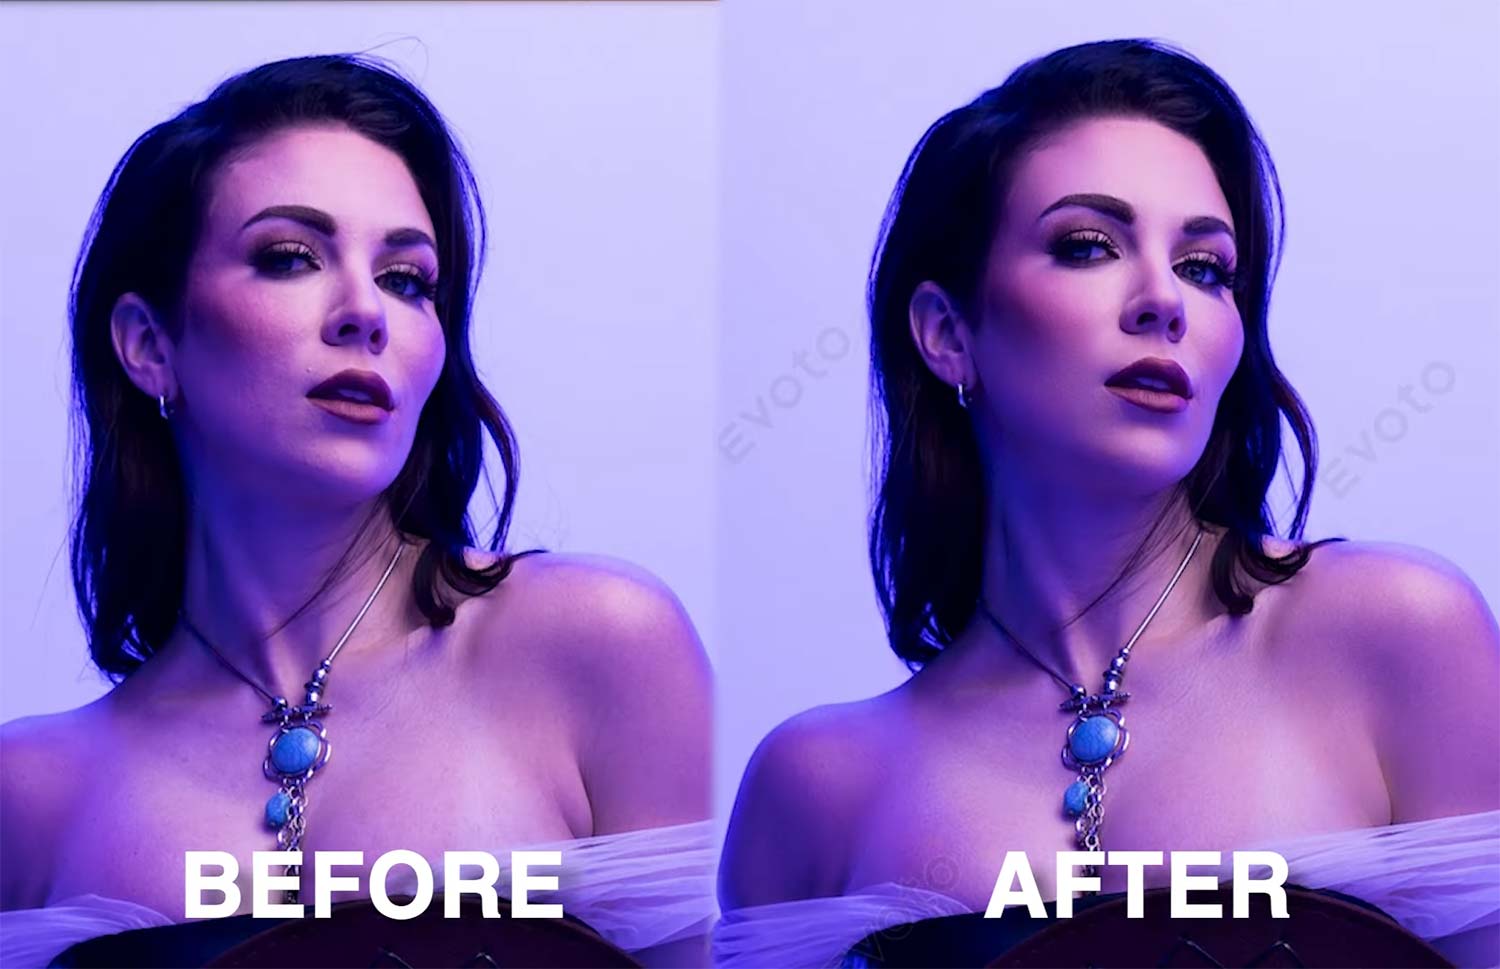
Also makeup. So we can increase highlights here. See that? I really like that. Contouring, I like that. Now right down here, you hit this button and you can really see the before and after. I mean it’s just beautiful. Honestly, you’re finalizing this image. Come down here, I don’t think we really need anything else. I think it’s just an overall stunning image right here. So here’s your final, here’s your before, after, right? It’s just a fully polished image.
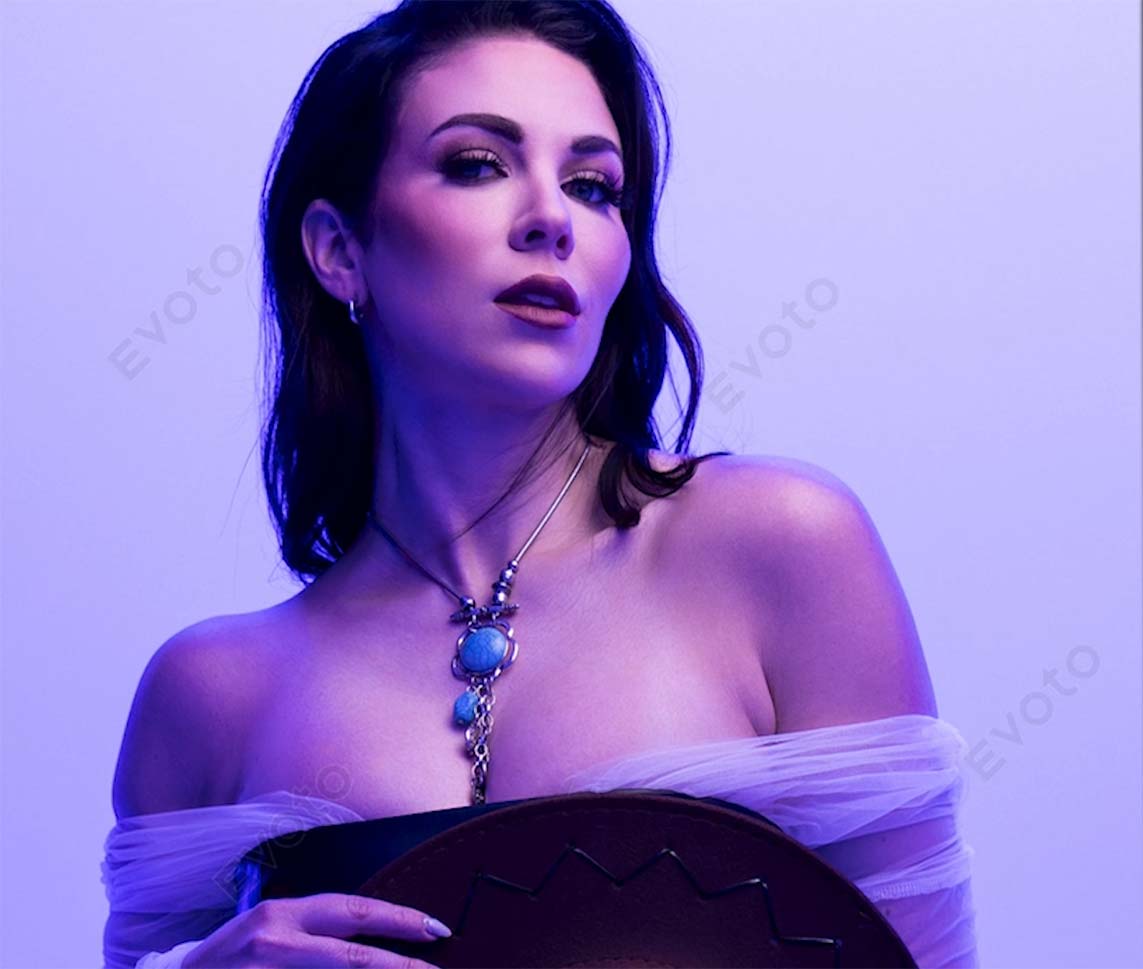
So maybe you like it, maybe you don’t. You let me know in the comments. Now let’s come back here. We’ll do one from Lauren. It’s more of a full body shot. And so we’re going to do a couple of things a little bit differently here. Now this is interesting and I’ll show you because we’ll sync settings, but we’re going to do the same thing.
Before Image
Face acne, 100%. Let me zoom in here a little bit more. Everything looks great. Body blemish, we’ll do the same kind of thing, all right, if we go to zero, there’s not much. She doesn’t really have any blemishes on her body. It just cleans that up a little bit. There’s no face shine, no eye wrinkles, no dark circles. Now here’s the remove armpit fat in beta. This is natural, right? I mean this is, all of us have this. No matter how heavy or skinny you are, I got news for you. Nobody wants it. Every client that has this, my brides, they want that removed. All right, so remove armpit fat. Watch this. I mean, love it. Okay, so didn’t remove like it looks like nothing’s there. And you could dial this back a little. There you go. That is perfect.
Before Removal
After Removal
Also here you’ll see, notice she’s got some straight hairs, so we’ve got to dial for that too. But let me get working on the skin here. So smooth face skin, we can do some dodge and burn face skin smoothing. You don’t want to overdo it. Body skin smoothing, I think needs to be the same. If we see body skin smoothing, that’s too much. You could start seeing it glow. Now we want to add some texture. Don’t want to lose that skin texture. A little bit of clarity. That’s a little too much. Now remember, this is a pulled back shot, right? So that’s what it’s going to look like. So we don’t want to overdo it. Now, the eyes are really, really dark. So that’s where I want to focus here. So we can make her eyes a little bit bigger and we’ll go here. Before we do that, let’s jump down the brightness of the eyes, right? You got to find that balance. But then that iris flare, I need those eyes popping a little bit. And if we look at before, after, now those eyes are popping, especially when you get this far back, it becomes harder to see.
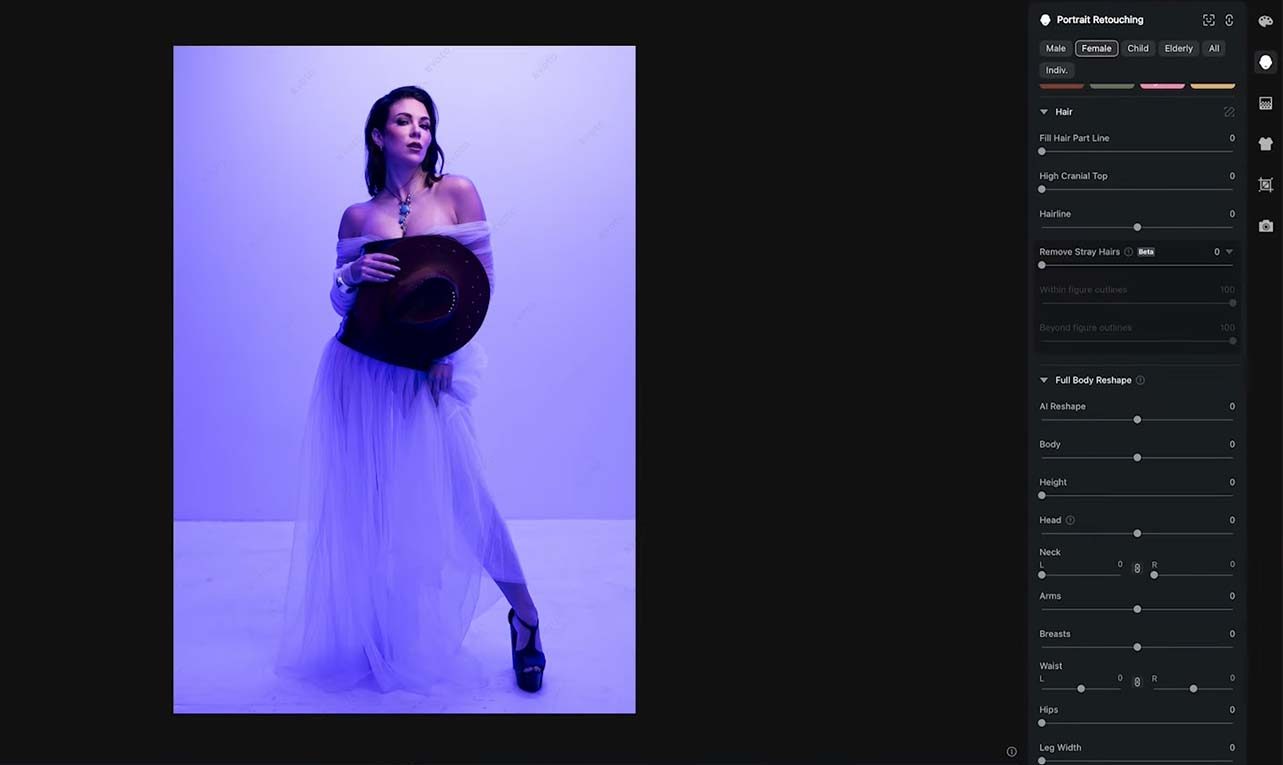
But I want to get to this hair. We’ve got eye makeup. We don’t need any of this kind of stuff, but we’ve got hair right? So check this out. This is pretty cool. Fill the hair part line. Now this is meant for when there’s a part, but it’s seeing this part of the image as having a part, and I don’t think I mind darkening that a little bit. The other part of this is making the hair look more full. Again, a lot of people like when you give the top of their hair a little more volume. So that’s how I use that here.
Hair Retouching
And I want to get rid of this stray hair. Now, one of the things I think they need to work on here, I love this tool. I use it. I think there are so many knobs and dials that it’s really difficult to find. You’re seeing me struggle going up and down. What would be better? If you’re watching, Evoto, give me a way to quickly context search here and just type in hair and then show me on the menu, just hair so that I can find it quickly versus scrolling up and down. I think that would make the tool that much more efficient to use. And to Evoto’s credit, this tool from V1 to where it is now, I mean they are investing in this big time, so it’s going to get better. But you can see me struggling in this scrolling up and down looking for this one fricking dial. There it is. Remove stray hairs under the hair toggle switch. So I should have been able to find that easier, but whatever. Got rid of that stray hair up there.
Stray Hair Removal
Now the one last thing I’m going to do to this image is Lauren, our model here in this particular picture, I think Lauren’s probably five foot two, three, four, something like that. So, I can now extend the length of her legs and just make her a little bit taller, give her a little bit more presence in the overall image to her lower body. I like it. Again, it’s one of those things where you may not use it in everything you’re editing, but for this final image, I like it. So here’s before, after.
The eyes make the biggest difference to me. All right, final image. Now we’re a little bit closer on Lauren. Now one of the things you can do here that I love, we already kind of edited Lauren’s skin and this scene and the lighting. I would never sync from this image. Doesn’t make any sense, right? Different skin, different facial structure, everything’s different. But this is of Lauren. So now I can just highlight these two images and sync them.
Now all those same edits have been done on Lauren. Now this is what I mean. And I’m sure they’ll get to it over time, right? See this that kind of see-through part of her hair. That’s real time that happened on the photo shoot. What would be nice is as we are getting hair dials, we can fill this in. So over time, I’m sure stuff like that will make its way in. But I love this image. Now the one thing, you can see what’s happening to the hat, and that’s probably because it’s trying to extend the leg length. We don’t need that happening, but before and after.
Before and After
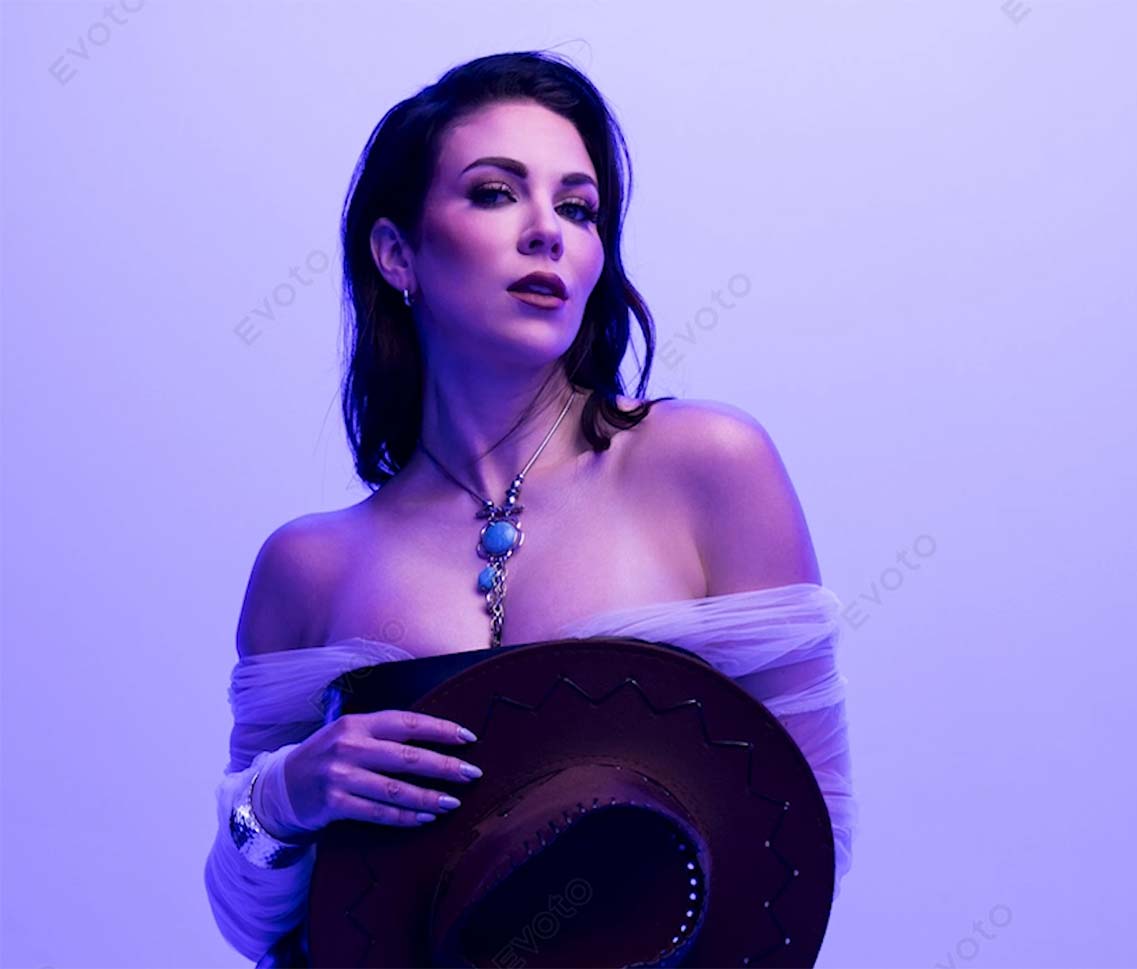
Now, same thing here, right? This shoulder thing happened because of just the dress and it’s pulling on her. That’s going to go into Photoshop if I decide to push that in. But the overall toning, we were using Nanlites lights here, beautiful image, beautiful toning to get this kind of blue feel out of it. But really, really love the way that came out.
So now my workflow, because Evoto and Lightroom don’t talk to one another. Maybe they’re not friends, they don’t like each other, don’t know why. Now what’ll end up happening is I’ve got to export this and I will put it in a folder. We’re going to export it as a JPEG. You can export it as a TIFF. There’s no real benefit to that. And then what’ll happen is I have to re-export that, or re-import that into Lightroom for my normal workflow for social media, et cetera, et cetera. So that’s kind of my normal workflow with that.
But there you have it guys, right? Quick, easy, beauty retouching. Not sure which image you like below, but these are tied to other YouTube videos that we’ve produced. So you can kind of see the behind the scenes on how we did it, but a lot of fun, quick, easy retouching here. And the beauty of all of this is, once you get one image dialed in, so maybe you’re going to spend 10 minutes on a single image. Now you sync those settings and now every image looks the same. This is incredibly important for today’s clients who want to be retouched, but don’t want to know that they were retouched, right? You know what I’m talking about? All right, hopefully you guys enjoyed it, we’ll see you in the next video.
New users can get extra 30 free credits and returning users can get 5 free credits when you using this link for Evoto AI.


