
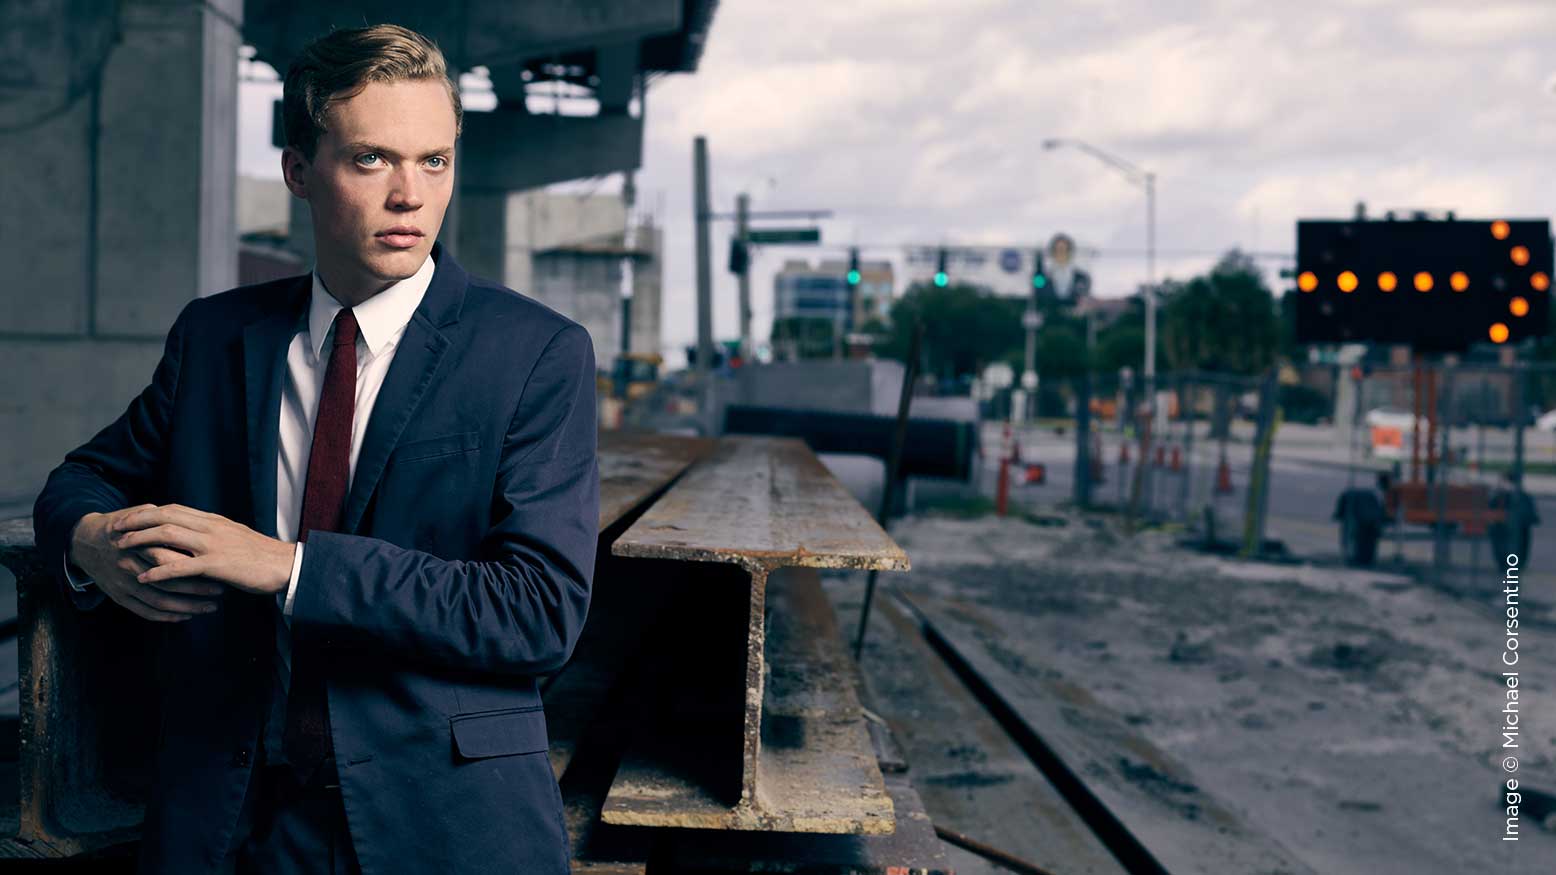
Balancing Ambient Light and Flash with Michael Corsentino
We need all the tools, techniques and creativity we can muster to tackle whatever situations we encounter when we’re crafting killer images on location. Sometimes available light and a reflector, scrim or both get the job done. Other times, Mother Nature needs a helping hand from a flash.
Get Rid of the Fear Factor
Flash can be intimidating. Fear of flash and especially flash paired with ambient light can keep people stuck shooting solely with available light. Once you understand how easy it is to balance ambient and flash, you can quickly and simply create myriad lighting effects and free yourself from the constraints of ambient conditions. The possible effects when you’re mixing ambient and flash range from very soft and natural looking all the way to edgy, more dramatic looks.
Let’s demystify flash and take away any of the fear or intimidation surrounding it so we can focus on its benefits. The easiest way to do this is to simplify the way you think about flash. I’m guessing that if it intimidates you, you probably feel overwhelmed technically. Keep it super simple—flash is just another light source, and you either need more or less of it. It really is that straightforward.
With ambient light alone, the only option at your disposal is the current lighting conditions. Ambient lighting can be anything from overcast to harsh midday sunlight. It can vary from one moment to the next without notice, impacting the flow of your shoot.
When you add flash to the ambient light, you gain control over the lighting. This is because you have two sources of light to work with. Each can be balanced separately to create virtually any look desired. With flash in the mix, you call the shots, not just Mother Nature. You can make up for shortcomings in the ambient lighting conditions, like overcast skies, harsh sun and dappled light. With a powerful enough flash, you can overpower the sun for dramatic lighting. You can create a subtle kiss of fill light to open up the shadows in an image and add sizzle. You can use the sun as a backlight and illuminate your subject in the foreground with flash. You can underexpose the ambient light to hold the detail in skies, shoot with wide apertures to lessen distracting background elements and properly expose your subject with strobe. None of these techniques can be done without using flash and ambient together. The secret sauce is learning to balance both.
Balancing ambient and flash doesn’t mean each source contributes the same amount of light. In most cases, ambient light is the dominant source providing the majority of the illumination in a scene, while flash adds additional light where needed. You may need very little light from your flash to get the job done, while other more dramatic looks call for more flash and less ambient light. Having these creative options makes incorporating flash into your ambient shoots so compelling.
Understanding Flash and Ambient Light
Learning to control the amount each of these light sources contributes to your exposures is what balancing ambient and flash is all about. Ambient and flash do different things, have different properties and are controlled in different ways, independently of one another, to produce a variety of predictable and repeatable results.
With ambient and flash lighting scenarios, ambient light is generally the dominant light source unless you’re overpowering the sun with your flash. In either case, you’ll want to set your camera’s white balance to daylight. Strobes and flash guns are daylight balanced to match ambient light; with the daylight setting, the color temperature of both light sources will match.
Ambient light contributes the illumination for the overall scene, while strobe is used to illuminate specific areas of the image and can also be used to freeze motion. When mixing flash and ambient, there are two ways to work: manual exposure mode with manual flash or TTL metering with a compatible camera and flash system.
Working Manually
Manual exposure mode is very straightforward. You simply set a desired aperture, shutter speed and flash power output. For many of the images in this article, I underexposed the ambient light to accentuate the sky and create a moody, dramatic look. This is easily done by increasing shutter speed. Follow this simple rule of thumb: Shutter speed controls the contribution of ambient light and aperture, and flash power controls the contribution of strobe light. The faster the shutter speed, the less ambient light appears in the exposure, and vise versa. That’s balancing flash and ambient.
I lock in the ambient exposure first and then turn on my flash and dial in the power required to match the ambient light, seasoning to taste as I go. If I want more ambient light in the exposure, all I need to do is use a slower shutter speed. The more ambient light, the more open and airy the image appears, and vise-versa.
If you’re working manually, a handheld flash meter is a very useful tool that can substantially speed up your workflow. Without a flash meter, you’ll spend a good deal of time repeatedly adjusting and chimping to check exposures. With a flash meter, you take a few readings and start shooting with great exposures right out of the gate. I use the Sekonic L-758 and L-858, which allow me to get precisely 20% of the light from the flash and 80% from ambient light.
Working With TTL
For a more automated method that still provides plenty of creative flexibility, use TTL flash. Compatible camera and flash systems are required for this. It’s a great option for run-and-gun shooting or situations where the distance between your subject and your lights is rapidly changing. TTL does the heavy lifting for you by performing distance calculations and communicating exposure information between the camera and strobes to determine the proper exposure and balance between flash and ambient.
TTL provides a great starting point, but if you’re like me, you’ll probably want to season to taste and make the exposure your own. This is easy to do. The same rule of thumb applies here: Shutter speed controls the contribution of ambient light and aperture, and flash power control the contribution of strobe light. The faster the shutter speed, the less ambient light appears in the exposure, and vise versa. We use flash exposure compensation to adjust flash power, typically in +/- one- to three-stop increments. Where you make this adjustment depends on the camera and flash system, but look for flash exposure compensation.
TTL is useful in many situations, but there are situations where its metering system can be fooled by surfaces with dramatically different levels of reflectivity. This is because TTL metering measures the light reflected from whatever is being photographed. This is known as a reflective meter reading. The classic example of a scenario that can trip up TTL metering is a bride in a white dress and a groom in a black tux. Highly mirrored surfaces can also be tricky. If your exposures are inconsistent, overexposed or underexposed, TTL may be to blame. There’s an easy fix: Switch to manual. This is why a handheld flash meter is such a useful tool. Its measurements are based on the light falling on what you’re photographing. This is known as an incident reading, and it’s always consistent and reliable, never fooled.
High-Speed Sync
One of the other major benefits of working with TTL is high-speed sync. This is a game changer, allowing photographers to use flash in conjunction with very fast shutter speeds up to 1/8,000th of a second. Without high-speed sync shutter speeds above your camera’s top flash sync speed, images will be only partially exposed. This is because the flash and shutter curtain are out of sync. High-speed sync changes all that. With higher shutter speeds, your control over ambient light and the latitude you have to reduce or knock it down is greatly enhanced. This is essential to balancing ambient and flash in bright ambient conditions and with wider apertures, useful for controlling depth of field. You remove distracting background elements and focus on the subject matter in the foreground, which is perfect for portraits.


