
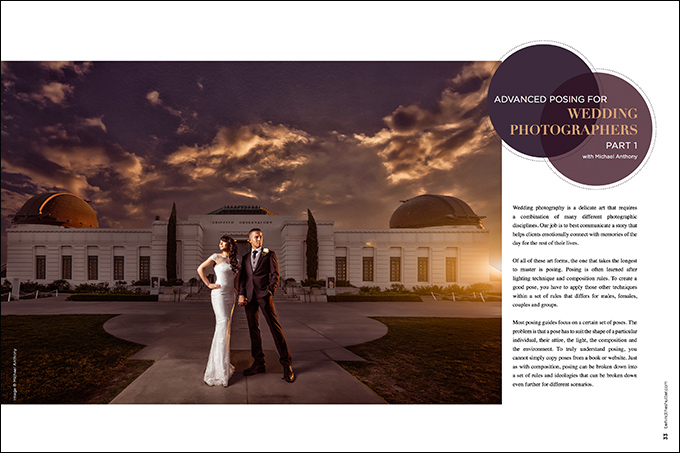
Advanced Posing for Wedding Photographers Part One with Michael Anthony
Wedding photography is a delicate art that requires a combination of many different photographic disciplines. Our job is to best communicate a story that helps clients emotionally connect with memories of the day for the rest of their lives.
Of all of these art forms, the one that takes the longest to master is posing. Posing is often learned after lighting technique and composition rules. To create a good pose, you have to apply those other techniques within a set of rules that differs for males, females, couples and groups.
Most posing guides focus on a certain set of poses. The problem is that a pose has to suit the shape of a particular individual, their attire, the light, the composition and the environment. To truly understand posing, you cannot simply copy poses from a book or website. Just as with composition, posing can be broken down into a set of rules and ideologies that can be broken down even further for different scenarios.
First rule of posing: Posing is about communication
If you take nothing else from this article, understand that posing is first and foremost about communicating with a viewer. Something as simple as an expression can change the communication of a photograph to the viewer from happy to sad. While it may sound cliché, to truly understand how posing is about communication, think about how filmmakers use music to influence viewers’ emotion in a sequence. The same rules apply to a pose. When you change a few elements in a photograph, you can change the communication of an image completely.
In the rest of this multipart article, I am going to show you some of the rules and ideologies that will allow you to communicate with the viewers of your images. As an artist, the pose is your strongest element in creating a complete image.
Posing the female form
Every wedding photographer starts here since weddings focus heavily on bridal photography. The concepts we will talk about, though, are most certainly applicable to all aspects of photographing women. We will break down a pose piece by piece so that you are able to learn how to approach posing one step at a time. Before you begin arranging your subject, there are a couple of things you need to consider.
Direction of the light
It is important to understand fully what direction your light source is coming from. Even when photographing in open shade, you will have a direction of light that will be apparent in your images. It’s up to you to discover that direction of light, and place your subject so that the light complements the subject and the pose. Keep in mind the type of light you are working with so that you know how to use it (a hard light source such as the sun won’t always be the most flattering light to place on a subject’s face, for example). You can modify the light with tools such as reflectors and off-camera flash to get the look of your choice.
Background and composition
These elements are extremely important. We want to minimize distractions in your image. Your pose needs to suit the mood of the image. For instance, if I am taking a photo of a dramatic scene slightly underexposed with off-camera flash, I am not going to have the couple smiling into the camera, or off into a light source. The scene will not match and not communicate my story effectively.
With women, the goal is to emphasize curves and shape
As we begin our foundation for a good pose, we have to understand that the goal of posing women is to emphasize their S-curve. Every time we position a woman into a pose, the ultimate goal is to further exaggerate her natural shape. You can see how this ties directly into composition, and we will use light to place further emphasis on her curves.
Start by turning the body away from the source of light
To start, we will almost always turn the body away from the source of the light. While you may have heard this technique before, let me break down why we do this.
By placing the body away from the light, we are using shadow to carve shape into the body. The light falling on her gives texture to her attire, but, most importantly, leaves the short side of her body in light and the broad side in shadow. So as the light falls across her, we get dimension in her body and curves, and make her look thinner at the same time. Use this technique for all body types; the dimension it creates allows for further emphasis of her curves.
Next, focus on the lower half by shifting weight
I always start the basic foundation of a pose the same way. I have the subject point a toe toward the camera, and then shift her weight to one leg.
Remember, posing is about communication. Shifting the weight in her hip away from the camera causes her backside to appear smaller. We use this technique when photographing the majority of our clients, but when posing boudoir, fitness modeling or other types of intimate portraiture, we often shift weight into the camera to create a stronger curve or place more emphasis on a particular area of the body.
To increase the hourglass shape of our client, we can turn her front knee over the back knee, which adds curves to the hips and helps accentuate the most flattering parts of her.
Spine
Correct posing of the spine is essential for a solid foundation pose. The lumbar spine on a female should almost always be arched to further showcase her natural curve and make the chest fuller. I often instruct women to bring their shoulder blades together, which makes the chest appear more full. After they arch their spine, I ask them to take a breath. This helps push the natural arch in her back even further while placing the spine into the best possible position.
Arms and hands
Arms and hands can be hard to pose. In wedding photography, we often get lucky with this because our brides have a bouquet, dress, or veil to work with.
The first rule to understand when posing arms and hands is that they should never be hanging flat next to the body.
The second rule is that generally you want to leave space between the elbows and the waist if the arms are posed close to the side. Doing so shows the subject’s waist, eliminating the boxy look that happens when that area is covered by the arms.
With most female hands, we want an elegant and dainty appearance. Of course, these are general rules that may be broken once you understand them.
Ask your subject to turn the wrist upward and relax her middle, ring and pinkie fingers, while keeping slight tension in the index finger. You should get a look similar to that below.
The goal in posing the hands is to complement the overall pose and surroundings.
For a shortcut, all you have to do is give them something to do. Have them hold onto something. This is often necessary to add context to a composition. A bride may hold her veil or bouquet, or the lapel on the groom’s jacket.
For women, generally we want to see the side of the hand. When you have the back of the hand to the camera, you are projecting a more masculine appearance. When you pose the palm of the hand toward the camera, you are projecting a powerful and almost aggressive message to the viewer.
Use the arms and hands to create compositional elements such as triangles or leading lines. The arms can be used to bring the attention of the viewer ultimately where it needs to go, which is usually the faces.
Posing the face and expression
Next to the hands, this can be one of the hardest elements to master. The goal of all posing is to communicate intention, and the face of your subject can be one of the most crucial elements in accomplishing this.
In foundation posing, turn your subject’s face back toward the light, which casts the light onto the short side of the face. Short side light almost always looks best on a female. Just be careful not to cast too much of a shadow on the short side; using a reflector can help to fill the shadows. Here is an example of short side light versus broad side light.
Posing the eyes
For women, we often like the eyes to appear larger. If you have your subject lean into the camera when posing the hips and legs, you may be shooting slightly down on them. If you have them tilt the chin down, the eyes appear larger. If they tilt their head slightly up, the eyes appear smaller.
When you have a subject tilt her head down or to the side, make sure the tip of her nose does not pass her lips or cheekbone, which makes the nose appear larger.
The white part of the eye is called the sclera. We don’t want to see more sclera on one side or the other of the eye. When she’s turning her head a particular way, ask her to keep her eyes centered over her nose if you are seeing too much of the sclera.
Finally, we want to see light in the eyes. This is something we often forget. Make sure that both eyes are well lit, and that you are getting a good triangle of light on a subject’s face.
Posing the expression
When posing the expression of a subject, you are able to influence the communication of your photograph. By just asking a subject to smile, you get cheese. In order to get genuine expression out of clients, you have to inject emotion into your story. Laughter can often be the best medicine, but be careful when cracking jokes so you don’t capture an unflattering image. I will ask a subject to fake a laugh. They look at me like I am crazy, but when I insist they do it, the real laugh that follows the fake one always gives us a great expression.
If you are looking to create an expression that is more alluring or emotional, ask the subject to breathe through her lips, which will cause natural separation between the lips and create a distinct look that blends well with a more edgy or dramatic portrait.
There are many different methods and ideologies about posing. These are all general rules. In order to create aesthetically pleasing poses, you have to understand the foundations. If your images are not looking the way you want, it is likely because you are missing some foundational elements of posing and lighting.
In the next two articles, we will look at posing basics for men and couples.


