6 Essential Lighting Tips For Wedding & Event Photography with Kesha Lambert
As a wedding photographer, I often work weddings with large guest counts and wedding parties north of 20 people, at venues throughout the New York City Tri-State area. One of the very first things that I observed on this journey was that lighting for weddings and events presents a unique set of challenges.
Wedding and event photographers encounter a broad spectrum of lighting situations all within a single day. The soft diffused light of a windowed bridal suite, the hard shadowy light of a midday outdoor ceremony, the dark warm hues of a speakeasy room during cocktail hour, the ambient uplighting in a reception space, and strobing colorful DJ lights on the dance floor. Cityscape night portrait and wedding photographers need to know how to light it all.
I have had the honor of photographing hundreds of weddings across the globe, and along the way learned invaluable lessons about how to approach and prepare for event lighting. Take the pressure out of the fast-paced and ever-changing lighting conditions of the wedding day with these six tips.
1. Perfect Bounce Flash First
One of the best foundations for event lighting is understanding how to perfect bounce flash techniques. This is the part where you learn about flash power and direction of light. You can produce beautiful directional light based on the position and power of your on-camera flash and the surfaces you use to bounce the light. Ultimately taking your light off camera will open up a world of possibilities. Perfecting your knowledge and skill with on-camera lighting is your starting point and foundation.
2. Bring Your Bag of Tricks
Events typically flow through different spaces within the same day, so preparation is key to a favorable outcome. On a wedding day, we may start outdoors, then move to a separate offsite shaded park for formal portraits, then finally to an indoor reception space. These shifts and changes in the environment often mean switching up approach and lighting setup, sometimes on the spot and in the moment. One of the worst feelings for an event photographer is seeing something amazing in the moment that you want to make and not having the tools you need to execute your idea. Wishing that you “brought a <fill in the blank>” (aka gear regrets) are completely avoidable. Just bring your bag of tricks; bring all of the things that you might need or artistically want to use even if you ultimately don’t use them. Have them on hand just in case.
Here is a list of some of the things I may have packed and accessible on the wedding day:
- Steel wool
- Strobes: Profoto B10 and A1
- Continuous lights: Stella Pro Lights CLX10 and 2000
- Monopods and tripods
- 7-foot white umbrella and diffusion sock
- 3-in-1 reflector
- Magmod modifiers
- Gels
- Grids
- Barn doors
- 12-foot light stands
- Transmitters
- Tree lights
- Atmosphere aerosol
- 6-foot or 7-foot umbrellas
- Softboxes
3. Multiple Lights = Less Missed Moments
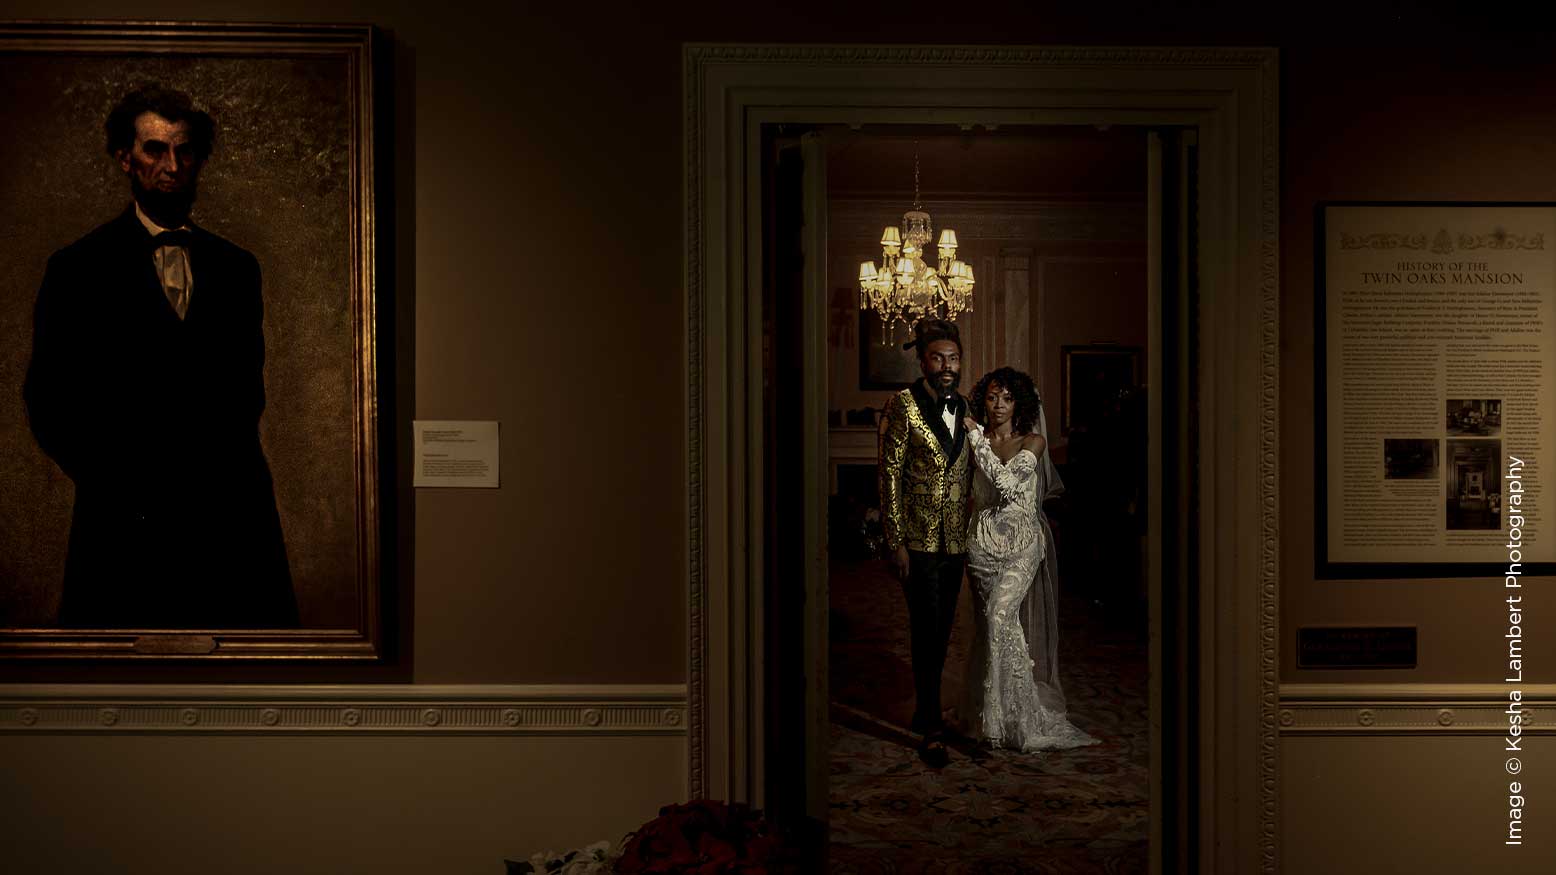
With the fast-moving parts of a wedding day, the simplicity, efficiency, and ease of working with one light is a lure. I am a found light enthusiast and love to find ways to make dynamic images by pairing the light that I find in the environment with one on-camera or off-camera light. My love of the one-light setup notwithstanding, there are instances where the use of multiple lights becomes necessary. For challenging event spaces, like spaces with dark walls or cathedral ceilings, setting up multiple strategically placed lights throughout the space is a great solution. Most importantly, the use of a multi-light set up in an event space allows you, the photographer, to follow the moment and be confident that you are fully prepared to capture and beautifully light the magic, wherever and whenever it unfolds. When deciding where to place off-camera lighting, I narrow it down to the areas where the action is most likely to happen. This means lighting the dance floor and sweetheart tables, and also the parent tables and tables where the most emotional or lively guests are seated.
4. Don’t Create an Eyesore
When a couple has poured a lot of preparation into the look and vibe of their wedding space, the last thing I want to do is set up gear that poses an eyesore. The goal is to light the space without an imposing setup. So leave the large umbrellas and softboxes in the car. Use small, unobtrusive modifiers when setting up off-camera lights; this becomes even more important when using multiple lights. I love to use modifiers like the MagSphere and the MagBeam because they are small and lightweight.
5. Turn Boring Into Bold With Gels
When working in an event space that is drab or unkempt, light is a tool that can be used to transform the look of the space. We commonly use gels to balance our subject with the color temperature in the environment. Use a CTB gel to cool skin tones in a warm environment. Gels can also be used to change the color temperature of your image. Use a full CTO gel and adjust your white balance under 3300k for bold environmental blues and natural warm tones for your subject.
6. Have a Lighting Assistant
Working with a lighting assistant means having an easily moveable light source that can be positioned anywhere in the event space at a moment’s notice. A great lighting assistant is intuitive, attentive, and understands where they need to be and how the light should be placed in relation to the photographer and what the photographer is capturing. This role is teachable and moldable, and when the assistant understands the photographer’s personal approach to event lighting, the outcome is smooth and seamless event coverage. For this reason, it is important to keep your rotation of lighting assistants small. While it’s inevitable your lighting assistant will eventually outgrow the role, avoid relying on the lighting assistant open call and invest time and energy in maintaining consistent relationships. Every photographer should have a lighting assistant circle of trust.
Take a Risk, Experiment, and Play
With weddings in particular, some rituals repeat across all weddings. It is so easy to slide into creative autopilot doing the safe thing. So after your safe shots have been squared away, remember to spend some time pushing the envelope. If there is a lighting technique that you’ve been testing or something that you’ve always wanted to try, take a moment to do just that.

