10 Tips to Revitalize Your Workflow This Wedding Season in Lightroom Classic with Dustin Lucas
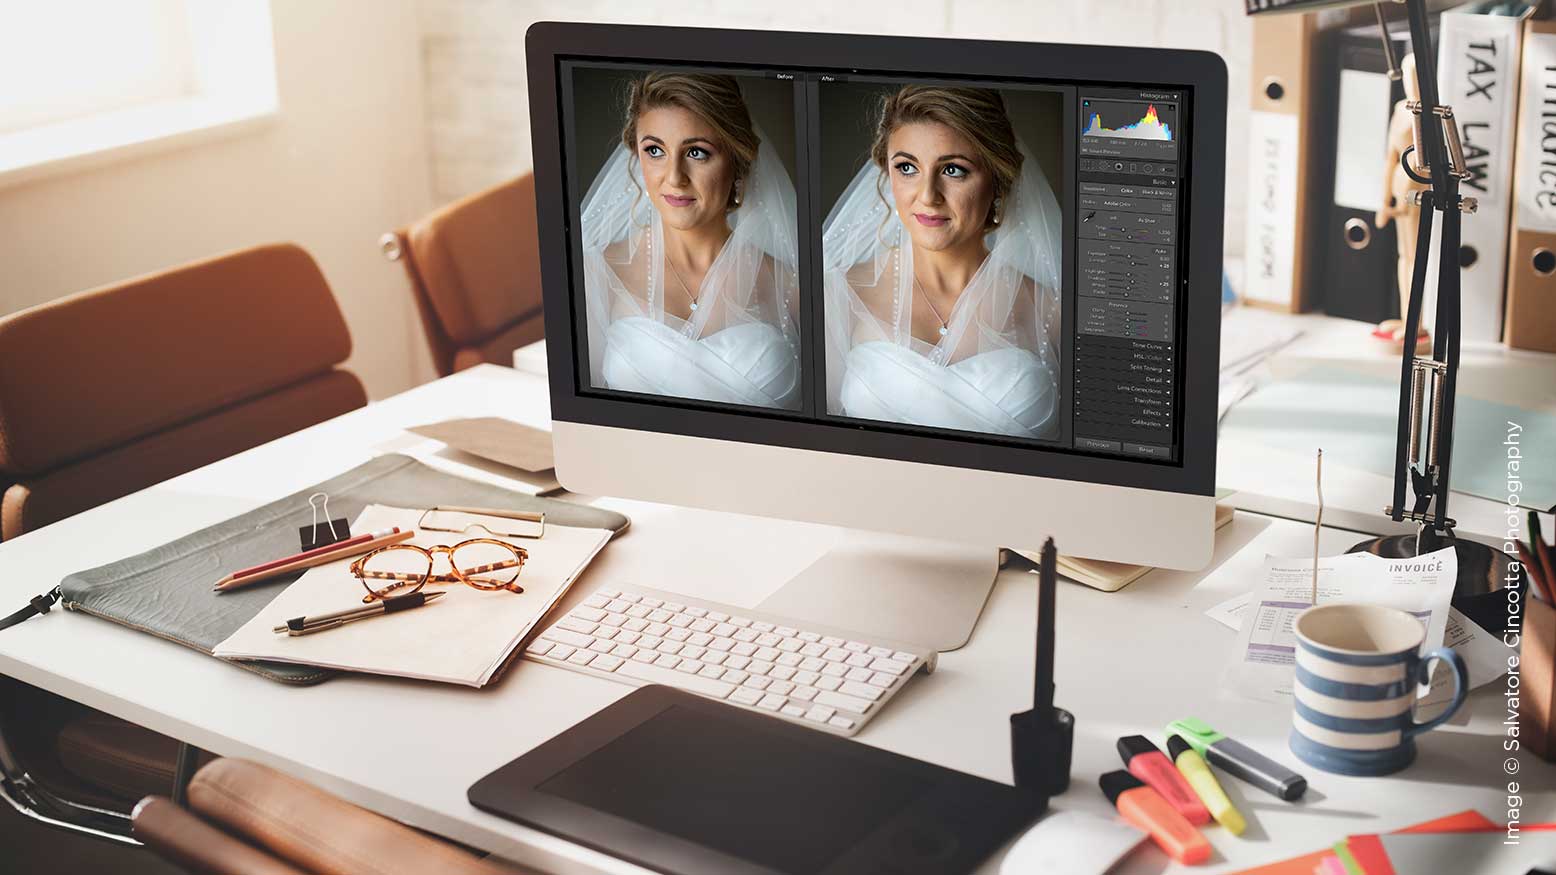
If you aren’t already feeling the heat of wedding season, it’s time to wake up and get ready! Before you know it, you’ll be up all night editing in October, wondering why all the issues you had last year are now hitting you in the face. There’s no better time than now to revitalize your workflow and prepare for the worst, because it’s coming. If you aren’t using Lightroom to battle your wedding volume and deadlines, this is the time to jump ship. You can learn this program quite quickly, and with these tips you can build a foundation around a sound workflow.
Once you wrap up your wedding and start your post-shoot ritual of some wine, some crying and a little sleep, it’s time to get on the computer and get to work.
It starts with importing from your memory card(s). Luckily, you can do everything in one place. I recommend one catalog for your 2019 work to keep everything organized. Don’t worry about speed, because we’re building Smart Previews, and this is just a catalog for archiving completed work, so we’ll get into that later.
Setting performance-based preferences is essential, as well as prepping previews for culling. When culling images in Lightroom it helps to remove visual distractions and go completely lights-out. Then we can custom sort and fix the capture time sync. If you aren’t using Develop presets, the time is now! Presets aren’t the end-all, be-all solution—you have to adjust the sliders per image, and it helps to shoot in manual mode. Three-step editing involves making samples, using the Match Total Exposure tool, and syncing your Develop settings to sequences of images for that consistent look and feel.
Moving on to the more attention-to-details aspect of Lightroom, I use Target Adjustment Tools for Color. Photoshop is required on some images you’ll want to show off creatively, and the “Edit In” feature makes this seamless to toggle between. Cropping and straightening can be tedious, of course, so it helps to shoot straight in camera.
Fortunately, have a quick and painless way to fly through your images. And last but not least is exporting the easy way, using presets! OK, enough talking about it—let’s dive into our 4,000+-image wedding.
Tip #1: Ingest, Import and Build Smart Previews in Lightroom
First things first, you need to create a 2019 Master Lightroom catalog to import into. I recommend starting in a single catalog for archiving closed sessions, and then working in individual ones for open clients. This will make more sense later. Once you have Lightroom open, go to the import module to ingest raw files from your memory cards into the program. Now, many of you might be importing from multiple memory cards and get annoyed to have to repeat this process with each card. Well, there is a trick to selecting multiple cards at once if you have a multi-card reader. Instead of selecting one card at a time under Devices, expand each card under Files and be sure to check the Include Subfolders option at the top. Boom, now you can import all your images at once.
Doing this requires setting a backup and destination location as well as a folder-naming structure. I recommend creating these folders outside Lightroom so the folder names can be identical for the backup and destination drives. This is important for when you end up needing to relink files due to hard-drive failure. Renaming your files is especially key if you are importing duplicate file names from different cards, so you can keep things organized from the start. It helps to set this up in camera with file naming and syncing capture time to avoid extra work in your post-production process.
Moving on to setting previews at import can be a tricky decision. Here is what I recommend: set Build Previews to Minimal, and check the Build Smart Previews box. I want the copying, importing and building of previews to be as fast as possible. I don’t want to wait 12 hours for 1:1 previews to build, despite them being recommended by many. This workflow is simple: Import into a master catalog for archiving, and export individual catalogs to work in.
Tip #2: Export a New Catalog, Set Preferences, and Build Standard Previews before You Cull
Now that the files are imported and Smart Previews are built, we can export these files as a new catalog. The best place for the catalogs to be loaded is on your local hard drive, while you keep your raw files on external drives. To do this, select all files in Library/Grid mode, go to the top menu bar, and click File > Export as catalog. The Save As name should be the event date/name. Then, make a folder on your desktop called “2019_Working” and select this folder as the destination. Next, and most importantly, only check the Build/Include Smart Previews option to ensure you package all the necessary files for culling. Once you click Export Catalog, this process is quite quick to finish, since we built the Smart Previews at import.
Next, we need to open the newly exported catalog, disconnect the raw files and set preferences. To disconnect your raw files, you can either eject your external hard drive or simply update the folder location. To update the folder location in Lightroom, you must be in Library. You can then drop down the Folders panel on the left side, right click on the listed folder, and choose Update Folder Location. From the pop-up box, select the desktop and click Choose to quickly disconnect the raw files from the catalog. You will know this was done effectively once all the images populate under the histogram, showing Smart Previews only. Now, let’s check out our Lightroom & Catalog Preferences.
In general preferences, we can go to the Performance tab and copy the settings shown here. Then click the Go to Catalog Settings button and go to the File Handling tab. When culling, it is important to think about how often you’ll be zooming into 1:1 or 100%. If this is important to you, then skip this altogether and build 1:1 previews from the start (and be ready to wait a long time to start working). That’s not what I want to do, so instead, let’s choose the setting shown here for a fast rendering. In Library, select all files and go to the top menu bar to choose Library > Previews > Build Standard-Sized Previews. This process is quick and will save you time when you start culling image by image.
Prepping in this manner is essential to saving time when working in Lightroom.
Tip #3: Lights Out Culling
Finally, it’s time to cull out the bad shots and keep the good ones. We need to be in Loupe View to see each image in full view to start. To enlarge an image without zooming in, you can hold Shift while striking the Tab key to make all the panels go away.
Now, we are ready to go into Lights Out mode. To do this, you can strike the L key twice to darken your screen. This allows us to focus on the best-of-the-best shots. Along with this tip, I recommend using the Auto Advance option—just press Caps Lock to initiate it. What this does is, when you apply an attribute like a flag, a star rating, a color label, etc., it advances to the next image automatically. This is a massive time saver when having to go through over 4,000 images, because very second counts.
A few keyboard shortcuts for applying flags are X (rejected flag), U (unflag) and P (flag). Another tip is to use the ~ key to toggle flag and unflag. Star ratings are great if you want to create a multi-layered system for selection for specific edits. These can be applied simply by striking the 1-5 number keys. The number of stars correlates to the number used. You can hit 0 to reset the star ratings. Numbers 6-9 are for color labels, which can add another dimension to sorting. Let’s move onto Custom Sorting with Tip #4.
Tip #4: Custom Sort and Sync Capture Time
Custom sorting can really help tell the story of the day when you’re using multiple cameras and not shooting at the same time. In order to change the order of your images, select all in Library and create a Collection. Once your images are in a collection, you can click and move them as you see fit. I like to start with details for the bride, getting ready, then groom details, getting ready, and then first look and the rest of the day fall into place. Hotel venue shots and rings together are a nice touch to start off with as well.
Syncing Capture Time should be done in camera at the start of the day; however, this doesn’t always happen. As a workaround, you can simply take a photo of your cell phone with the date and time showing, which makes syncing in Lightroom super simple. Without this, you have to find a unique moment like the first look or kiss at the altar between all cameras. Typically, you would want to do this before culling as well. Choose a camera for the date and time, and sync the others to it. To do this, filter to the specific serial number of a camera, select all the images, go to Library in the Metadata panel to the right, and click Change Time.
Tip #5: Presets, Presets, Presets
I cannot stress how much time I save using presets in Lightroom. You can create a preset easily by applying a few Develop slider adjustments like these here, then hold Shift and Command, and strike the N key. This is the starting point for all my images, and I’ll make little tweaks to exposure and white balance as I go through the catalog. This is how I am able to move through 1,200 images in less than three hours. I also apply additional corrective and creative presets to make editing fast and accurate—things like boosting the color in the sky with an HSL shift in blues, or desaturating the greens for outdoor portraits and applying Color Profiles for some cool effects.
What makes my editing really efficient is I can apply presets at import or in Library after I am done culling. I even make them for lens corrections when I want to fix distortion but keep the vignettes, which requires you to apply the fix on a per-lens basis. Of course, this is very interpretive, but it’s something I like to control. Moving on to editing sequences of images, let’s look at the Match Total Exposure tool and the Sync settings in Develop.
Tip #6: Match Total Exposure and Sync Develop Settings
Shooting in manual mode and controlling exposure compensation allows me to fix a single image in Develop, select the entire sequence, and sync settings across all of them to maintain consistency. This is great if you shoot this way, and ideally you want to, but we all know priority shooting is popular and helps get the shots 90% of the time. Aperture priority is popular, as well as shooting manual with auto ISO, and we know how images vary in the same light depending on exposure metering in camera. This brings Match Total Exposure into play to quickly dial in brightness.
Instead of blanketing the same slider exposure setting to multiple frames that are brighter and darker, the Match Total Exposure tool auto adjusts based on the histogram. This is a really accurate tool when you are shooting the same composition and the lighting starts to change, causing variance in your exposures. This works really well for formal portraits as well as for window portraits where the sunlight shifts ever so slightly. Both of these really help keep my per-image time down as I work image to image. Let’s get dialed in with color on this next tip.
Tip #7: Target Adjustment Tool for Dialing in Color
Using the Target Adjustment Tool really makes removing color casts simple, and that’s exactly what I need. It’s easy to identify the blues in the dress and suit, and then we can hold Shift, Option, and Command, and strike the S key to open the Saturation tool. Once you click and drag down, the saturation is dropped in the sample color. Boom, this is too easy. Keep in mind that this is a slider tool and it will affect these colors throughout the entire image, so watch for turning blue suits to dark grey. This is great for cooling down skin and reducing redness quite quickly, and you can then sync color adjustments across multiple images. I recommend adding this to the starting point if a bride is overly orange to start.
Tip #8: Create and Organize Creative Edits
You can seamlessly open images in Photoshop, apply your adjustments, and save them back into your catalog in one fell swoop. In Develop, you can select an image or even a few, hold the Command key while striking the E key to save a copy of the image(s), and start working in Photoshop. Once you finish, you can save and close the images, and they’ll automatically save in front of your original raw file. This makes it simple to then collapse all stacks so the creative edit is the only one visible in the catalog. You can also select a preference to stack with the original so that this happens automatically when using the External Editor feature.
This makes organizing your creative edits simple as well. If you want to stay in Lightroom, of course you can export LUTs from Photoshop and create a Custom Color Profile in Lightroom. I highly recommend exploring these, since you can quickly apply profiles to multiple images just as fast as with a preset. This would take too much time to do in Photoshop image by image. In this case, you can choose to create a virtual copy for the color image and keep the creative as the master photo. Cropping and straightening can be such a pain, but it’s simple to move image-to-image in Develop.
Tip #9: Quick Crops and Straighten Your Horizon
From the Library or Develop modes, you can strike the R key to open the cropping tool. Then, it’s all about holding the Command key to click, draw a line for straightening, and then arrow right to the next image. This is a simple technique, but important to allow you to fly through 1,000+ images in no time. Of course, shooting straight in camera will save you the most time, but we all know that’s easier said than done.
Tip #10: Easy Exporting
The first step to quickly exporting your files is to create export presets to keep things consistent for rendering. You can create dimension-based ones for online proofing, like restricting resolution and assigning color space. I even create naming conventions so the files are renamed for the clients with the event date tied in. Beyond this, we can run Portraiture in Photoshop along with adding an output sharpening layer to all our images after export as well.
We will need to create a droplet in Photoshop that will call a specific action to play and save it to each image exported. Then we can set up our export preset to apply Post-Processing. After export, open in Other Applications, and choose the droplet you made. This will make applying skin softening and sharpening to your proofs simple. You can set it to export and walk away while it runs on all your images.
Once we close out the client, we need to import this catalog back into the master archive catalog we made at the beginning. Just open the master catalog in Library mode and drag and drop the working catalog you just completed. Boom, we’re ready for our client preview!
The Results
Now keep in mind, you may want to retouch a few images and showcase a few epic creatives to drive some sales in your war room. This is normal to do before the preview, as the clients have to see an example of a high-end edit to entice them to buy wall art. In the end, you need to shave off as much time as possible to get the images back to your client as quickly as possible. You want to book their previews no more than two weeks from the wedding—this makes a huge difference. Take these tips and make the change this year. You won’t regret it. There is no reason to fear October, you’ve got this!


