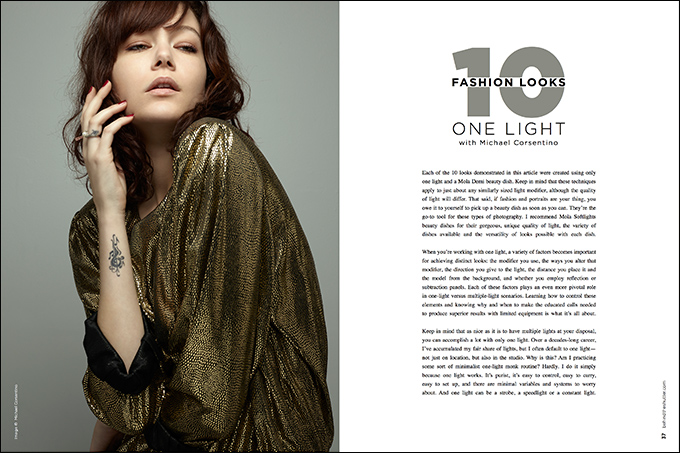
10 Fashion Looks, 1 Light with Michael Corsentino
Each of the 10 looks demonstrated in this article were created using only one light and a Mola Demi beauty dish. Keep in mind that these techniques apply to just about any similarly sized light modifier, although the quality of light will differ. That said, if fashion and portraits are your thing, you owe it to yourself to pick up a beauty dish as soon as you can. They’re the go-to tool for these types of photography. I recommend Mola Softlights beauty dishes for their gorgeous, unique quality of light, the variety of dishes available and the versatility of looks possible with each dish.
When you’re working with one light, a variety of factors becomes important for achieving distinct looks: the modifier you use, the ways you alter that modifier, the direction you give to the light, the distance you place it and the model from the background, and whether you employ reflection or subtraction panels. Each of these factors plays an even more pivotal role in one-light versus multiple-light scenarios. Learning how to control these elements and knowing why and when to make the educated calls needed to produce superior results with limited equipment is what it’s all about.
Keep in mind that as nice as it is to have multiple lights at your disposal, you can accomplish a lot with only one light. Over a decades-long career, I’ve accumulated my fair share of lights, but I often default to one light—not just on location, but also in the studio. Why is this? Am I practicing some sort of minimalist one-light monk routine? Hardly. I do it simply because one light works. It’s purist, it’s easy to control, easy to carry, easy to set up, and there are minimal variables and systems to worry about. And one light can be a strobe, a speedlight or a constant light.
Ten Looks
- Bare beauty dish camera right (loop light):
Starting with an undiffused beauty dish provides soft light with contrast and more rapid transitions between shadow and highlight than the same source diffused. We add a diffusion sock to the front of the beauty dish to create a softer look. We create a small loop-shaped shadow with a slight angle under the subject’s nose by placing the light camera right at an approximately 45-degree angel. This lighting effect (pattern) is known as “loop light.” A close cousin to Rembrandt light, loop light works well in both fashion and portraits.
- Beauty dish with diffusion sock camera right:
For the second look, I’ve added a diffusion sock to the front of the beauty dish. The direction, angel and distance of the light from the model have remained the same, creating loop light. By adding a layer of diffusion fabric in front of the modifier, I’ve softened and broadened the illumination, diffusing and spreading it across the diameter of the fabric. The added benefit of diffusion is softening of any hotspot at the center of the beauty dish. This is a further reduction on top of what’s already provided by the beauty dish’s internal diffusion disk. This creates a softer look that delivers a good amount of contrast and edge detail. I use it often.
- Bare beauty dish camera right with white V-flat reflector panel:
I’ve added a white V-flat reflector panel camera left to add fill light and open up the shadowed side of the face. Any white material will do. Here I’m using V-flats commonly found in studios. These large 4×8-foot sheets of foamcore are typically taped together to form folding bookend-style reversible reflectors/subtraction panels known as V-flats. These are some of the least expensive yet most valuable, versatile tools you’ll find in a studio. A reflector panel used for fill light is essentially a very inexpensive second light. But unlike a light, there’s no power knob to control the output. You’ll need to rely on the distance from which you place the reflector from the keylight to modulate the amount of fill light provided. The angle of the reflector relative to the light source also plays a roll in determining intensity and contrast. An angle delivering a more feathered light, where you’re working with the edge of the light, will result in a softer effect, and vise versa.
- Bare beauty dish camera right with black V-flat subtraction panel:
I’ve removed the white reflector panel that was providing fill light and replaced it with a black subtraction panel to introduce more shadow to the dark side of the face. Most V-flats are double-sided, white/black, so by simply turning it around, I’m able to completely change the quality of the light. Black subtraction panels are particularly useful in large white studios where light is bouncing off the walls in every direction. Lighting done right is all about shaping and controlling the illumination. If there’s light all over the place, it becomes much harder.
- Beauty dish with grid spot camera right:
I’ve removed the diffusion sock and subtraction panel, and inserted a 10-degree grid spot onto the front face of the beauty dish. Don’t underestimate the importance of grids. When it comes to finessing light, tools like grids, flags and nets are essential elements in your arsenal. Light is all about pools of illumination. Grids allow you to more precisely control where those pools of light fall, providing a center pool of light with rapid fall-off. With a grid on my beauty dish, I’m able to drastically reduce the amount of light spilling onto the background, arguably contaminating it, while still maintaining the right amount of light on my subject. This is dramatic lighting at its best.
- Beauty dish with diffusion sock, centered (Paramount/butterfly light):
For this look, the direction of the light or the lack thereof is referred to as Paramount light (after the movie studio). With Paramount light, also know as butterfly light, the beauty dish is positioned directly in front of and above the model, resulting in a virtually shadowless look—save for the shadow below the nose and those below the neck and eye sockets. You can clearly see how this look differs from previous looks, how the direction of the light determines the amount of shadow contributed. I’ll open those shadows up in the next look by simply introducing a fill reflector from below.
- Diffused beauty dish centered above model with white/silver fill reflector below (clamshell light):
With the simple addition of a reflector placed below the model’s face, I’m able to open up the shadows created by the keylight overhead. This modification turns Paramount/butterfly light into a pattern referred to as clamshell light, a go-to look for fashion, beauty and glamour work. I started with a white reflector, and progressed to a silver reflector for a more specular look with increased fill light from above.
- Diffused beauty dish centered above model with white fill reflector below, dark background (clamshell lighting):
The next three lighting looks are the same except for one all-important difference: the brightness of the background. Readers of this column will recollect that when you’re working with one light as the sole source of illumination for both the subject and the background, distance plays a vital role. I’m starting with the model and the light pulled away from the background about 20 feet. Over the next two looks, I’ll bring this entire arrangement closer and closer to the background to create a progressively brighter background. All the while, the illumination on the model will remain the same.
- Diffused beauty dish centered with fill, lighter background (clamshell):
For look nine, I’ve reduced the distance between the background, my model and the keylight by half. For each of these progressively brighter backgrounds, it’s important to note that the relationship between the model and the keylight illuminating her remains the same; that is, the distances between them remains constant. The only thing that does change is how close they both are to the background. The closer the keylight is to the background, the more illumination reaches it. This is referred to as spill light.
- Diffused beauty dish centered with fill, lightest background (clamshell):
This last look is about 3 feet off the background cyc wall. Consequently, it has the brightest background of the bunch. If you’ve got only one light to work with and you want a nearly white background, close proximity to the background is key.
Now I want you to grab a light and create 10 looks yourself. Reading all this is only the first step in a very long road of trial and error and discovery. Practice makes perfect, so get going.